I have been quite busy since the last update, but lets talk about my biggest stress… The budget!
I will try to follow with an eye candy post later in the weekend.
Budget
If I had a million dollars, this whole thing would be a lot easier. But as it is, I will need to borrow to make this home a reality, and that means carefully counting the cost. I finally got in enough quotes that I could complete my budget and get a pretty good total estimate. It was pretty high, at least relative to my early hopes. I got a bit depressed about it, but we crunched the numbers with the 4.25% interest rate that my loan officer says is likely, and it is still affordable on my salary, so we press on… But I will be looking to save money any way that I can.
Some people are really against having a mortgage… I don’t mind it too much as long as it is my only long term debt (credit cards and other bills are paid off each month) and the mortgage payments are better than rent would have been. It probably helps that my job (and income) is relatively stable.
Possible Budget cuts?
Windows?
The fancy eyebrow windows came back as about half my window cost. I could reduce that dramatically if I was willing to replace them with hand cut poly-carbonate (Lexan). 1/4 inch thick poly-carbonate sheets have a decent R value (considering they are transparent) and I can buy a 4×8 sheet for less than 100$, cut and install it my self… I have had this idea for a while, but seeing how everything has added up has really convinced me that it may be a good idea.
Poly-carbonate is fairly flexible, so I could actually curve the windows to match the curve of the walls. My only concern at the moment is that they are more than 8′ wide, so I will either need to find someone selling larger sheets or break each window up into segments, which will mean more difficult installation.
Basement?
Could I get rid of the unfinished basement? I have been tossing this idea around in my head for a while.
While it is true that a basement is a relatively inexpensive way to gain square footage, mostly because it is square footage that doesn’t need an additional roof, it does still need its own walls, floor, and ceiling. Even an unfinished basement needs electrical and plumbing and that also adds up. The suspended floor over the basement costs considerably more than the slab-on-grade floor that would be needed without the basement.
A basement also complicates the construction process with a much more difficult excavation, deeper drainage pipes, a more dangerous construction site, etc.
My specific design only called for a partial basement. I thought that would contain the extra cost to just the area of the basement, but because I have a sandy site, the engineer specified a slope of 1/2. This means that my 10 ft deep basement will effect the construction for 20 ft around. I will need much more expensive “step footings”, taller stem walls, two levels of french drains, and probably other things that I have not thought of yet.
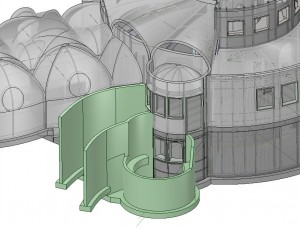 The egress window on the North side of the house is causing difficulty with earth sheltering because I need to be a lot more careful about retaining the earth. It looked good in 2D, but now that I am looking at it in 3D, I am a bit more concerned about the scale and cost of the retaining walls that will be required to keep earth from spilling into the basement.
My wife was mostly wanting the basement for storage, but I could more cheaply add a few feet to the length of my garage to make up for that. I wanted the basement for the placement of the mechanical room. If we got rid of the basement, we could use the location of the basement stairs as a main floor mechanical room, but the central location under the rotunda was important for my passive HVAC design. And after many years without a basement, Sherri and I both liked the idea of extra “unfinished” space down there to grow into…
You can’t come back and decide to add a basement later. You need to make that decision from the start of the building process. On the other hand, as Sherri pointed out, the storm room at the top of the tower is pretty superfluous and we could just decide to leave it off if we ran out of money. We could also come back and add it later if money became available, so maybe that is the best place to cut?
For now, I think we are going to wait to hear what the banker says about how much they will loan us and then decide what to do.
Sweat Equity
It seems like a number of the tasks are coming in with only ridiculous quotes… Some, like the precast ribs, the garage Quonset hut and the insulating “umbrella”, I always planned to do myself. But as I get quotes back, I am picking up more and more of the other tasks. I now expect to do much of the steel work myself (hopefully with a little help from my friends and family), along with a number of finishing tasks. Sherri is very concerned that I am taking on too much and that this could stretch out the build and wear me out… It could also be a great exercise program (I spend too long sitting and typing at my “computer job”). I also feel a bit like a kid who is getting a new giant sand box, I can’t wait to get out there and play… But it could get old after a few months, and I am not as young as I used to be… Something to keep in mind.
Smart little improvements to the plan
There are a number of smart little ways I could improve the plan to save money. For instance, The people who bend my steel arches charge by the bend, not by the length of the material. Instead of ordering a number of 90 degree bends for my apses, I plan to switch to ordering half as many 180 degree bends that I will cut in half.
I also noticed that there are a few spots where I can make a small layout adjustment and save a lot of structure. I will talk about that more next time I show pics from my virtual build.
Water isn’t very expensive
I had liked the idea of buying a 1000 gallon water cistern and installing it between the house and the garage. It could catch the roof run off and be used for watering the garden. The problem with many “green” ideas is that they don’t actually make financial sense. As I have mentioned before, I live in the Great Lakes basin where water is always plentiful (we have more than 20% of the worlds fresh water in our basin). At current electric rates, it only costs me about 25 cents to pump a thousand gallons from my well. See the calculation here. The thousand gallon tank costs nearly $800, but it would be double that by the time it was installed. There is also the risk that it would break down or become polluted… I would hate to look at my investment and know that, even full, it was only worth 25 cents, so lets skip it.
I also liked the idea of solar hot water. But I checked my current bills and I only pay about 20$ a month to heat my hot water. A decent vacuum tube solar array with the storage tank, pumping station and other odds and ends easily comes to $6000, plus installation. At 20$ a month, it would take 25 years to pay off that investment. Plus, it is not exactly attractive on my green roof.
I will set things up to install a solar hot water system some day, but not as part of the construction cost. Perhaps I will eventually be able to build my own for a lower cost.
As for the urinal in the boys bathroom… It may not have a rapid payback due to our cheap well water, but the total cost is not high, so I think I will keep that one ;^)
HVAC is expensive
My HVAC quotes came in. I knew that Geothermal was expensive, from the buried heat exchange tubes to the unit that goes in your house, they are expensive. But I had a nice back up plan to use the electric (in demand) mini boiler instead. With its much lower cost and much easier install (no loop field required), I thought it would save enough money to justify the higher operating costs. Due to the Federal Tax Rebate for Geothermal, it didn’t turn out that way. I put some info about my HVAC sourcing here.
However, the quotes are still very high, so I may take on the easy parts of the job myself. For instance, I may be able to save money if I install the radiant floor tubes myself. I am still thinking about it.
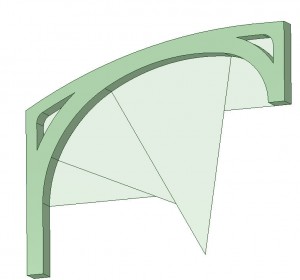 As you may recall, my design features pre-cast concrete arches to support the heavy earth loads and let me have open spaces without requiring large spans. I had some old posts about how these will be built, and even my own experiment to build quarter scale models.
I did get quotes on having these ribs done by professional concrete pre-casting companies. One even sent me nice faux stone concrete samples, but when the cost estimates came back, they ranged from $40K+shipping to $80K (with shipping) for the 10 ribs… I thought that was ridiculous considering that each rib only used about 130$ worth of concrete and less than 200$ worth of rebar. I asked the companies how many forms they would make and what they would make the forms out of… All three said that 10 was a small order, so they would just make 1 form out of wood…
Obviously, they were charging way too much and I was going to have to take this into my own hands… I had designed the ribs to be cast easily in a 1ft deep form. I could do this.
But first, I wanted to make a computer model to figure it all out.
My model revealed that the cost of reusable parts, assuming I went with a rather expensive Melamine base and 2 layers of 1/4 inch smooth plywood for the side walls, would be about $575. I would probably make 2 in order to cut down on crane visits (the crane will have to come at least 5 times with 2 forms). Then each rib would require about $350 worth of rebar, concrete, etc. I also decided that I would need to buy a concrete polisher (wet) ($200) and a sawsall concrete vibrator attachment ($50).
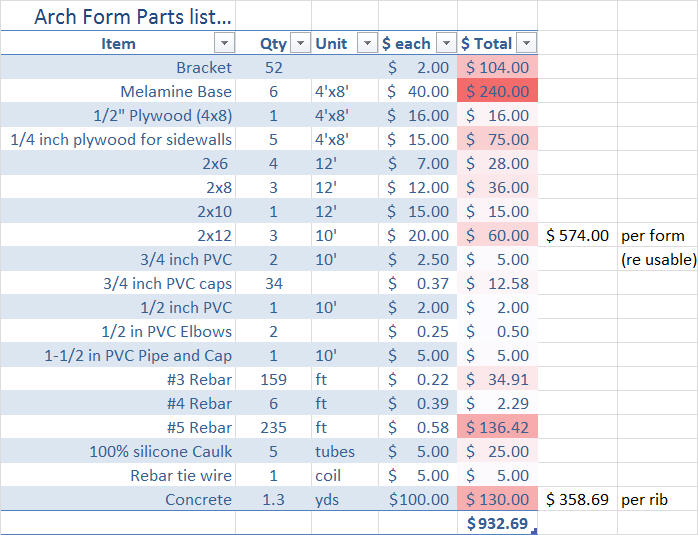
All told, that would mean about $1150 for the 2 forms, plus $3600 for the rib materials, plus $250 for tools, which gives less than $5000. If I add 20% to cover misc, it comes to $6000. I plan to work out a deal with the concrete company to rent their crane for a reasonable cost. They currently use it to place pre-cast septic tanks which are about the same weight (35 cuft at 130 lbs each is 4550 lbs, plus the weight of the rebar).
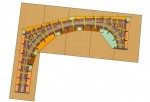
Along the way, I thought about things like layout, materials, form removal, etc. For instance, I plan to build these on the front half of the garage slab. I will build the back half of the quonset for use as a shop, and then cover the front half with a large tarp to keep the rain out. I can then remove the tarp so the crane can pick up the ribs more easily. I plan to use some #4 rebar to create hooks on the top of the casting. In order to remove the form later, I will need a slot in the form that I will plug with pieces of scrap insulation during the pour. For a base, I plan to use melamine sheets that will provide a non-stick surface. I will then need to polish both sides of the form to get a similar finish on the trowel finished side of the concrete. I plan to build two forms, one left handed and one right handed… There are a few different configurations to lay these out next to each other to minimize the space needed, I think I will go with a 24×24 layout that will require 5 sheets in the top layer, 6 in the middle layer and 1 in the bottom.
Here are some pics with a few more details…
-
-
Rib assembly. The brackets are screwed into the 2x# forms, which are bridged together with plywood scraps and all of that is screwed down to the melamine base… but the sidewalls are not actually screwed to the brackets…
-

-
-
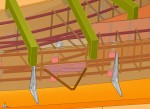
A detail of the hanger. The PVC pipes along the spine will make it easier to set the vertical rebar and feature ridged insulation wedges. The PVC is held to the form by a screw which is removed before the forms.
-
-
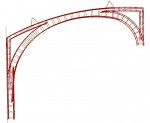
Rebar skeleton, mostly #5 rebar tied together with #3 rebar loops.
-

-
The loops are mostly spaced by 8 inches, but the engineer specified that the spacing be reduced to ~4″ near the high end of the lower spandrel.
-

-
Closeup on the high end spandrel. You can see the PVC holes that will help tie the rib into the central tower.
-
-
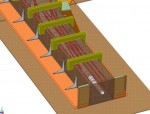
Low end of the form. The white PVC pipe will allow the rib to slide over a 1″ steel post in the foundation. The green “hangers” are 2×6 boards that will keep the form from bowing and help me suspend the rebar skeleton.
-

-
Table to calculate costs of the forms and rib material
Well, hopefully Sherri and I will love our underground house. “We don’t like our underground house” was the title of a blog by MizBejabbers who wrote about the pitfalls of her underground house.
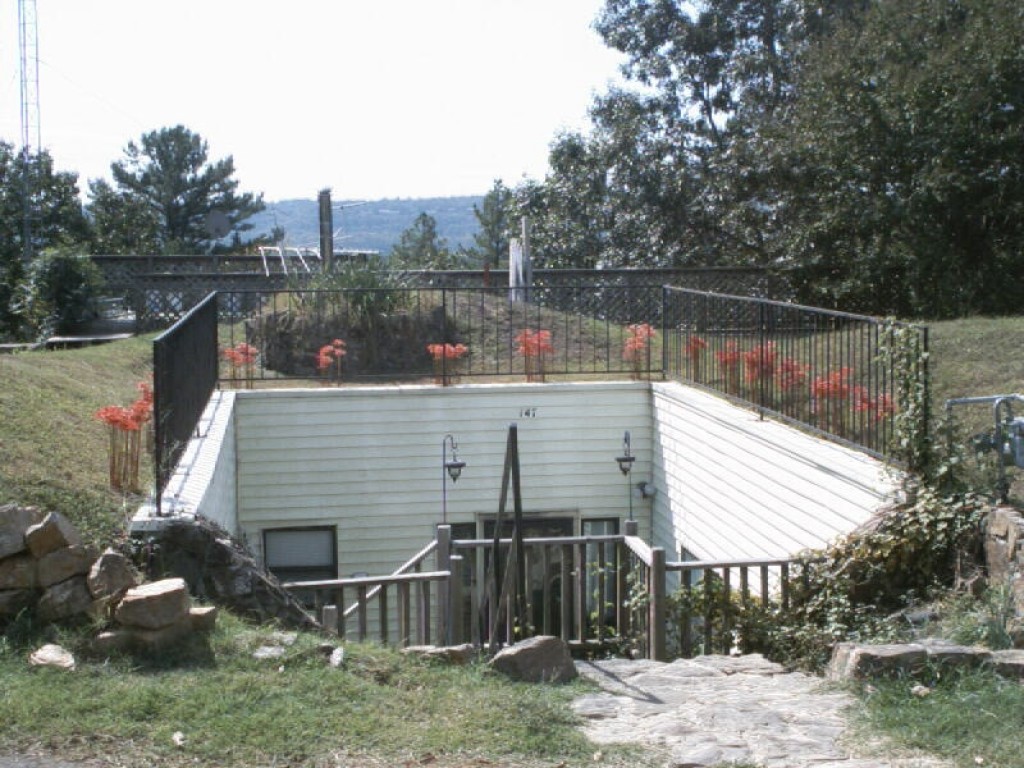
MizBejabbers’ earth shelter in Arkansas. Check out her site for more pics, but this was the best one ;^(
Miz tells about how they moved into an earth sheltered home 18 years ago (built by TerraDome for a previous owner, who may have covered up the problems to sell it) and how it has not lived up to the earth sheltered promise. She writes about how it had all the fears (leaks, mold, etc.), but without the benefits of energy efficiency. She also talks about increased construction cost, severe depreciation, pests (bugs, rats and nosy people), etc. She does have a section on “happy things” such as feeling safe during storms, enjoying the peaceful quiet, etc. but concludes that these were not worth the pain.
She even blogs about mini tremors, which she thinks are earthquakes cracking the house, but I suspect it is the house cracking and settling as the soil underneath is slowly eroded. No earthquakes required.
For someone like me who is considering a similar investment, this could be a blog from my future, so I read it very carefully…
My conclusion was that this house was just designed and built really badly and in the wrong time and place. By time, I mean that it was built in the early 1980’s when few people had worked out how to do these properly. Lets go thru the issues, as far as I can tell from the blog.
The site: This house is set below the road on the side of a large hill overlooking the Arkansas river. The U-shaped design that Miz mentions sounds perfectly designed to catch all the surface runoff from the hill above and funnel it toward the front door. What is probably happening under the ground is even more threatening… Hills do interesting things to water tables and an earth sheltered home may be sitting in an underground aquifer, like a wet pebble in a stream. Try a quick Google image search for “artesian well diagram” if you are not familiar with the concept. Miz acknowledges that the french drains are not sufficient in capacity or well placed to drain water away before it enters the house.
Our site doesn’t have such a majestic view, but it is on the top of a hill, and our hill is very permeable sandy loam that will dry out nicely. Before I bought my land, I walked around during a thunderstorm and made sure the water didn’t collect or run. After buying the land, and looked “deeper” and buried moisture sensors more than 10ft down for my Soil Temperature Experiment.
The construction:In the comments after the article, she mentions that the house was built on fill (to make a terrace on the side of the hill). If there was water flowing down, around and under her home, fill soil would wash away more easily and would lead to further settling and cracking and leaking. My home will be built on undisturbed soil with a high compression rating and no erosion threat.
She also blames a “bad batch of concrete” for the living room roof crumbling. I am not sure if that was really the problem (or if the bad conditions just wore down otherwise adequate concrete), but The TerraDome homes are monolithic structures which are poured into proprietary modular forms. If the concrete is not carefully mixed and poured, there is no good way to fix it later.
My home will use shotcrete, which (when done right) is considerably stronger than any poured concrete because of its lower water content and the way it is compressed as it is shot onto the wall.
Miz mentions metal ducts rusting and falling apart, I will be using only HDPE ducts that will never rot or leak. We also plan to heat our home with radiant floor heating, a method better suited to the heavy concrete construction. We will still have ducts, but only for ventilation and de-humidification.
She mentions drywall rotting and molding, internal wooden walls being eaten by termites, etc. we won’t have any of that in our all concrete house with a specfinish gunnite surfaces.
The waterproofing: TerraDome, like other earth sheltered builders (including Formworks) with “proprietary systems” does not use a waterproofing umbrella. Instead they insist on more traditional methods used for waterproofing regular basements, glued or sprayed directly to the walls. These include bentonite clay or a “tar modified polyurethane elastomer applied as a liquid”. These directly applied methods are pretty useless if the concrete cracks more than 1/16th of an inch. Even applying something like a pond liner right over the concrete before backfill is not as good as an umbrella (away from the concrete) because it can be torn by the movement of the concrete and does not help with thermal mass.
Applying the waterproofing and insulation directly to the structure also excludes the surrounding thermal mass and allows water percolating thru the ground to strip it of its heat, both of which reduce thermal performance when compared with an insulating umbrella.
It also sounds like the soil around this home was not properly drained. The French drains mentioned are not well placed or of sufficient capacity to handle the location on the side of the hill. This moisture increases the weight and lateral (hydro-static) force on the walls. Cycling moisture levels are even more damaging.
An interesting side effect of applying the waterproofing directly to the structure, and then draining around it, is that you need to make a choice about the moisture level of the soil above the water proofing… Do you want it to be dry for the structure beneath or do you want to keep plants living on the surface? It is difficult to have both. Miz ended up shutting down her sprinkler and letting her plants die. Eventually, they had to remove the covering soil completely. The umbrella solves the problem by requiring that you drain only the soil under the umbrella and allowing you to maintain the moisture in the soil above.
My home will use an umbrella with three layers and I plan to go overboard on the french drains under the umbrella. It also helps that my soil is very permeable.
Conclusion: I think I can avoid the problems shown in this blog, but I need to keep my eyes open and be as careful as I can. I am sure the builder of this home didn’t expect these problems… And neither did poor MizBejabbers when she and her husband bought it.
Caveat Emptor! Buyer beware! When buying an earth sheltered home, you must be doubly careful to check it out before buying.
What is the latin phrase for “this may be harder to sell?” There is always some mistrust between the seller and the buyer, but this gets worse when the item, your earth sheltered home, is difficult to inspect, because it is buried, or difficult to compare, because it is unique or custom built. Economic Game Theory would suggest that because the seller knows much more about the house than the buyer (informational asymetry), he would only be willing to sell the home at a deflated price if the actually thought it was worse than the buyer thought. Sellers who’s homes have no issues would be less likely to sell for less than they thought the home was worth. This would reduce the percentage of good earth sheltered homes on the market even further. Buyers could deduce this and realize that a large portion of earth sheltered homes on the 2nd hand market are likely being dumped by their owners. Therefore, sellers would be willing to offer even less. This is why earth sheltered homes tend to suffer heavier depreciation than other homes even thought they should last longer. Blog articles and anecdotes and even random experiences with cold damp basements only make it worse.
If you want to prevent or at least reduce the depreciation of your earth sheltered home, just in case you ever need to sell, you can do things to reduce the buyer’s doubt. I will start by taking detailed photos of the construction. I also plan to bury sensors (temperature and moisture) and keep good long term records. Other maintenance and utility records also help to establish the efficiency of the home. Not painting, or other wise covering, the inner surface of the home will also help to preserve trust during the sale process. The effect of these efforts would be similar to the effect of selling a used car and including a full set of records; including gas mileage for every fill-up, maintenance records, a car-fax report, etc. Increased buyer cconfidence will translate into higher offers. Of course, it only works if you actually build a good earth sheltered home ;^)
The blog mentions their attempts to enforce a warranty or get money from TerraDome or the builder, or the previous owner, but all failed. I don’t expect to get a warranty and I will have no one to sue but myself, so I will need to select the builders carefully and make as sure as I can that the concrete mix is a strong one.
 The egress window on the North side of the house is causing difficulty with earth sheltering because I need to be a lot more careful about retaining the earth. It looked good in 2D, but now that I am looking at it in 3D, I am a bit more concerned about the scale and cost of the retaining walls that will be required to keep earth from spilling into the basement.


