
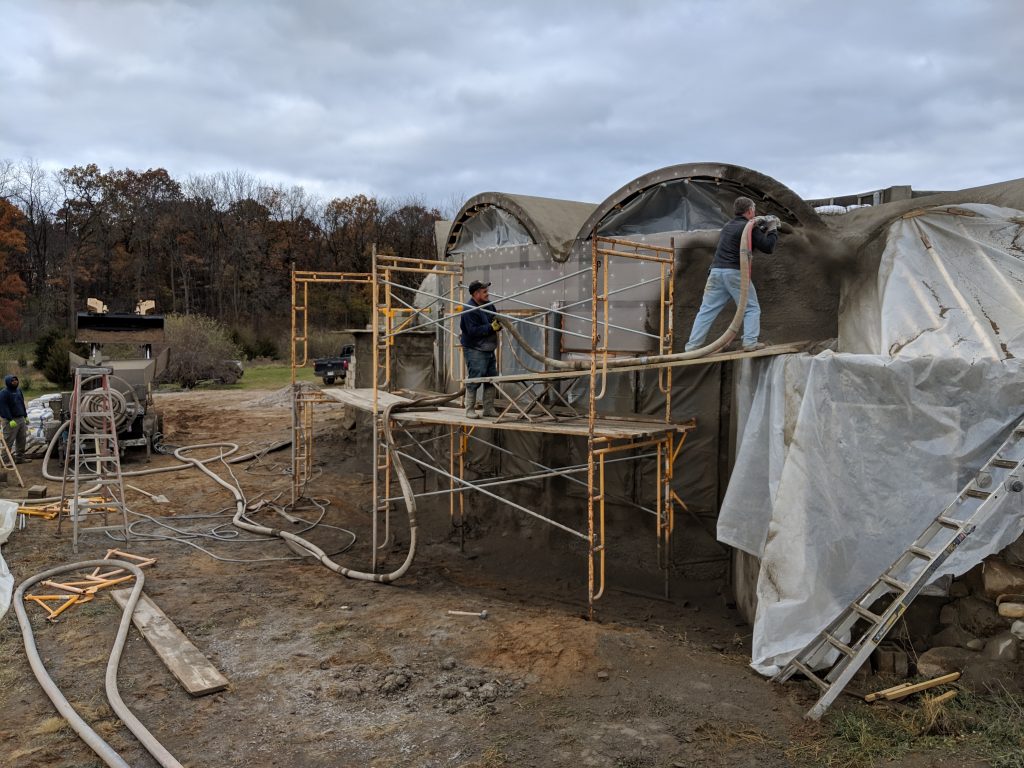
Gunite for the south wall
Posted on November 2, 2018 by
In this episode, the gunite crew from S.A.M. Gunite Pools comes back to shoot our south wall. They had just finished the roof on the Friday before, so the equipment and materials were already in place. The form work was lath covered rigid XPS insulation over steel stud framework. Easy-peasy… Easy to watch anyway.
The Video
The Forms
We started with a steel stud framework and attached 2 inches of XPS rigid insulation (Pink Board) to that. The window bucks were treated wood, cut to match the curve of the wall. We also had some 4 and 6 inch tube steel in the wall to take loads from the earth covered awing that we will add in a later step. Then we covered the XPS with lath to hold the shotcrete and we were ready to go. You can find more details and pics on the formwork here…
This is a pretty easy and robust way to form a wall, and includes built-in continuous insulation already in place from day one. The steel studs also leave a 4 inch deep cavity that I expanded out with some furring strips on the inside so I could fit 5 inches of additional insulation.
The Tools
For more on the difference between gunite and shotcrete, please see this other comparison page.

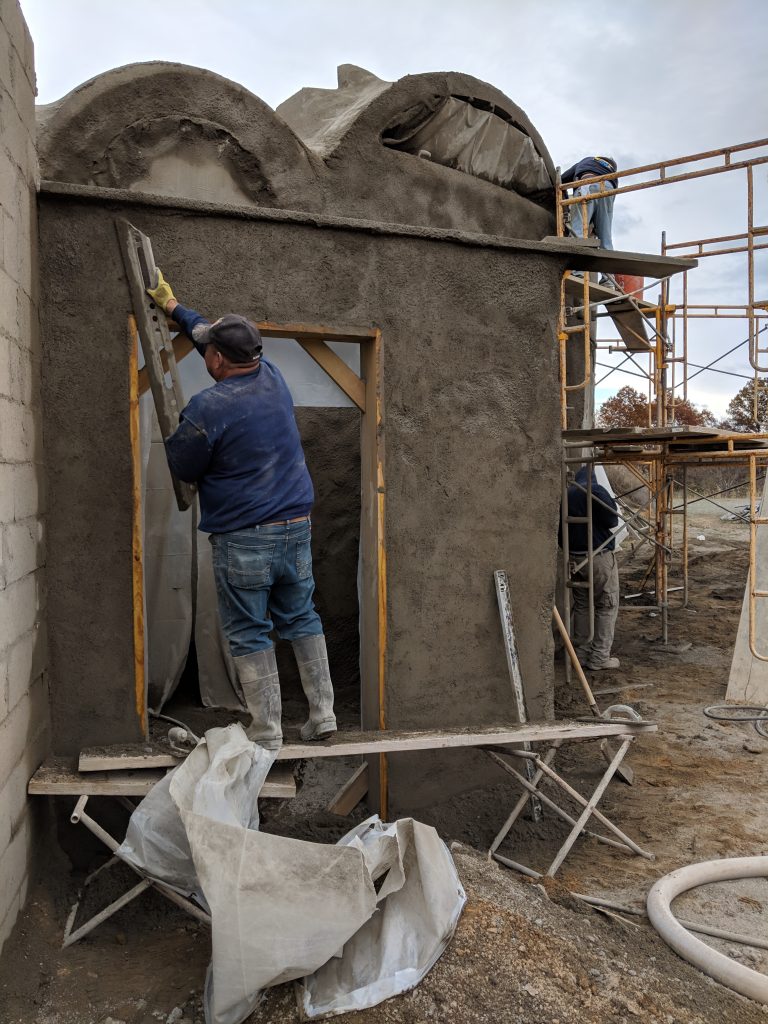
The Bat’Lath was used a lot in this job to trim down the walls to the correct thickness before troweling. This did create a fair amount of waste, but I am sure it was worth it compared to trying to push around that much concrete.
The Gallery
A picture is worth a thousand words, but these pics also have captions, so bonus words!
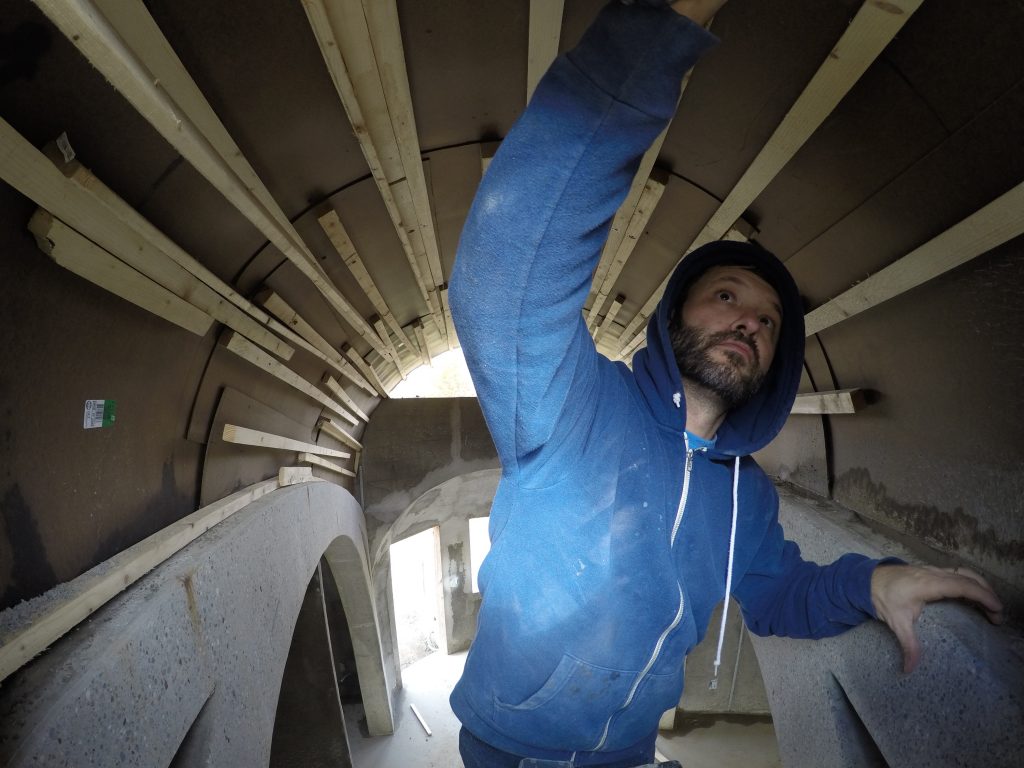
Over the weekend, I began stripping the radial vault forms from the roof gunite. 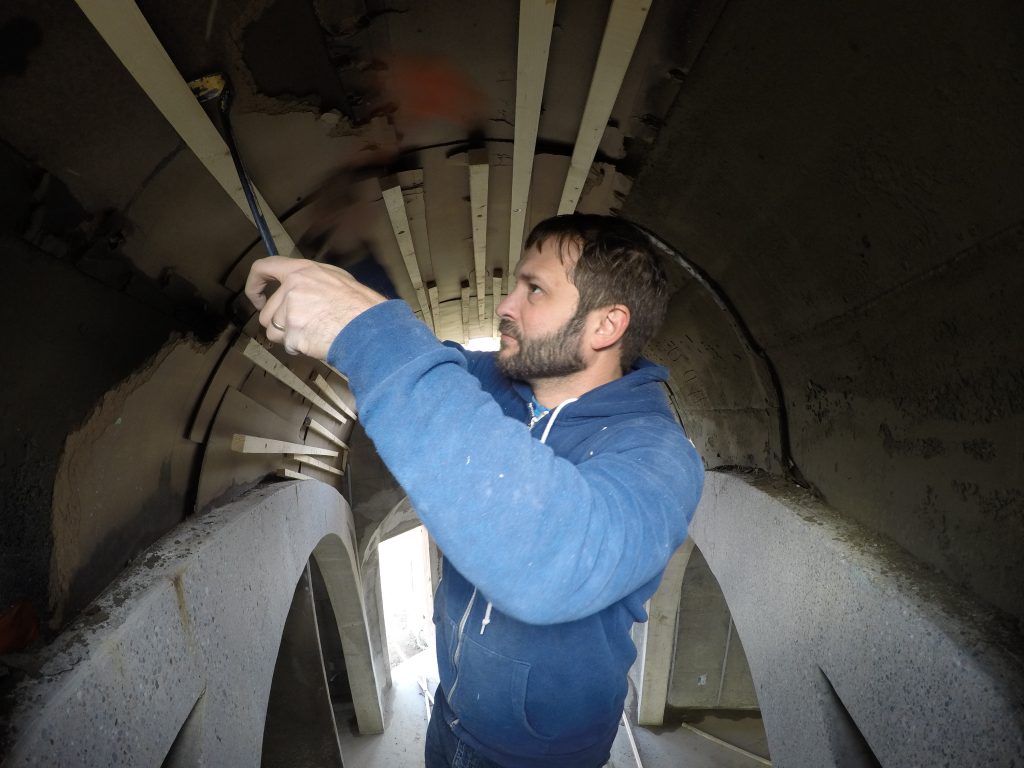
After taking out the screws, I was using a hammer and a pry bar. I would put the pry-bar in about the right place, and then hit it with a hammer to get it beind the batton, then I would lever it out. The lath screws would just pull thru the old hardboard and the strips would fall down. 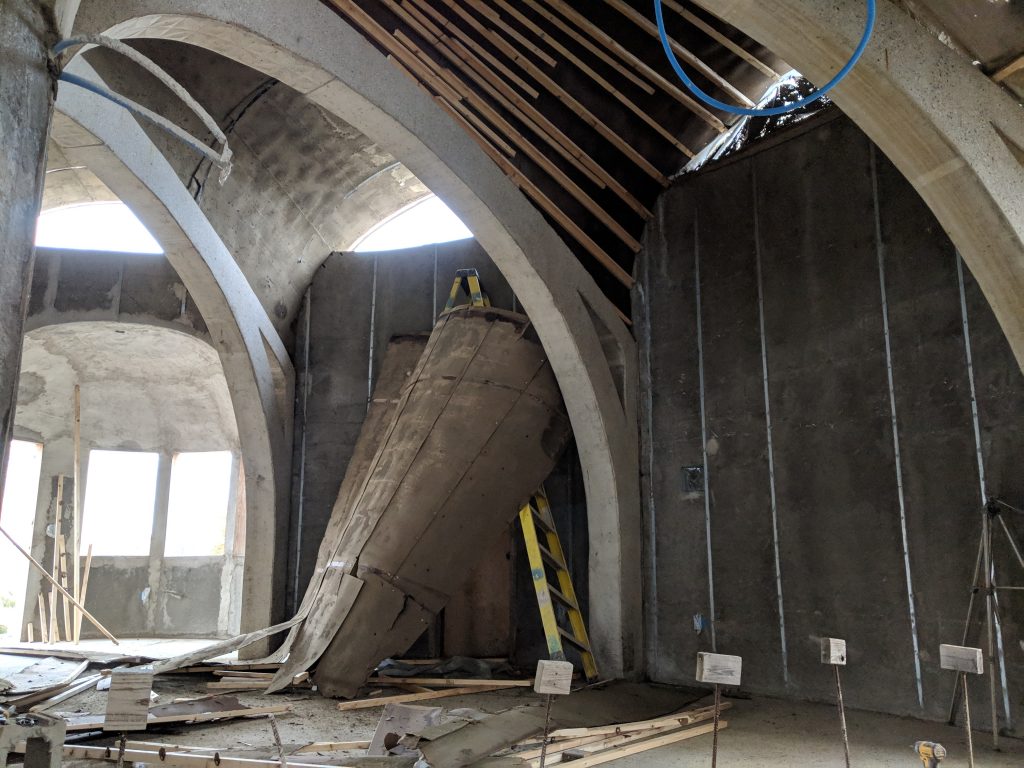
I tore down a big chunk of formwork all at once. Which is good, except I was on the ladder at the time… I was fine, but I did get a bit of a fright and decided not to do it that way the next time. 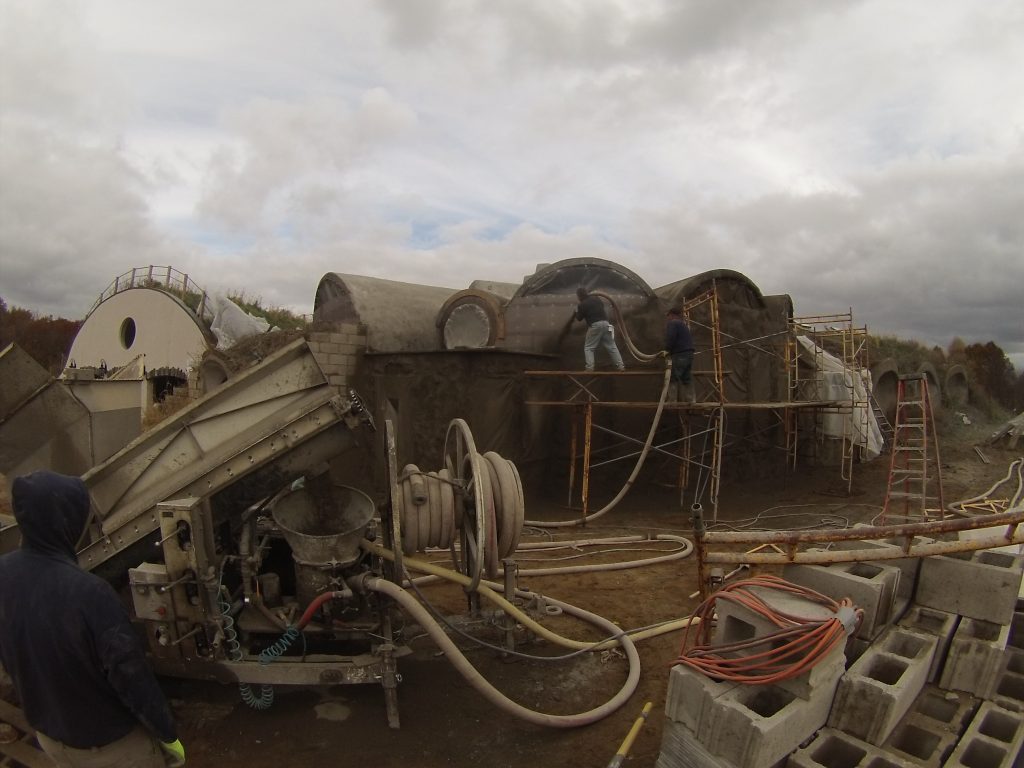
The gunite rig is both simple and genius. 
It wasn’t a pretty day for taking pics… 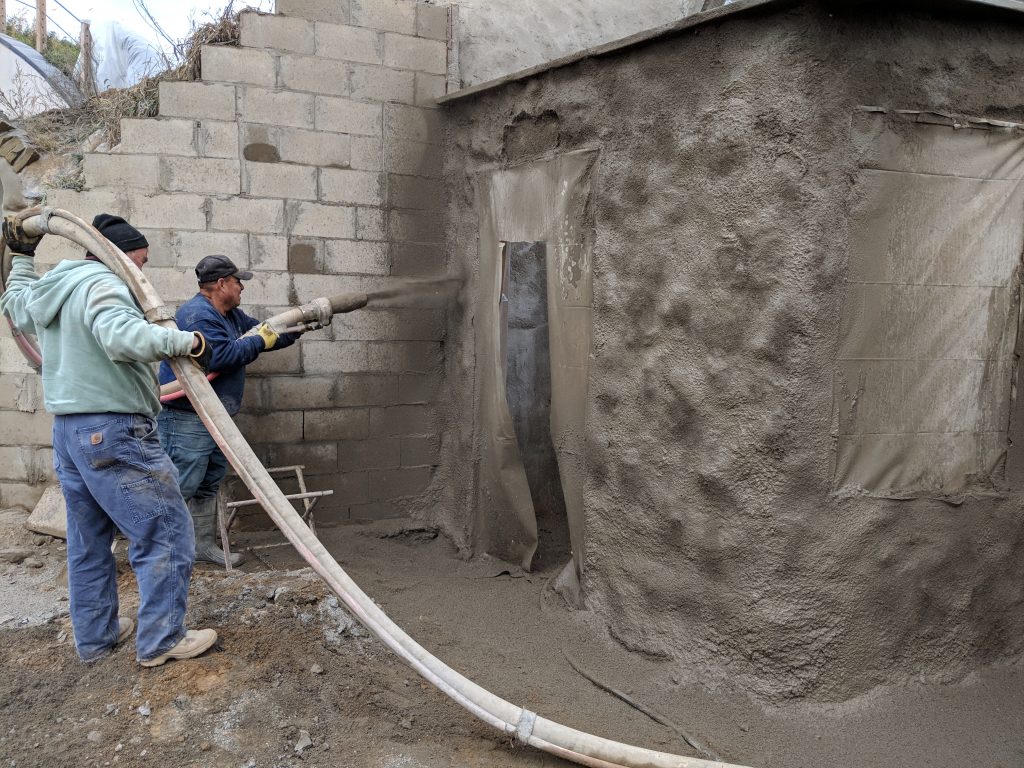
Shooting the entrance wall… Carlos using the Batleth on the wall… I liked to think of the tool as being a bat’leth 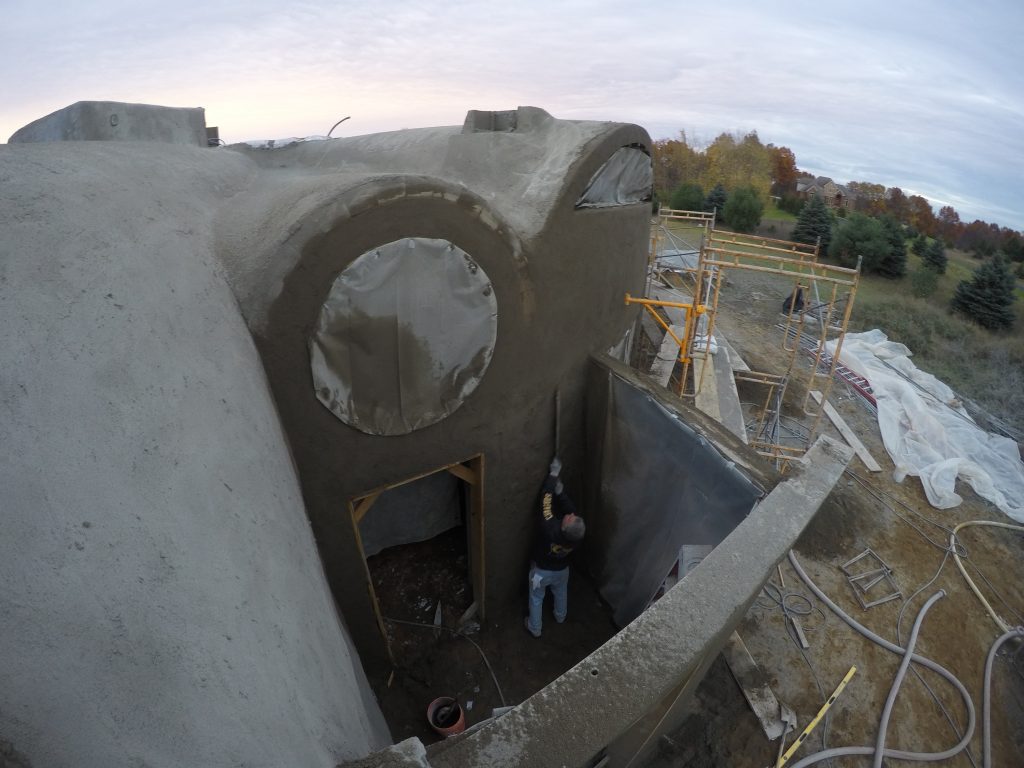
Here Scott is stretching to take care of that section. Earlier, they had ladders in here, but I guess he saw something that needed a touchup after they took them out. 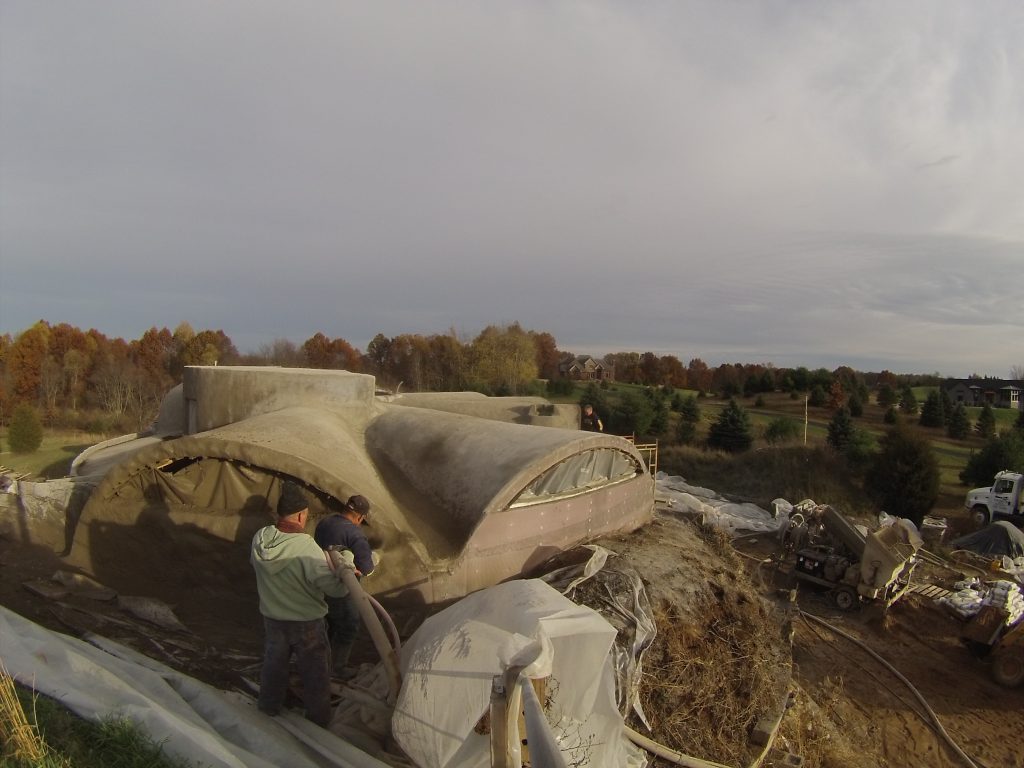
Sunset as they got to this last section… 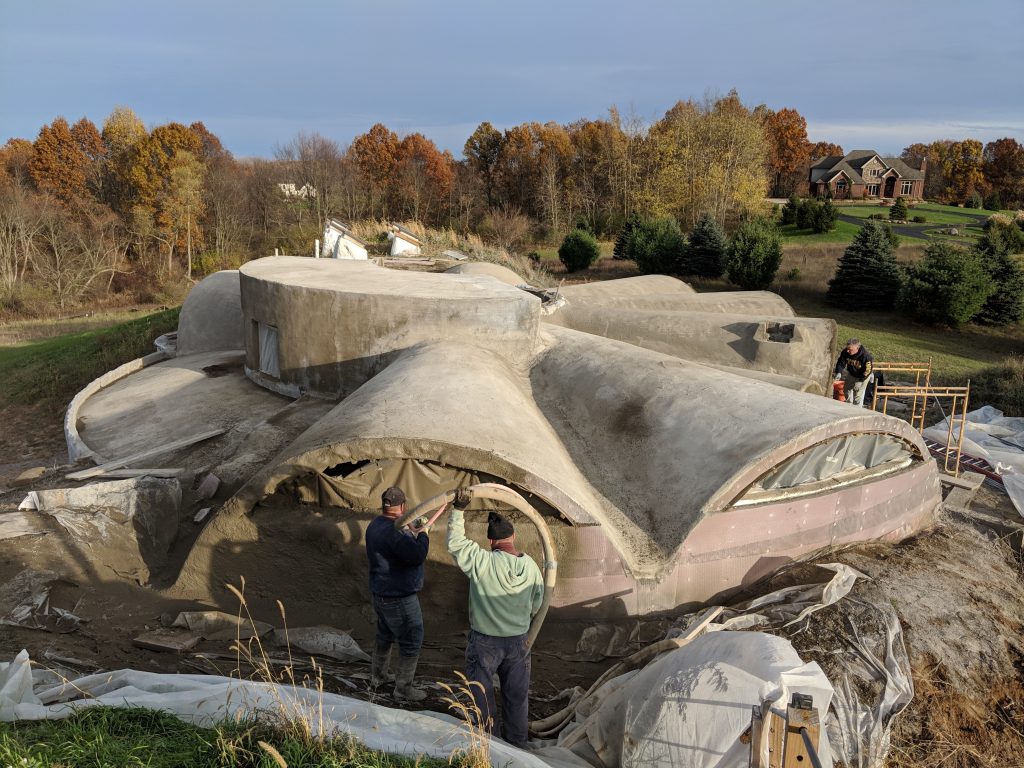
another shot of that brief moment when the lighting was good… In this pic, you can see Carlos working on the near wall and Scott still working on the south wall (top right) 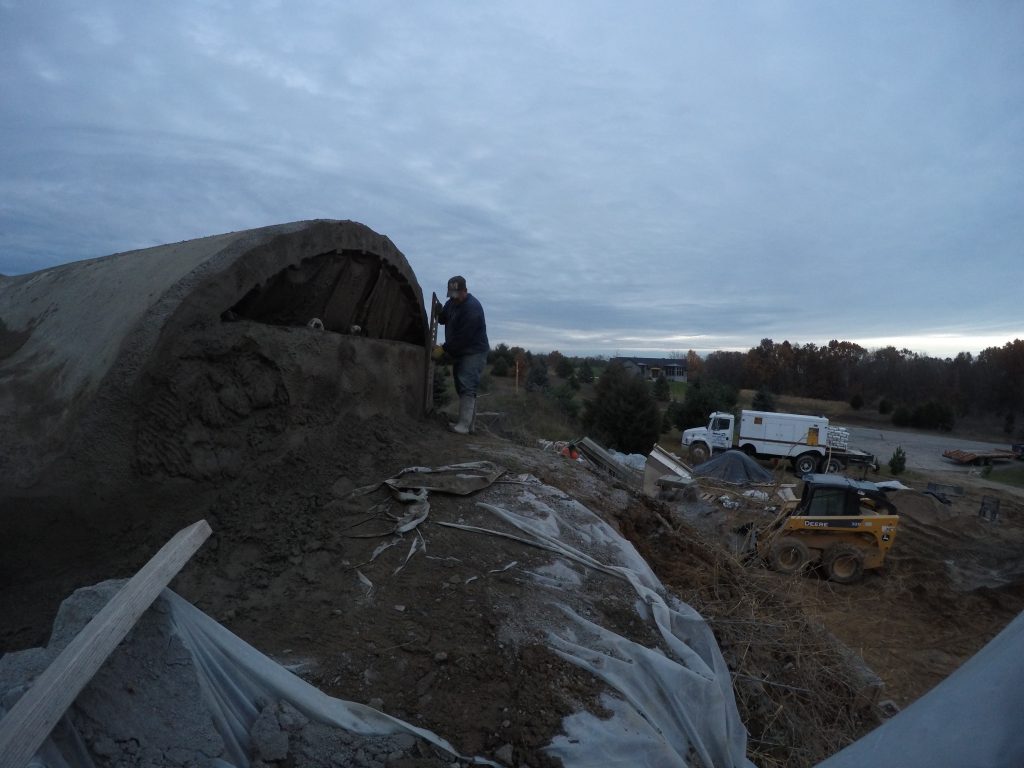
The last few dozen square feet… 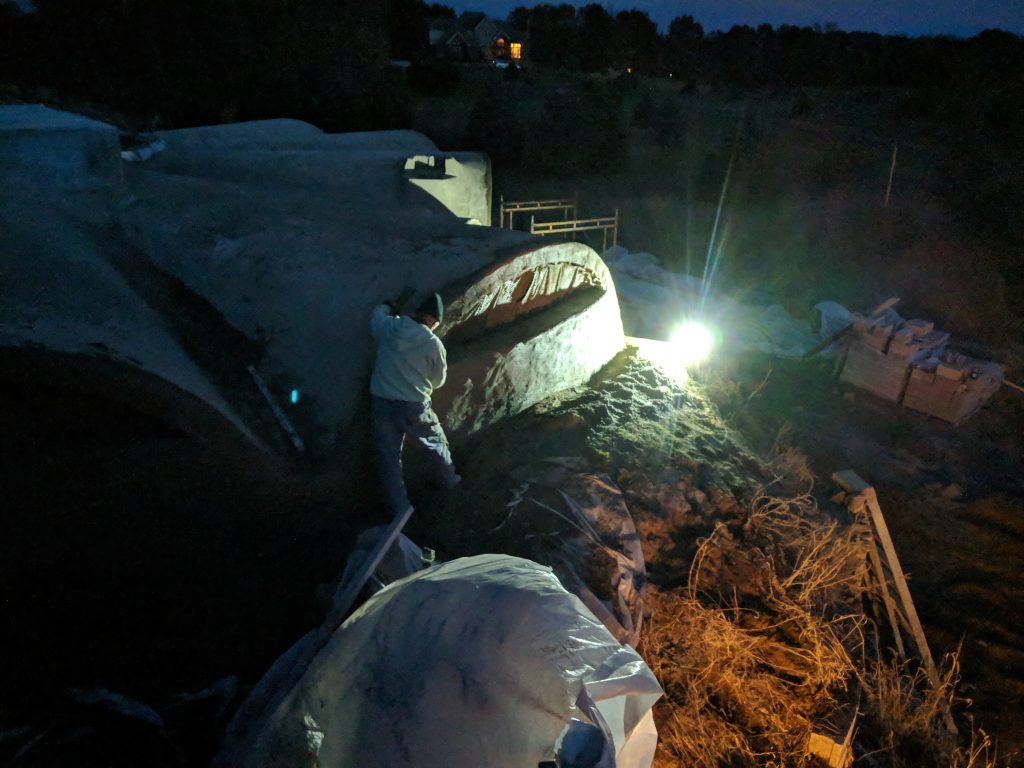
They worked until past dark and I ran out there with a flashlight. I don’t think they had brought any lights, or at least, they were not getting their own. 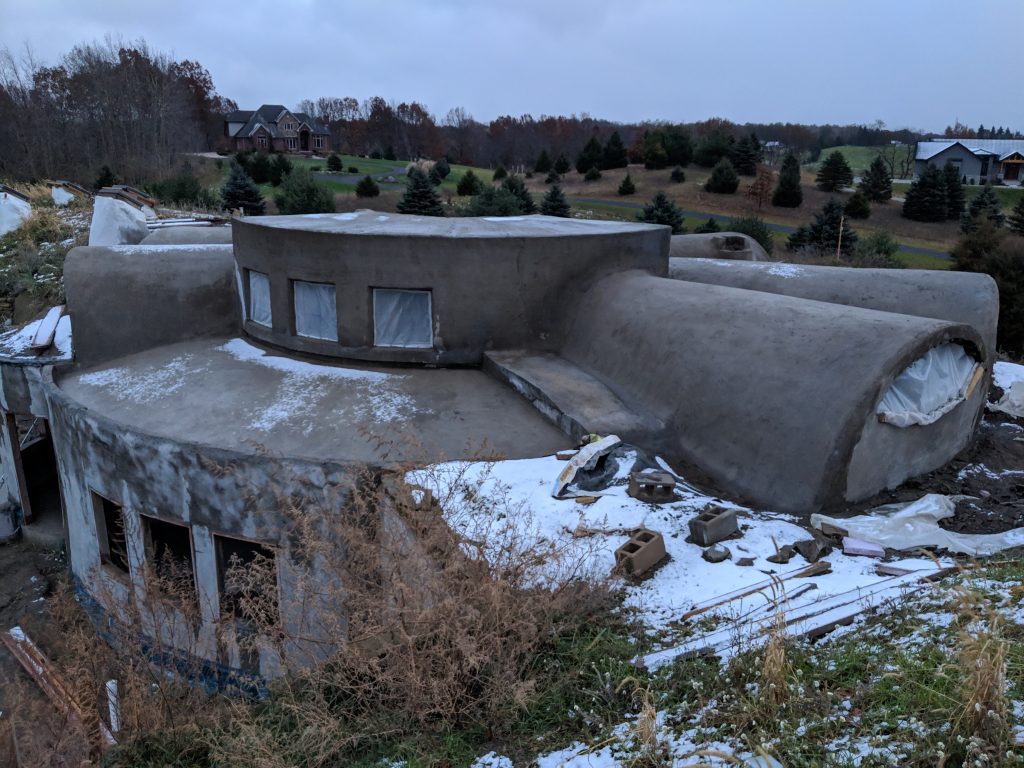
We just barely got that south wall on before the first snow of the season. Any longer delay and we would have been sunk. 
Michael built his first snow many of the year on the roof. 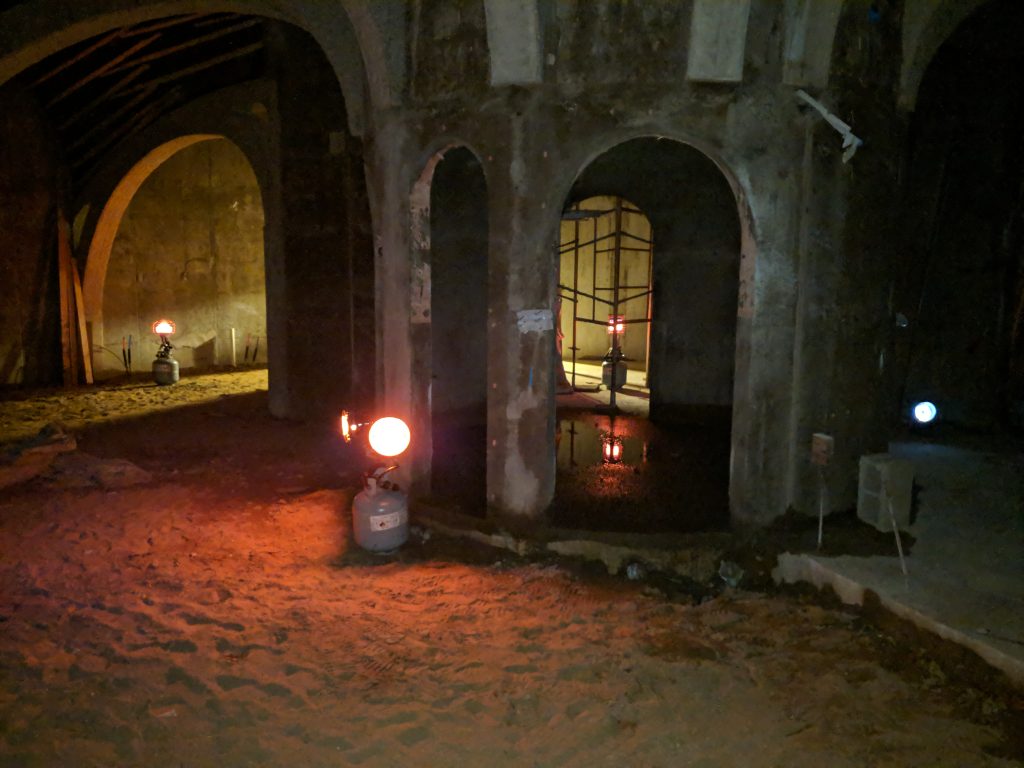
Due to the cold weather soon after the shoot, I ran heaters constantly for a few days. These are under the radial vaults and heat rises… But the south wall gunite is outside, beyond a layer of insulation, so I didn’t think much of this heat would get to that, and I didn’t want to bother running these little heaters outside in the cold wind. 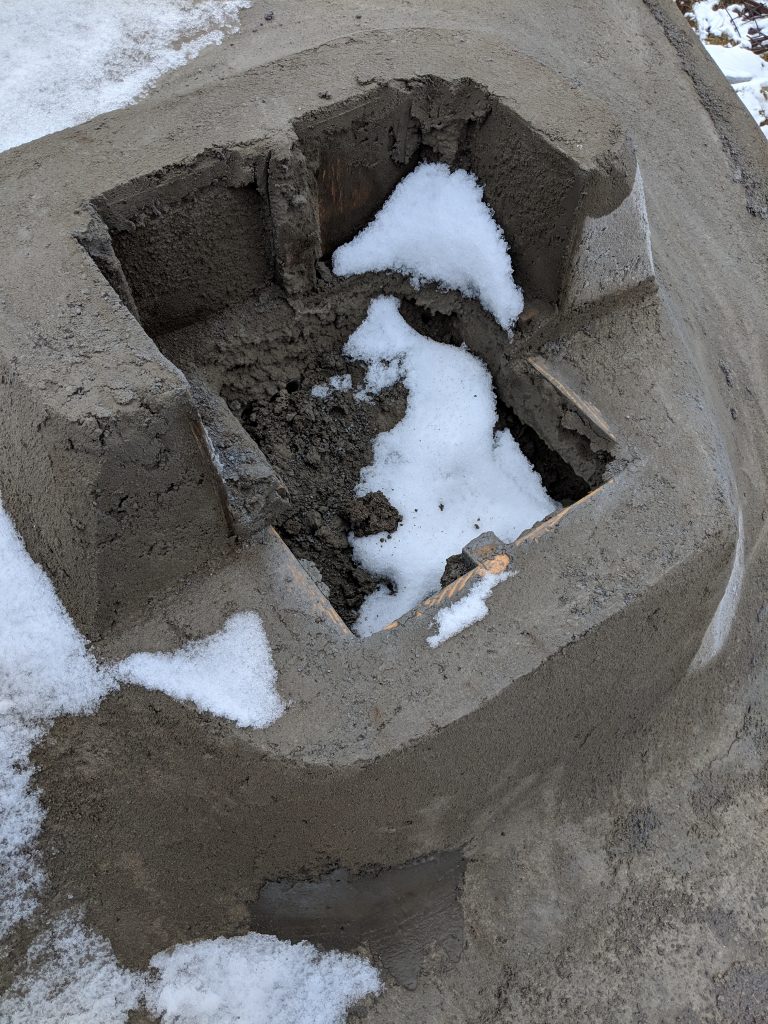
I didn’t cover the top of this chimney opening and gunite got inside. I probably should also have been more clear about its purpose with the crew. Anyway, no I’ll need to dig it out. 
I had to chisel away the exctra concrete from below, which wasn’t fun. I focused on the edges and worked my way around with a drill and chisel until it was separated from the walls… 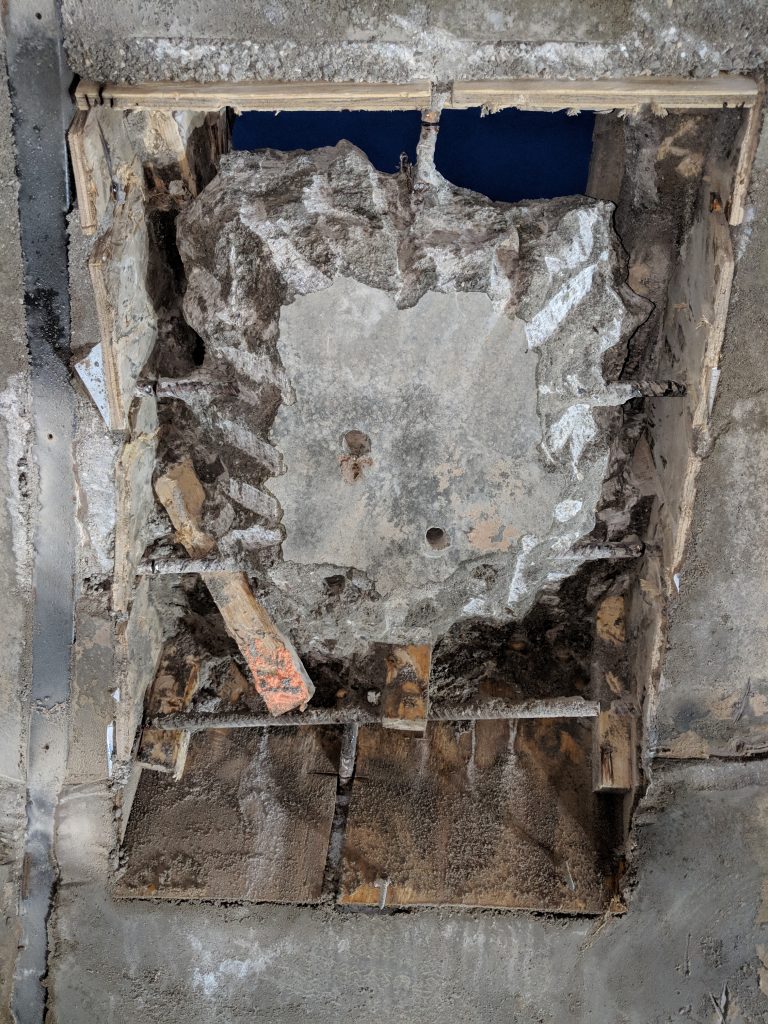
I removed the concrete all the way around the central chunk and then just had to cut the rebar. 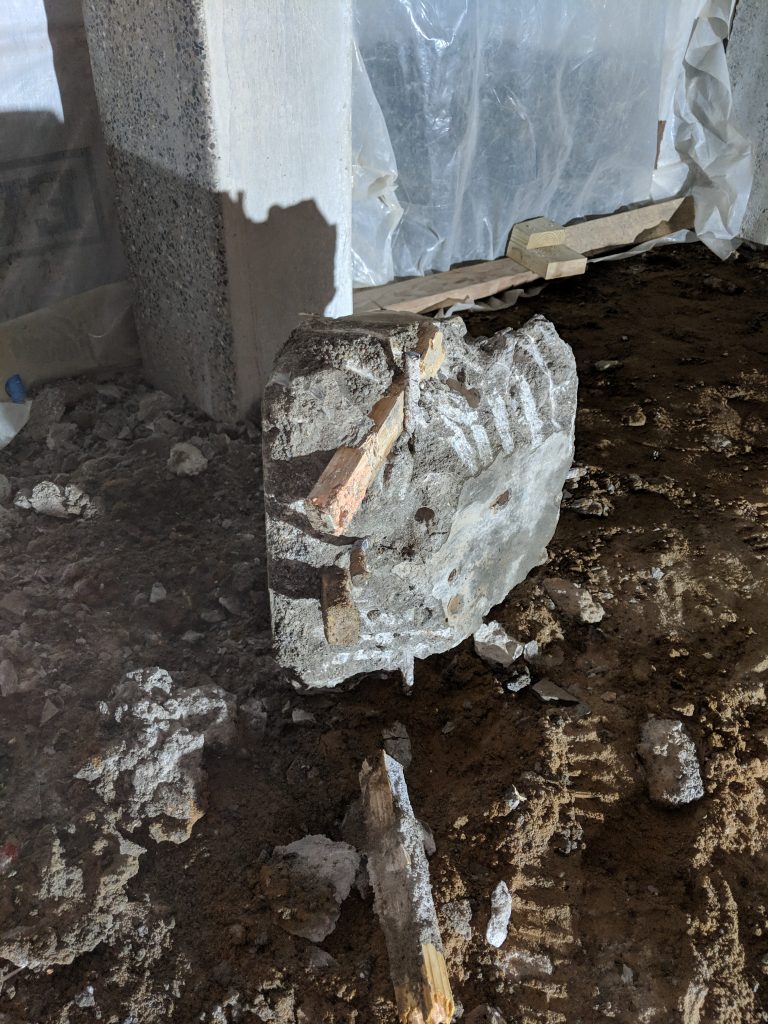
After cutting the rebar that was holding it up, the chunk fell with quite a thump. 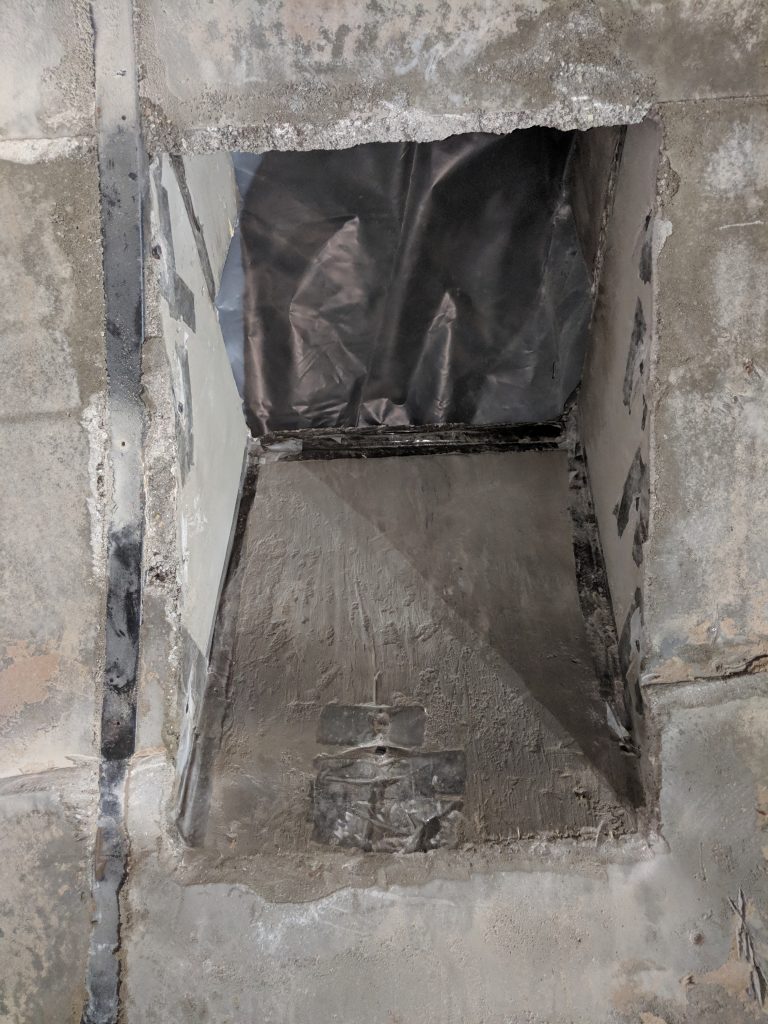
After getting rid of the chunk, we could remove the rest of the formwork. Later we installed the ceiling box for the chimney, etc.