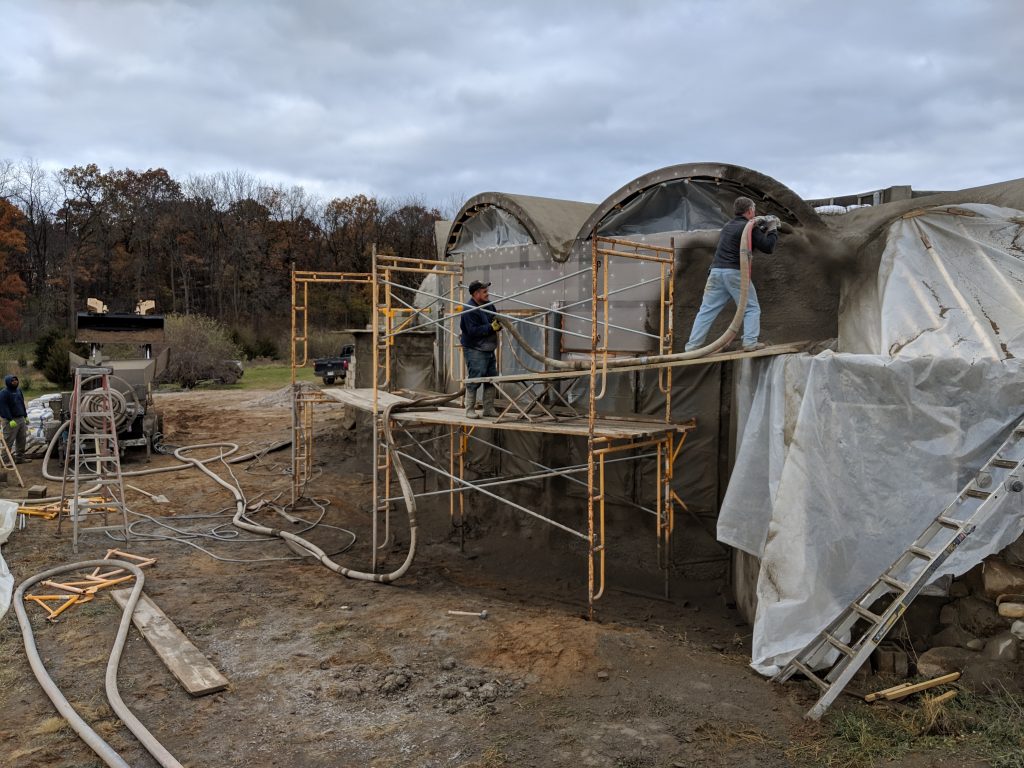
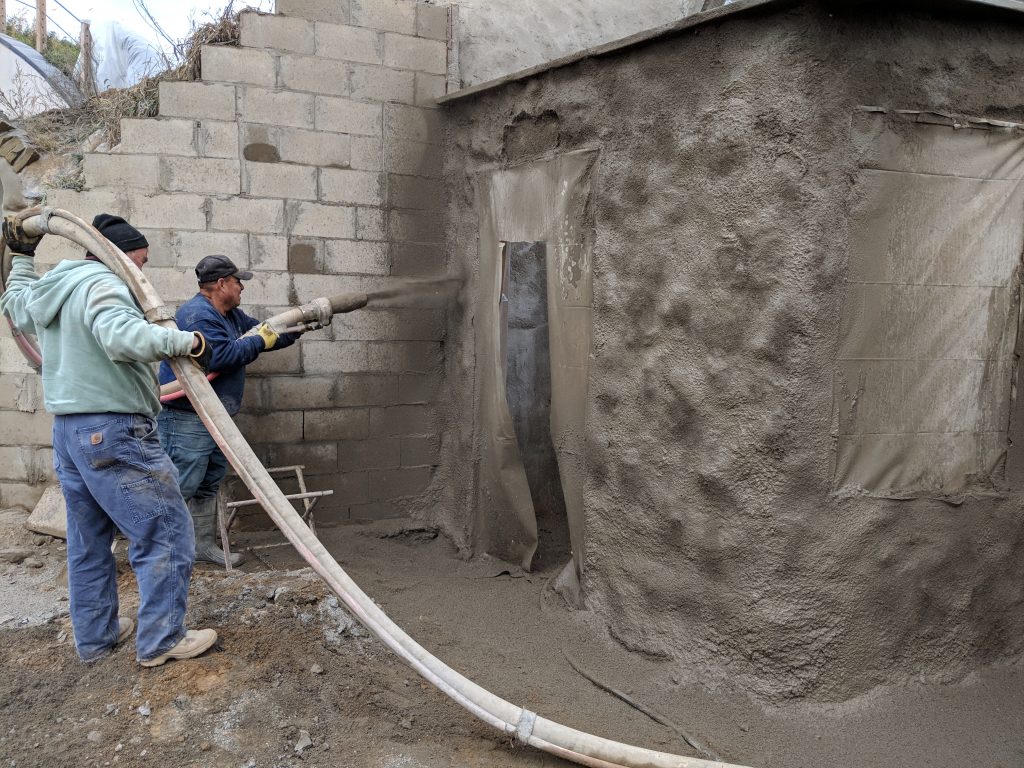
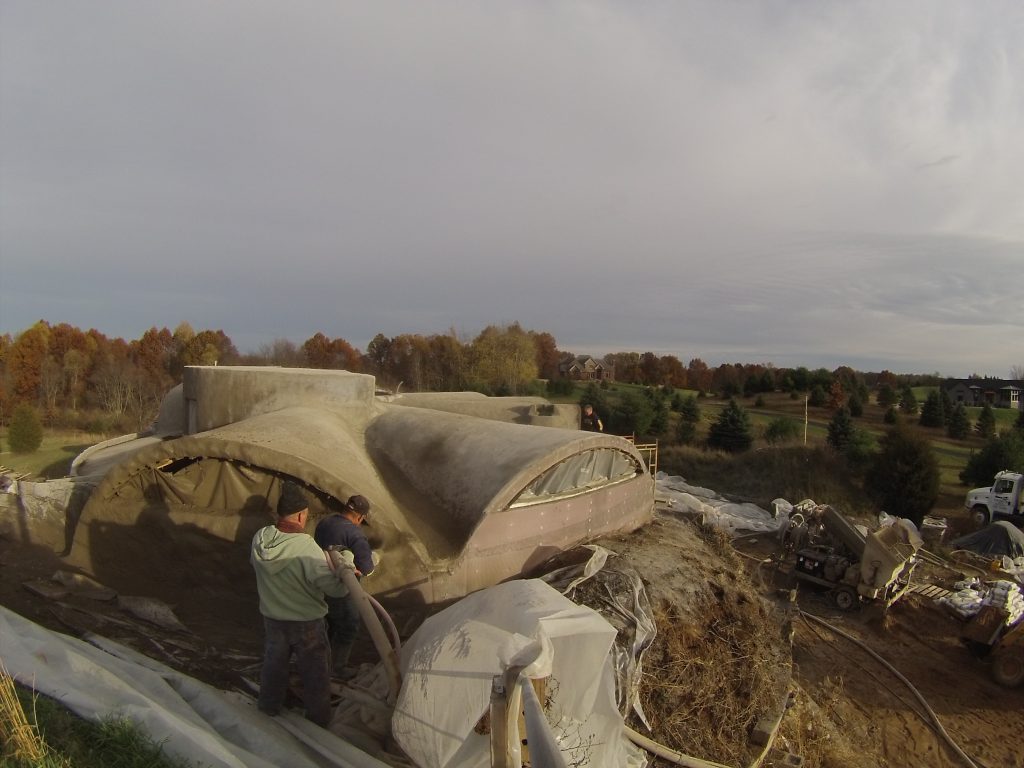
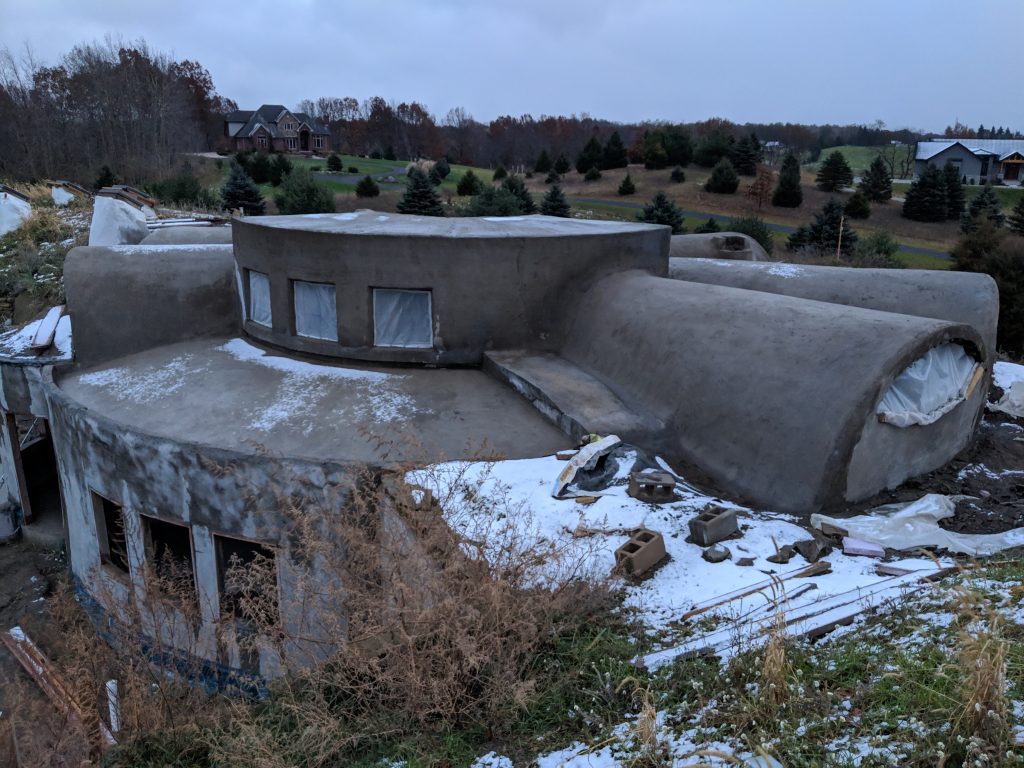
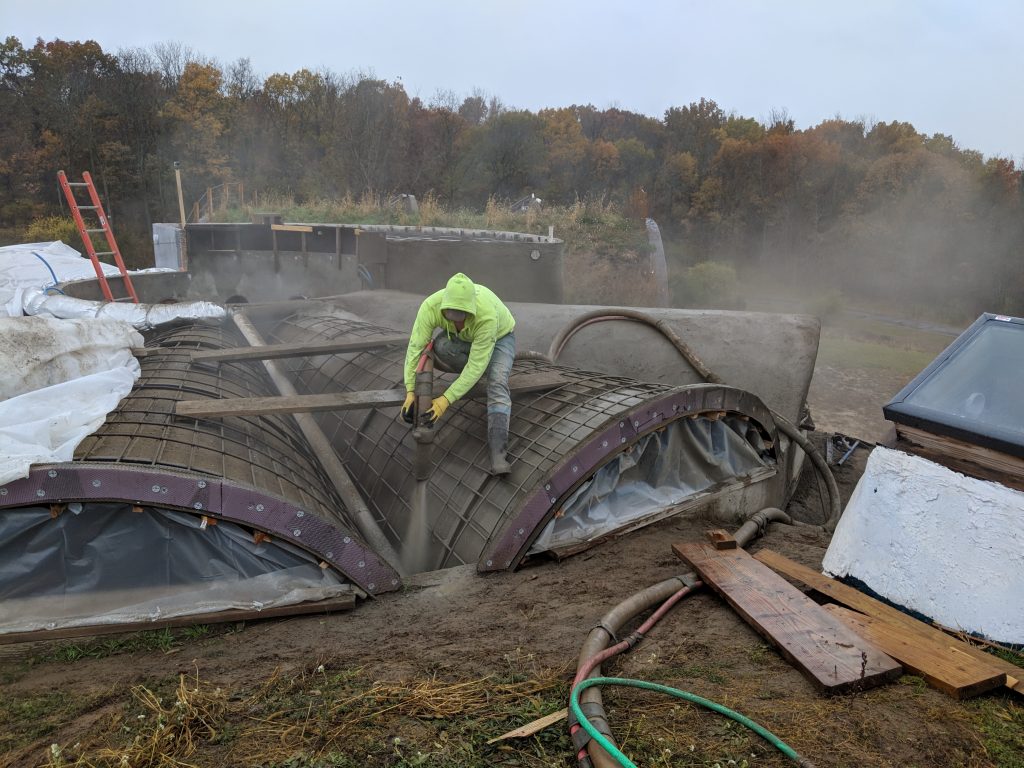
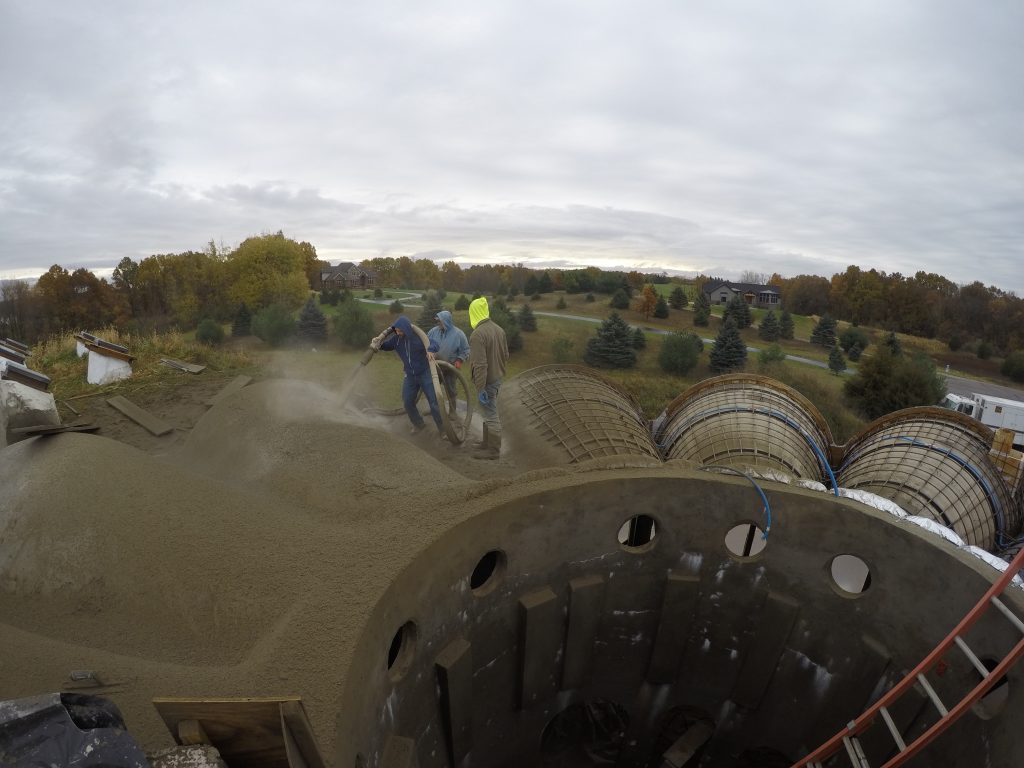
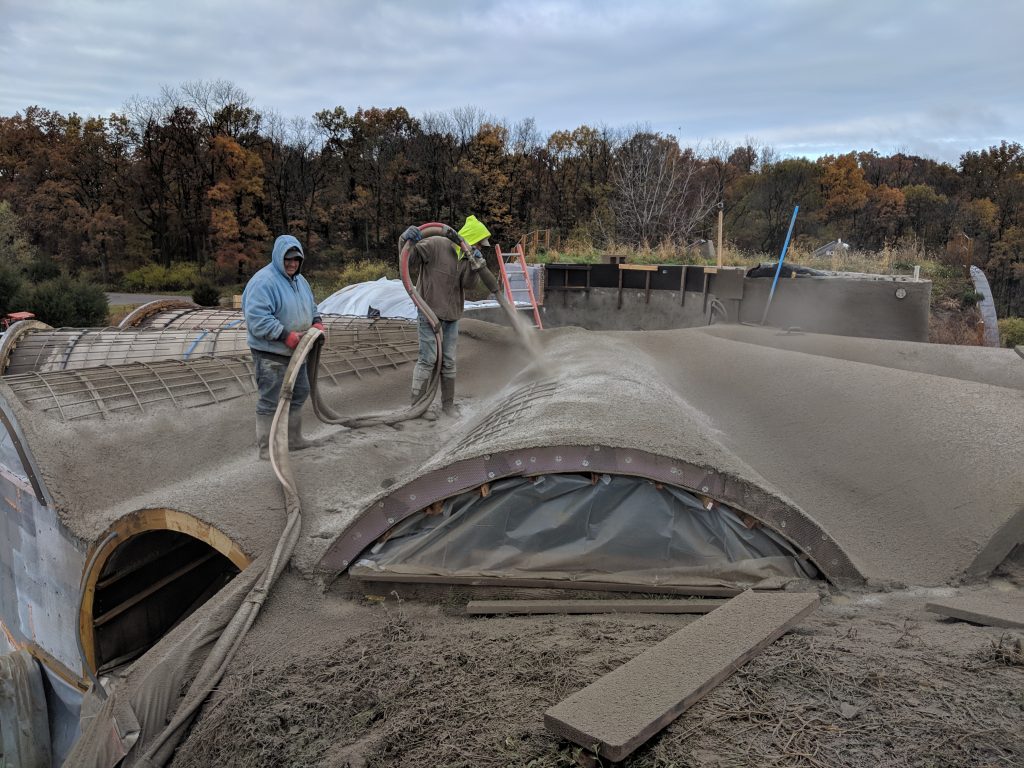
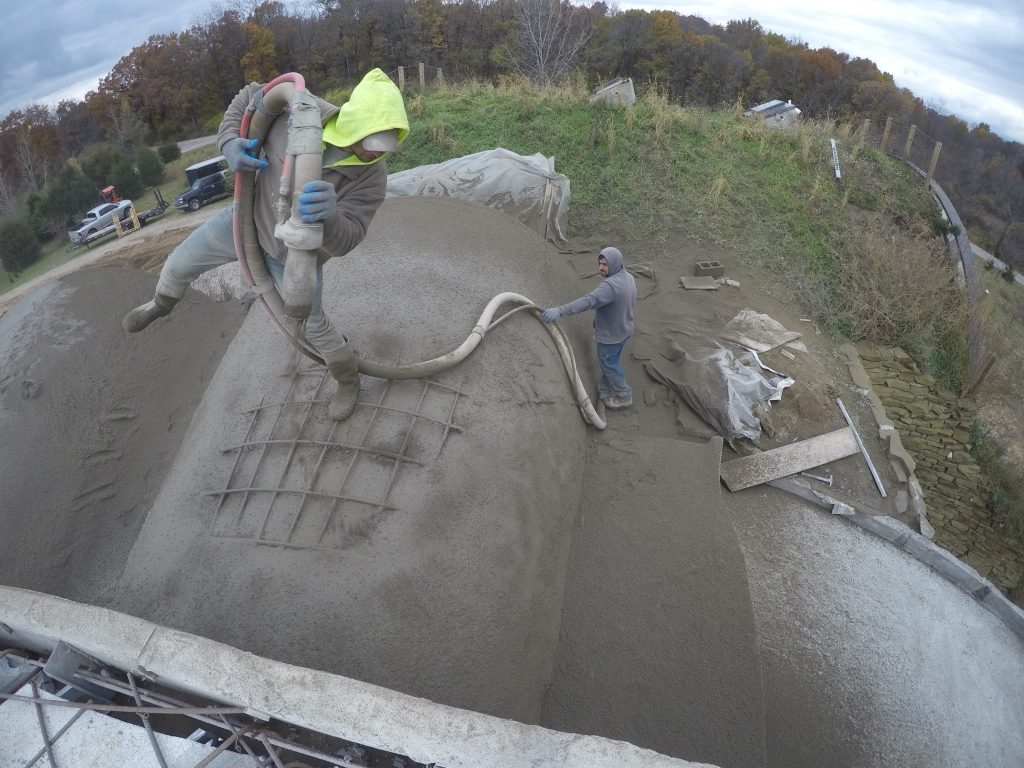
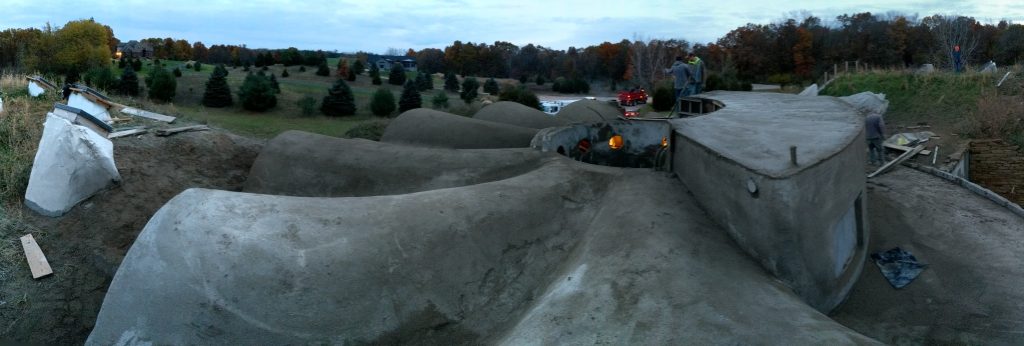
In this episode, the gunite crew from S.A.M. Gunite Pools comes back to shoot our south wall. They had just finished the roof on the Friday before, so the equipment and materials were already in place. The form work was lath covered rigid XPS insulation over steel stud framework. Easy-peasy… Easy to watch anyway.
The Video
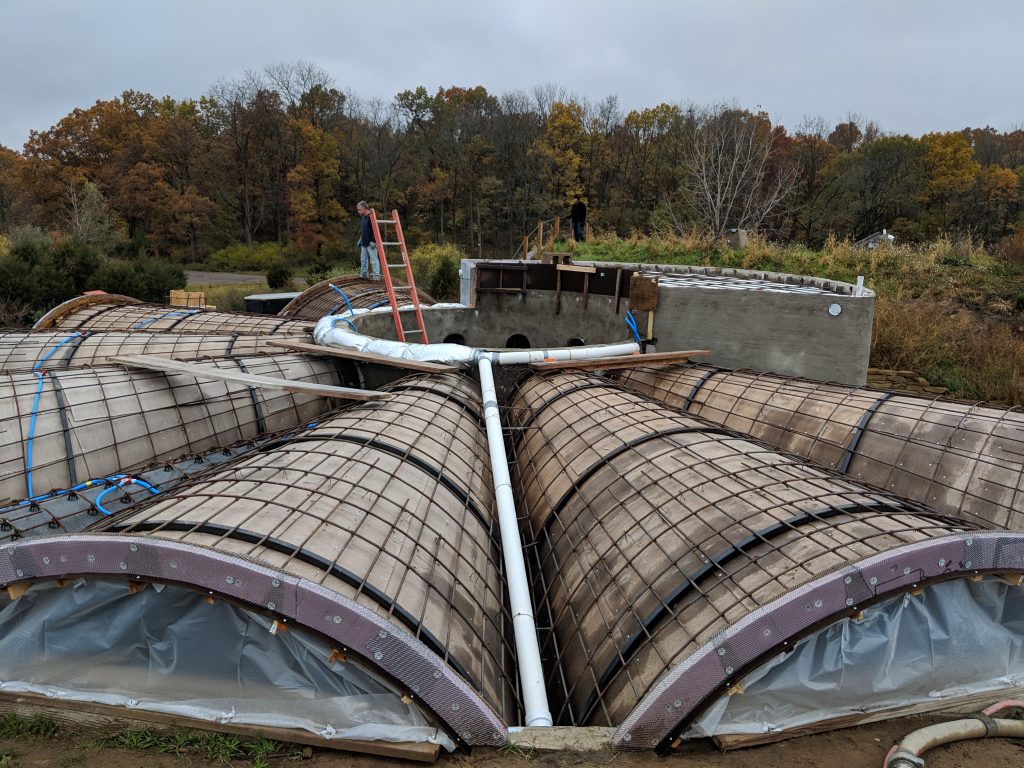
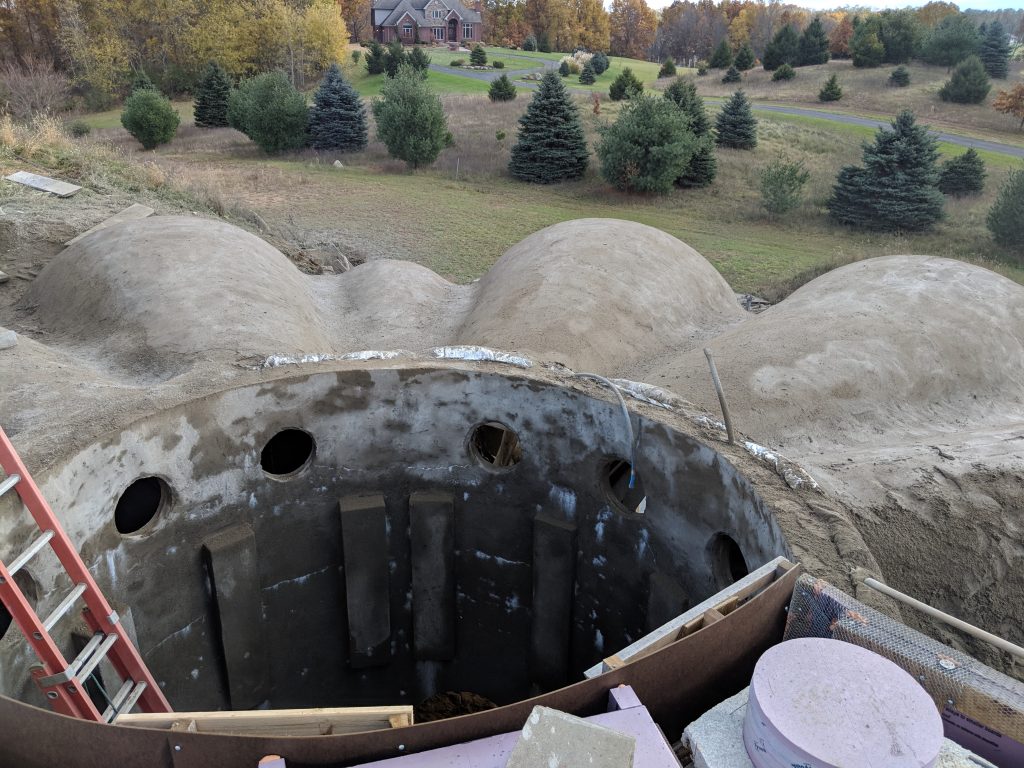
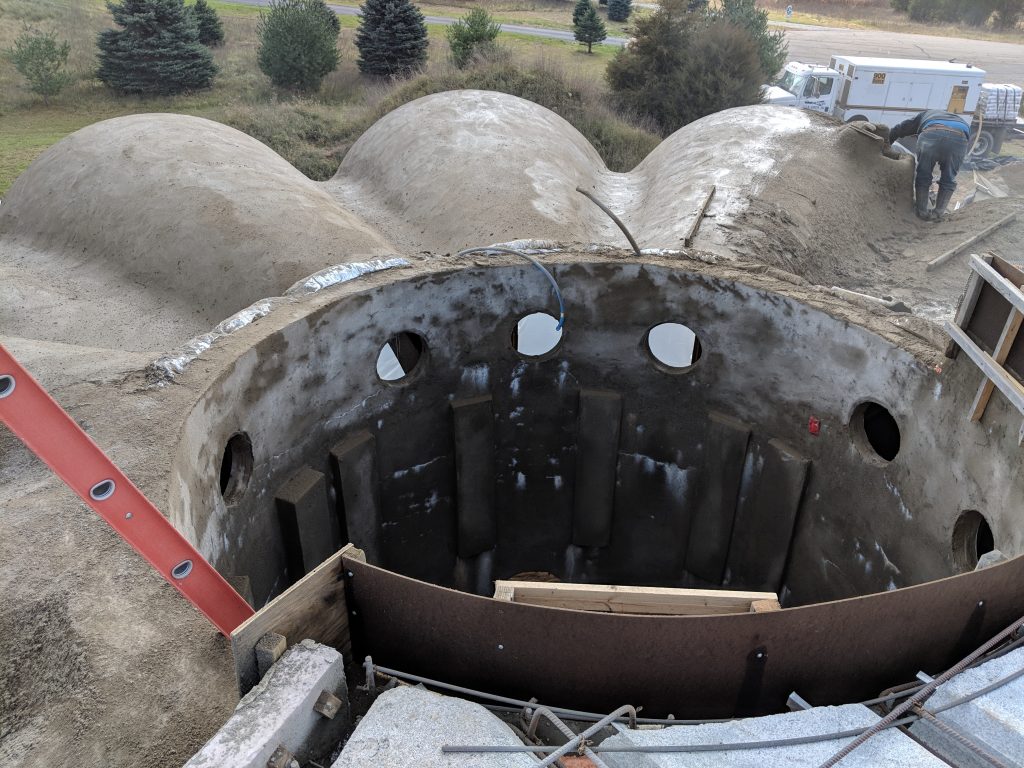
The Forms
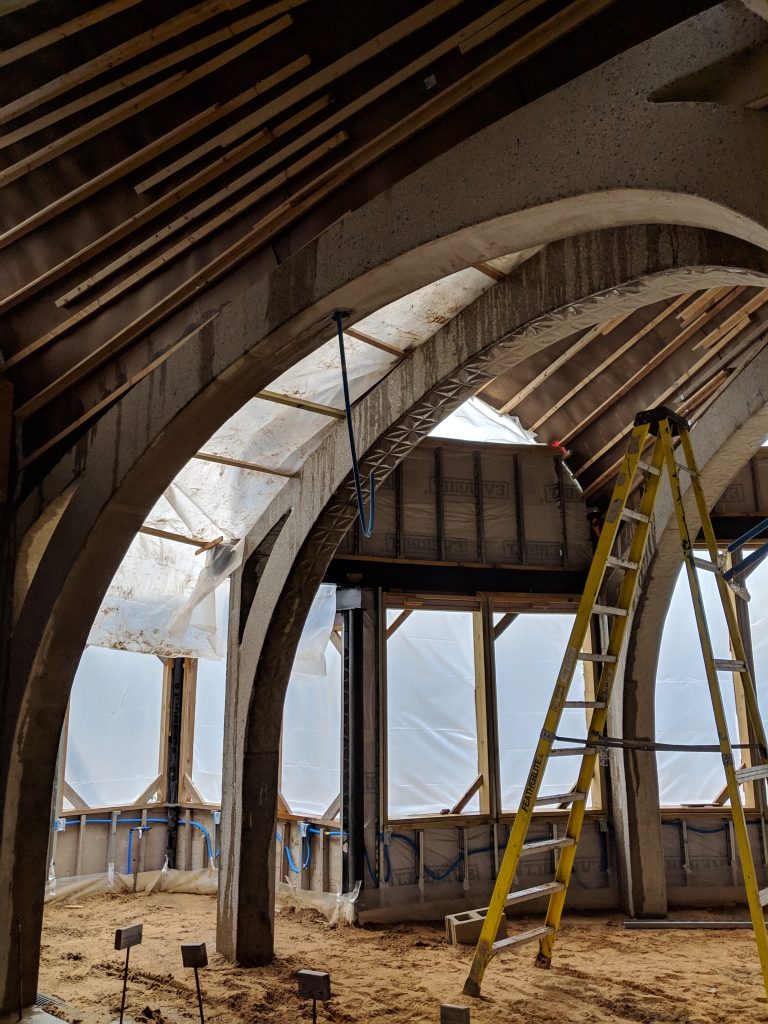
We started with a steel stud framework and attached 2 inches of XPS rigid insulation (Pink Board) to that. The window bucks were treated wood, cut to match the curve of the wall. We also had some 4 and 6 inch tube steel in the wall to take loads from the earth covered awing that we will add in a later step. Then we covered the XPS with lath to hold the shotcrete and we were ready to go. You can find more details and pics on the formwork here…
This is a pretty easy and robust way to form a wall, and includes built-in continuous insulation already in place from day one. The steel studs also leave a 4 inch deep cavity that I expanded out with some furring strips on the inside so I could fit 5 inches of additional insulation.
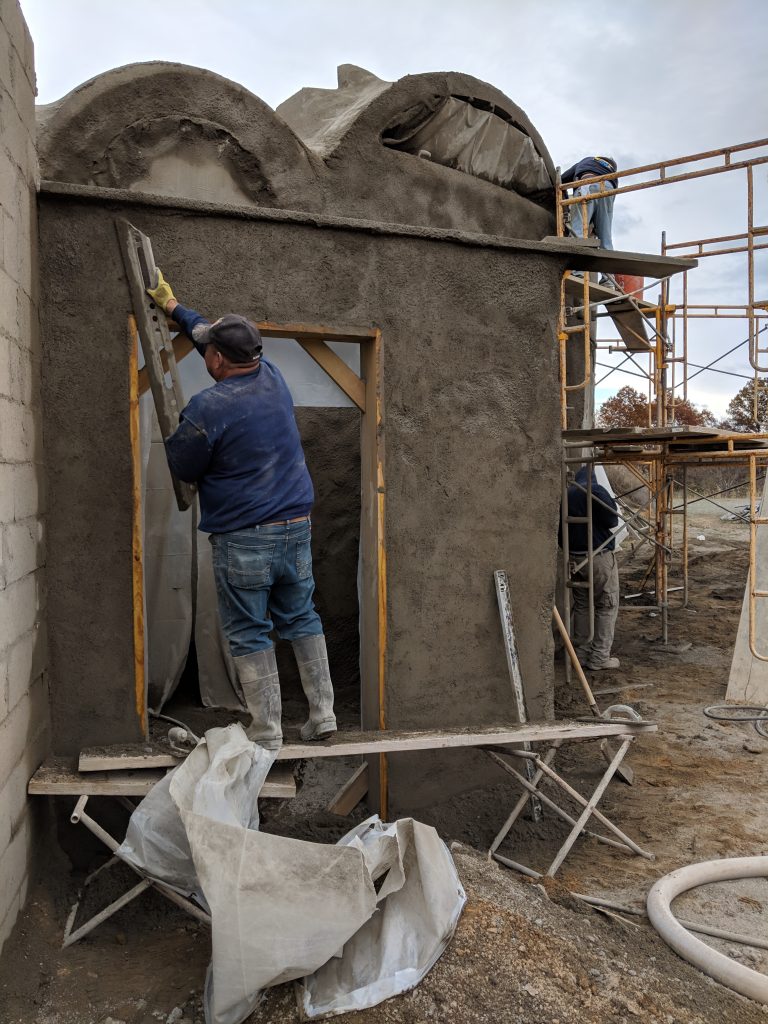
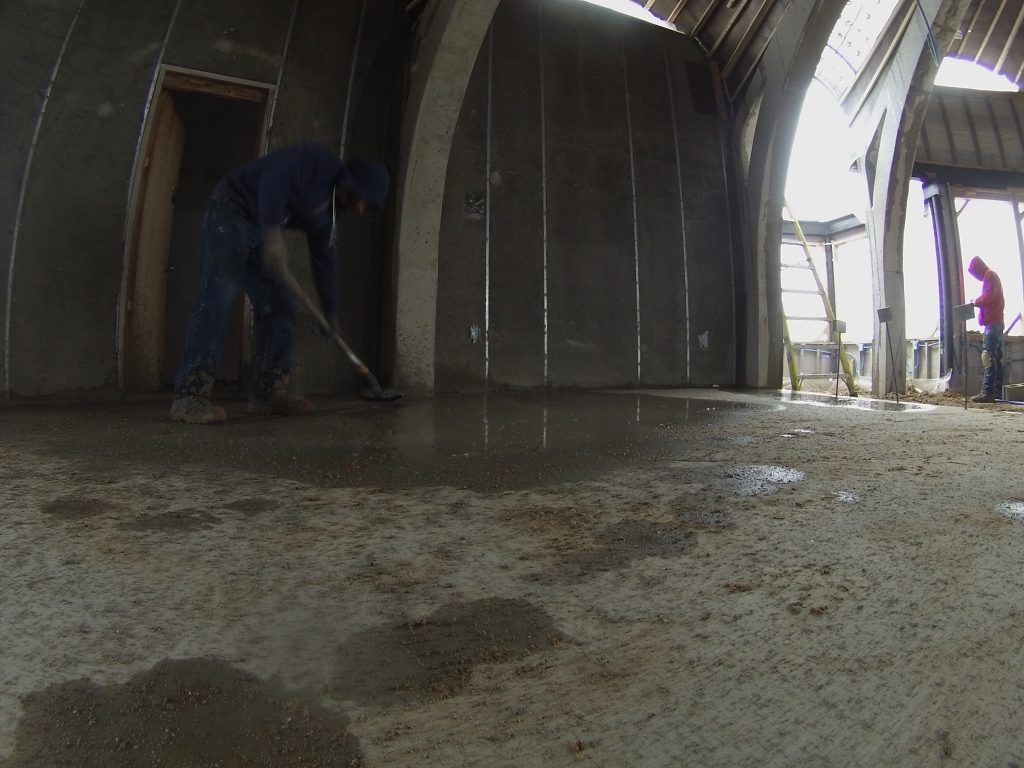
The Bat’Lath was used a lot in this job to trim down the walls to the correct thickness before troweling. This did create a fair amount of waste, but I am sure it was worth it compared to trying to push around that much concrete.
Carlos using the Batleth on the wall…
The Gallery
A picture is worth a thousand words, but these pics also have captions, so bonus words!
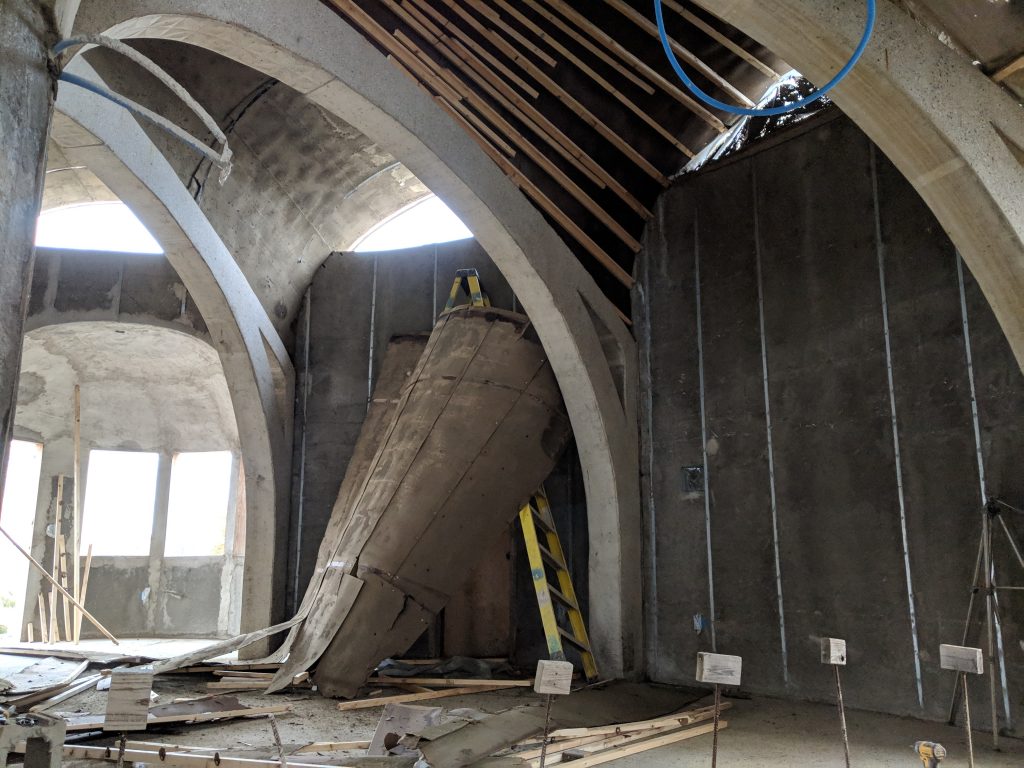
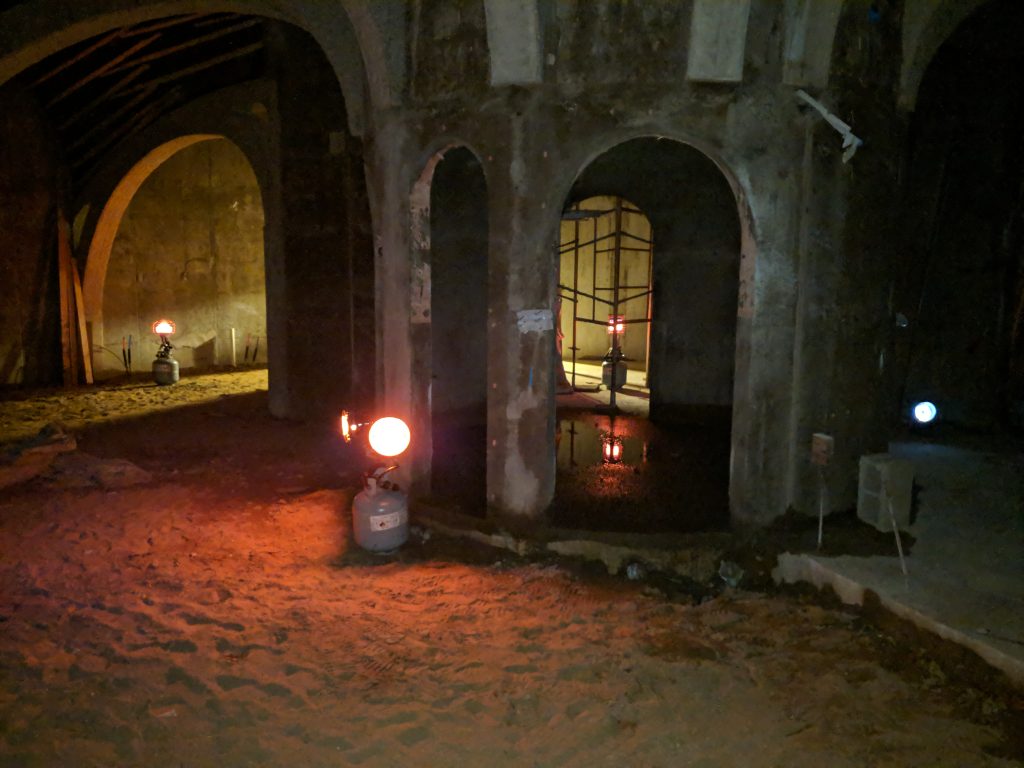
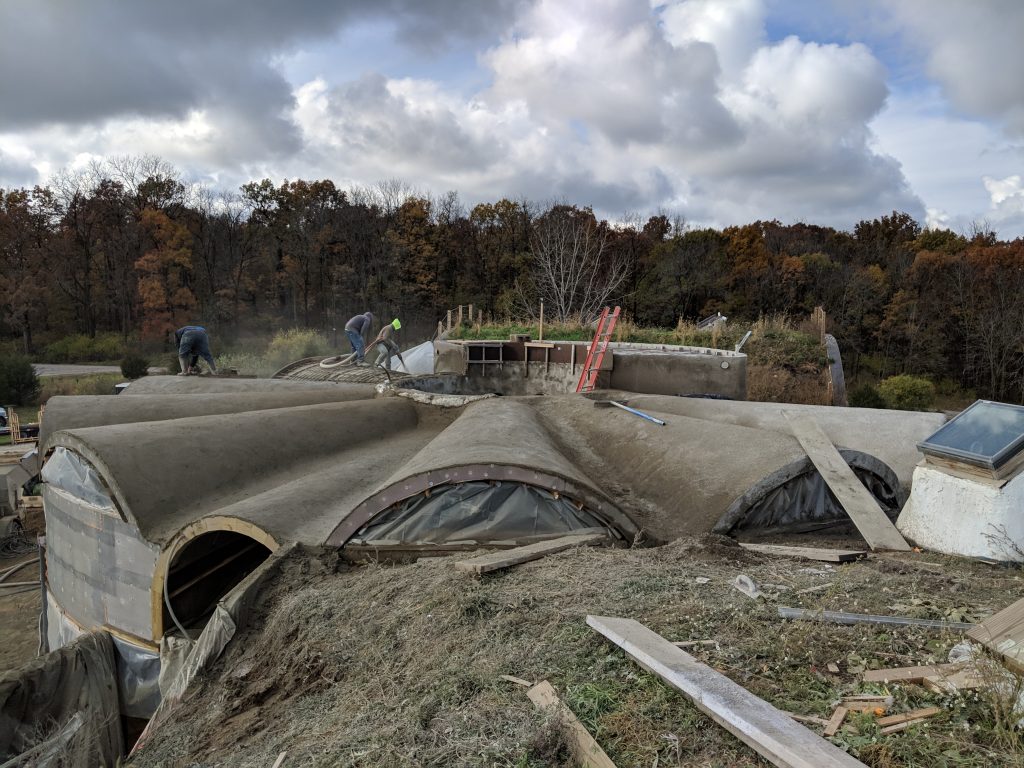
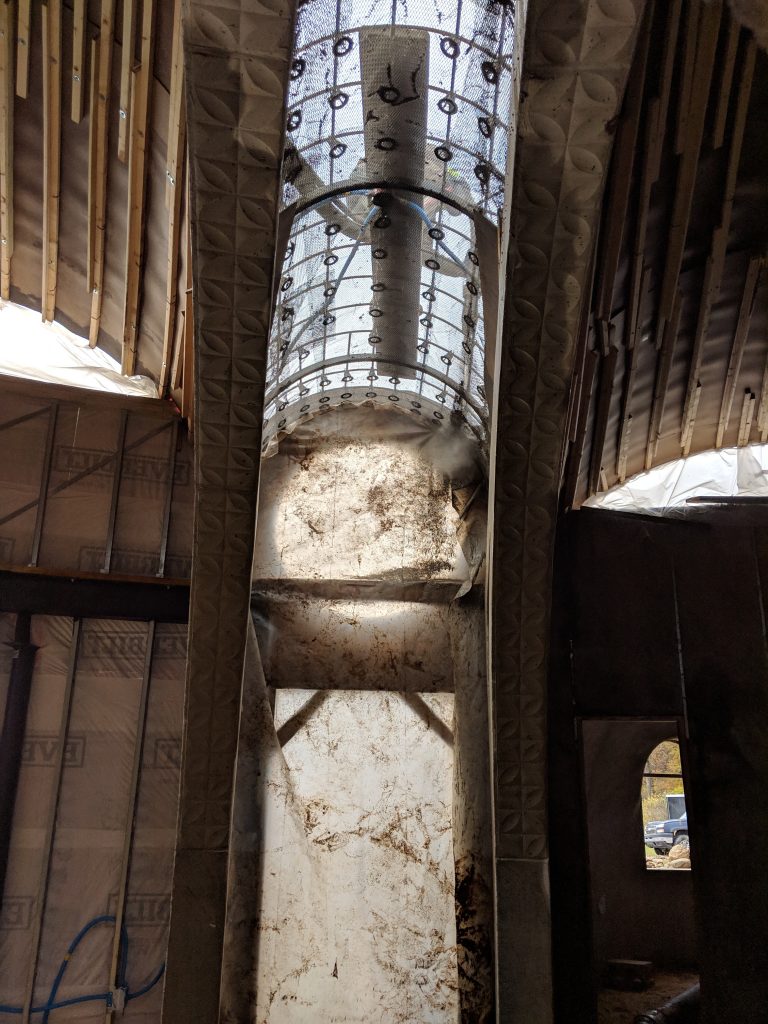
Over the weekend, I began stripping the radial vault forms from the roof gunite.
After taking out the screws, I was using a hammer and a pry bar. I would put the pry-bar in about the right place, and then hit it with a hammer to get it beind the batton, then I would lever it out. The lath screws would just pull thru the old hardboard and the strips would fall down.
I tore down a big chunk of formwork all at once. Which is good, except I was on the ladder at the time… I was fine, but I did get a bit of a fright and decided not to do it that way the next time.
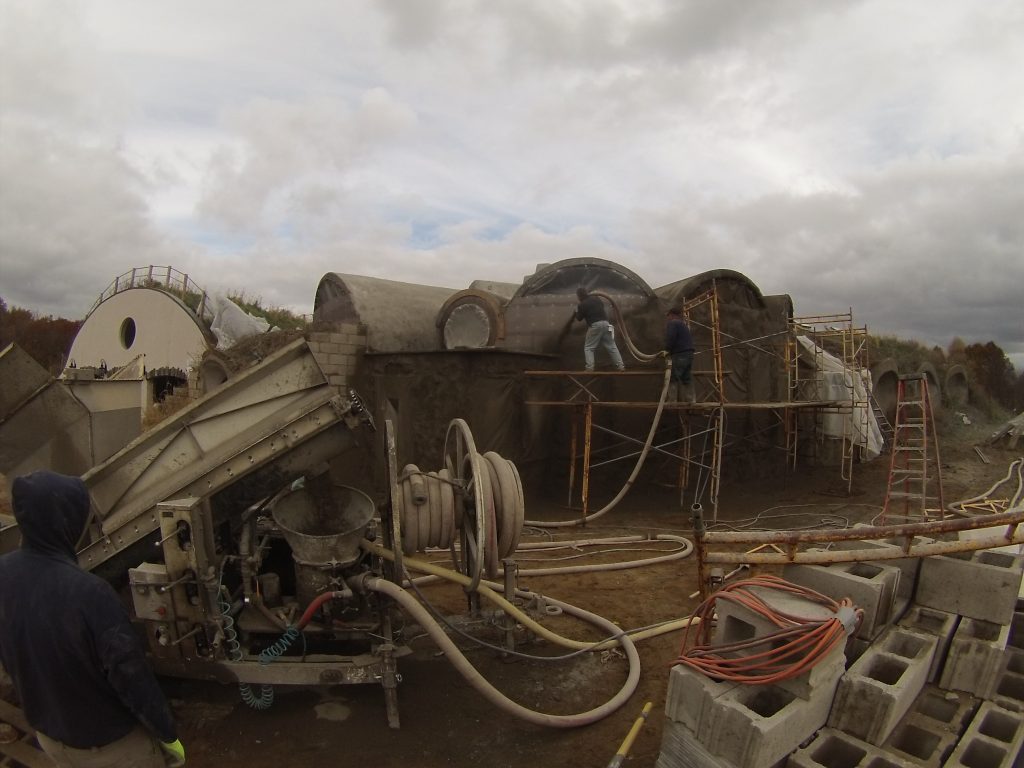
The gunite rig is both simple and genius.
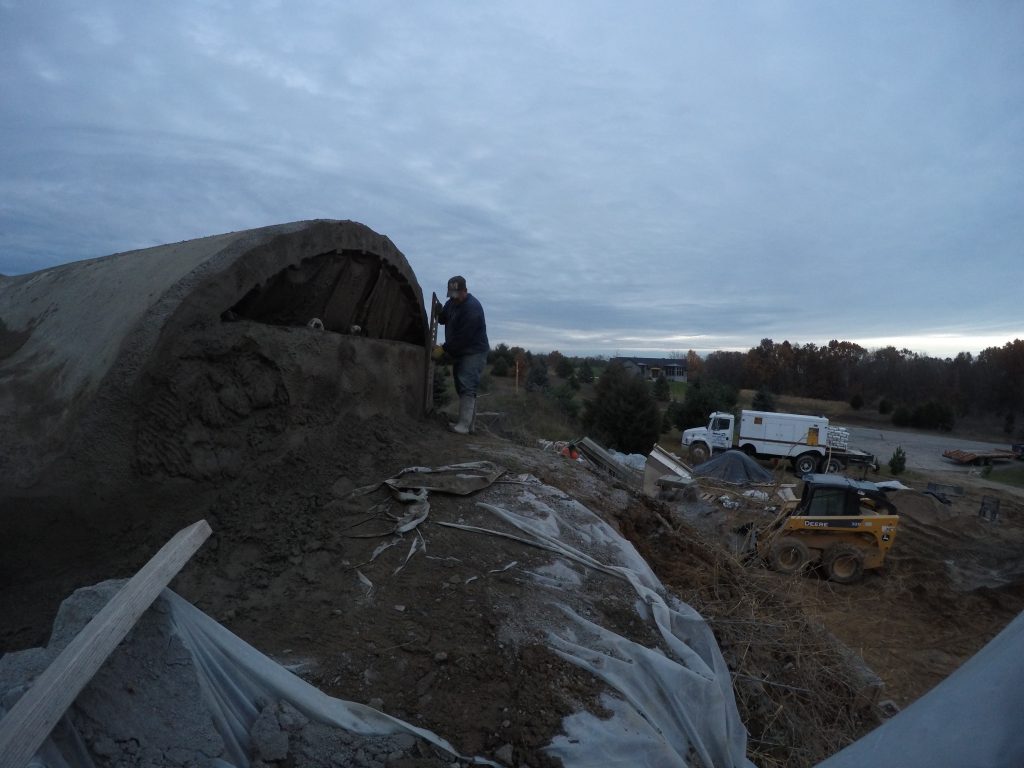
It wasn’t a pretty day for taking pics…
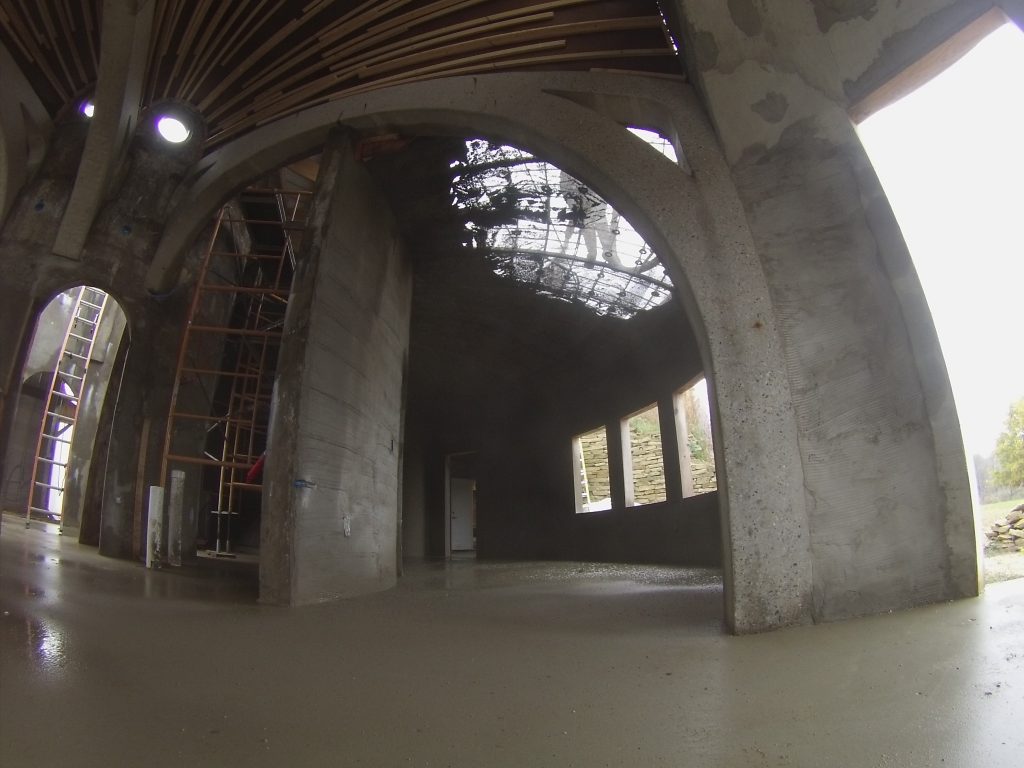
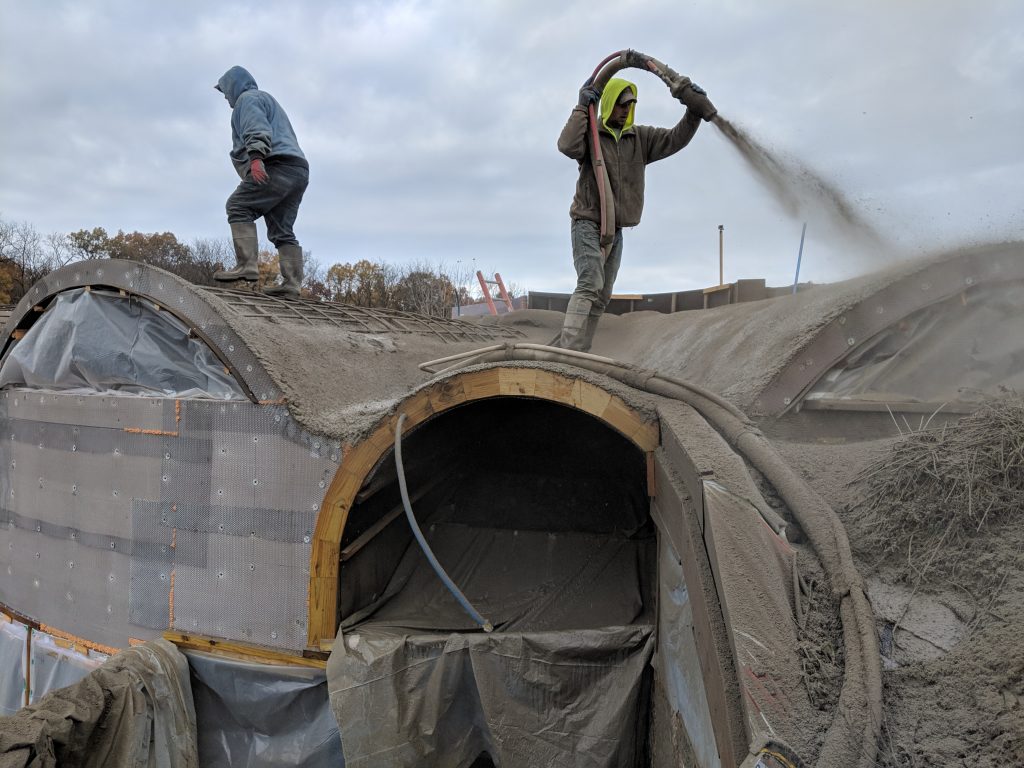
Shooting the entrance wall…
Carlos using the Batleth on the wall…
I liked to think of the tool as being a bat’leth
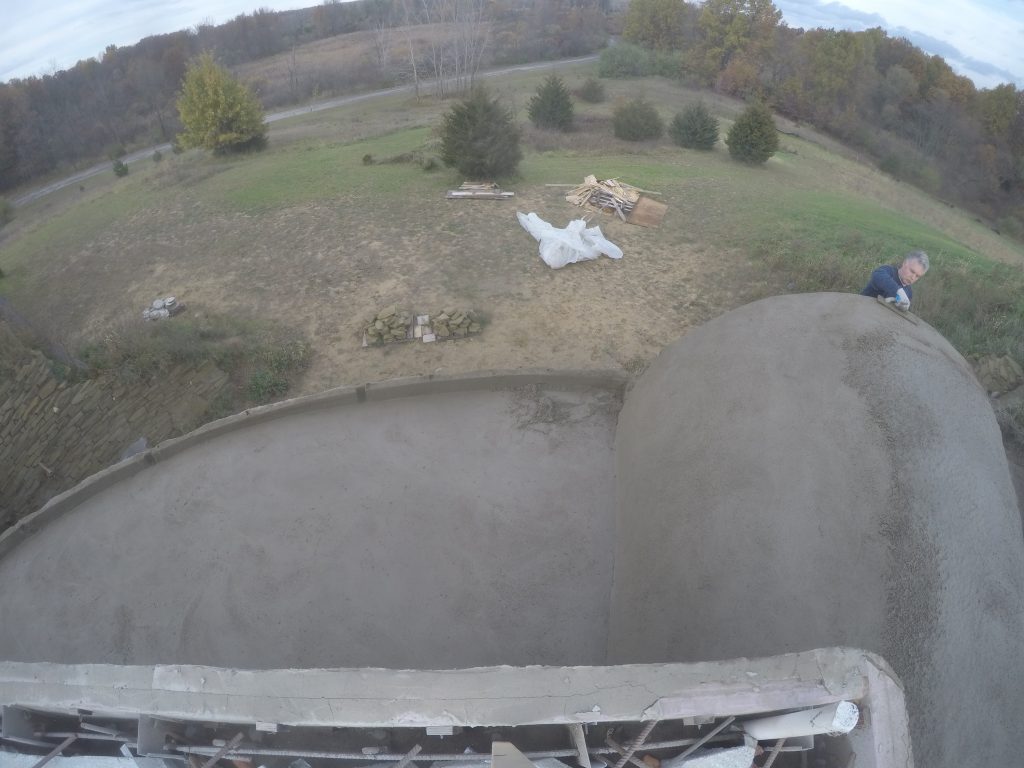
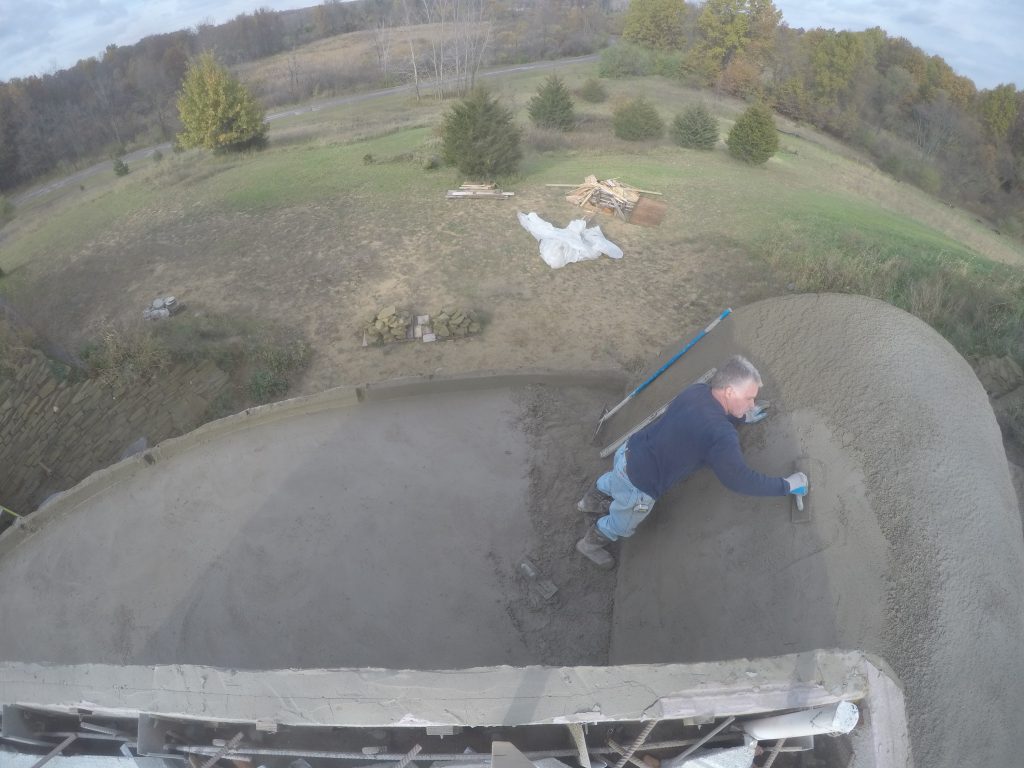
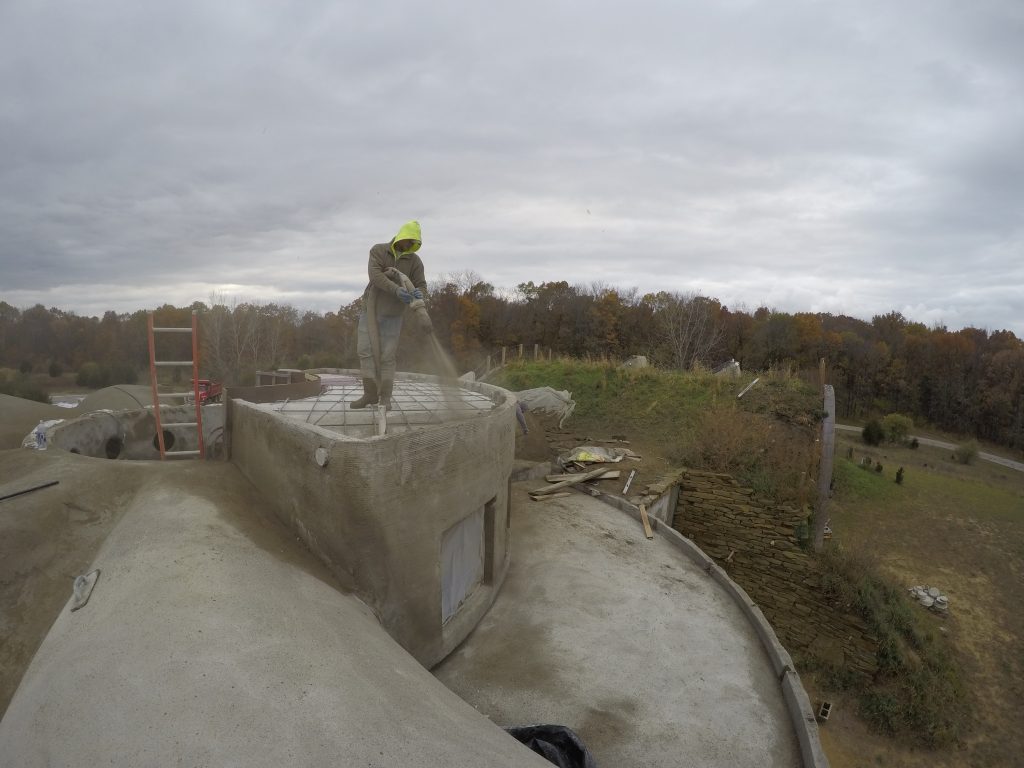
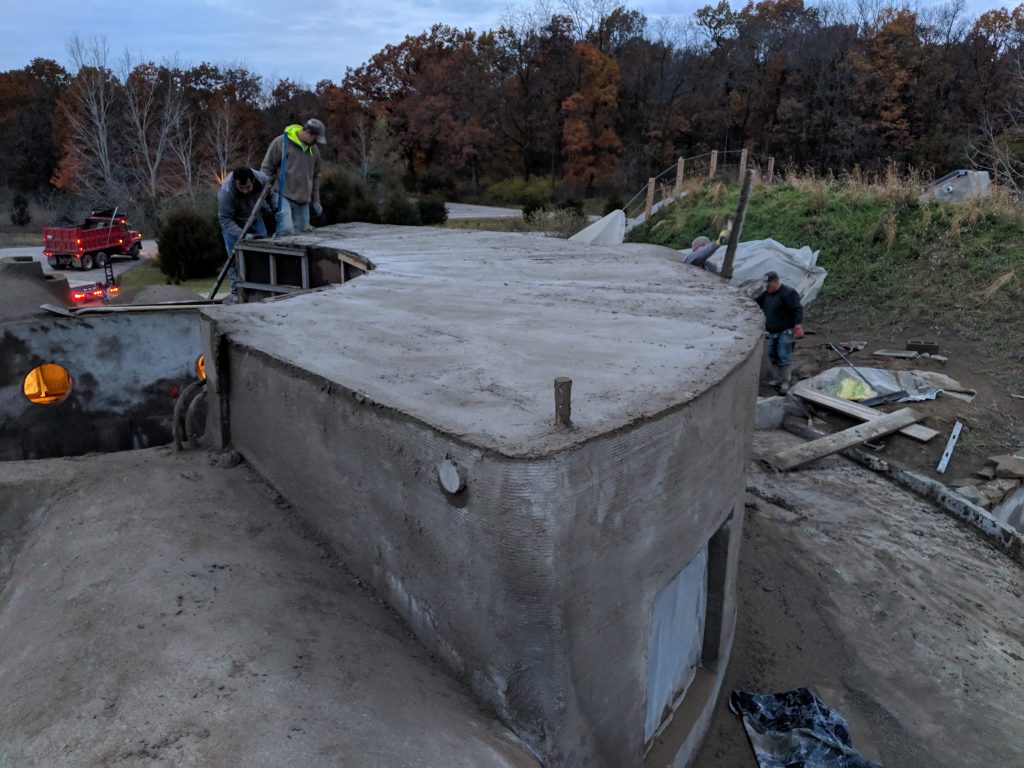
Here Scott is stretching to take care of that section. Earlier, they had ladders in here, but I guess he saw something that needed a touchup after they took them out.
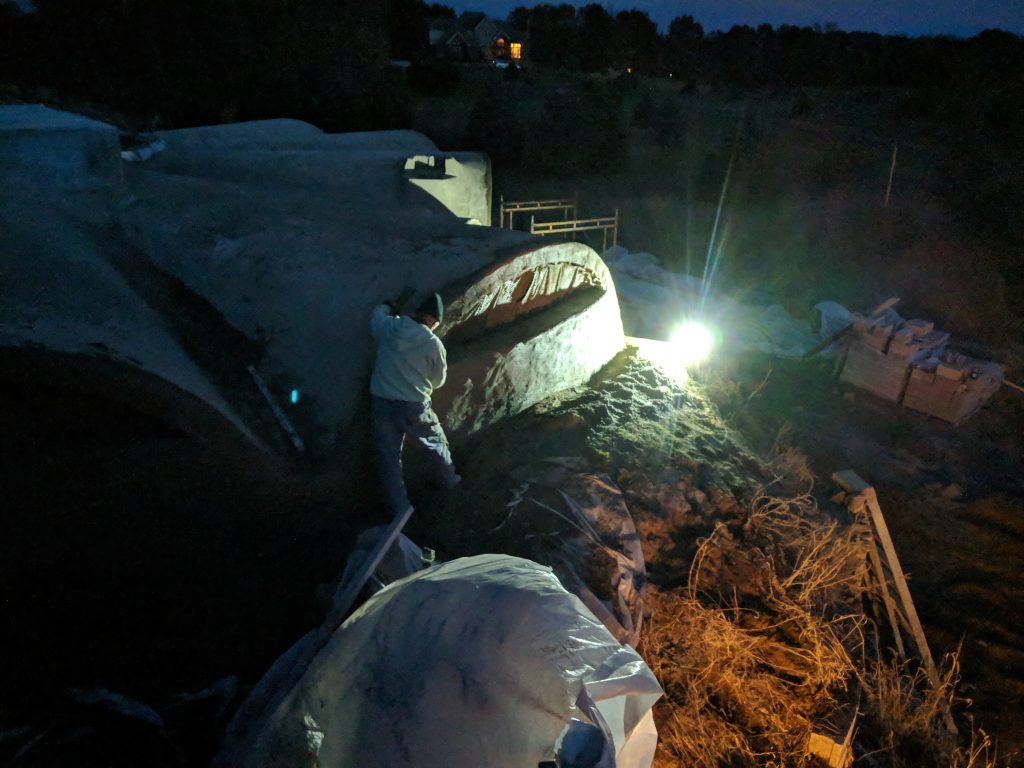
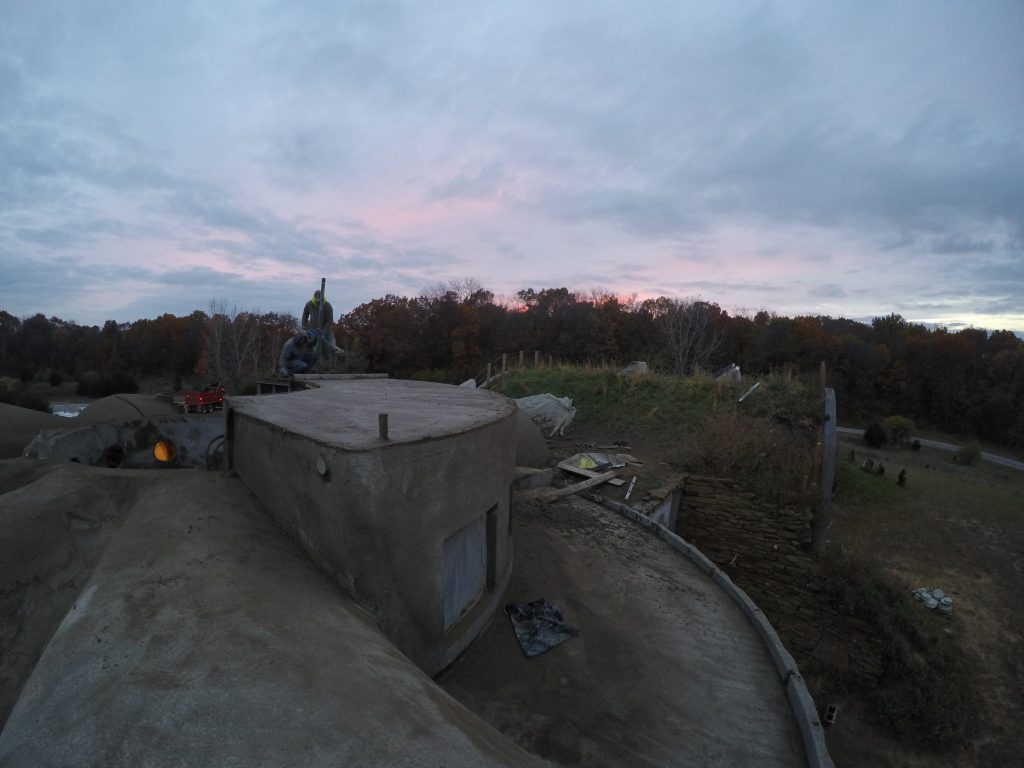
Sunset as they got to this last section…
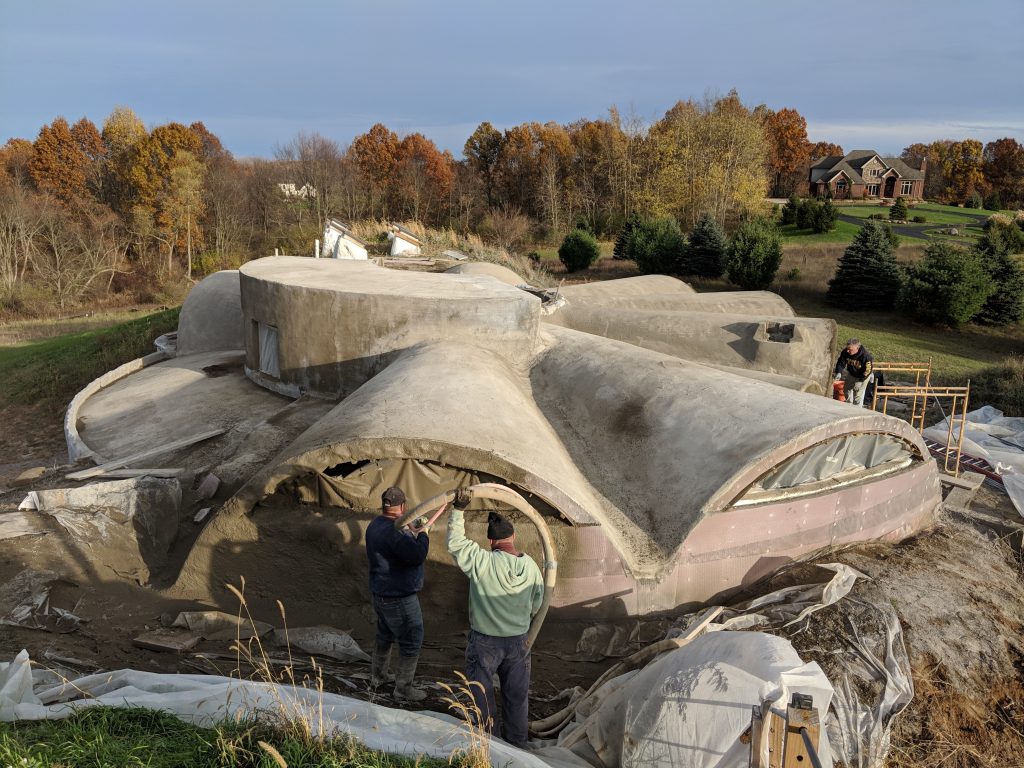
another shot of that brief moment when the lighting was good… In this pic, you can see Carlos working on the near wall and Scott still working on the south wall (top right)
The last few dozen square feet…
They worked until past dark and I ran out there with a flashlight. I don’t think they had brought any lights, or at least, they were not getting their own.
We just barely got that south wall on before the first snow of the season. Any longer delay and we would have been sunk.
Michael built his first snow many of the year on the roof.
Due to the cold weather soon after the shoot, I ran heaters constantly for a few days. These are under the radial vaults and heat rises… But the south wall gunite is outside, beyond a layer of insulation, so I didn’t think much of this heat would get to that, and I didn’t want to bother running these little heaters outside in the cold wind.
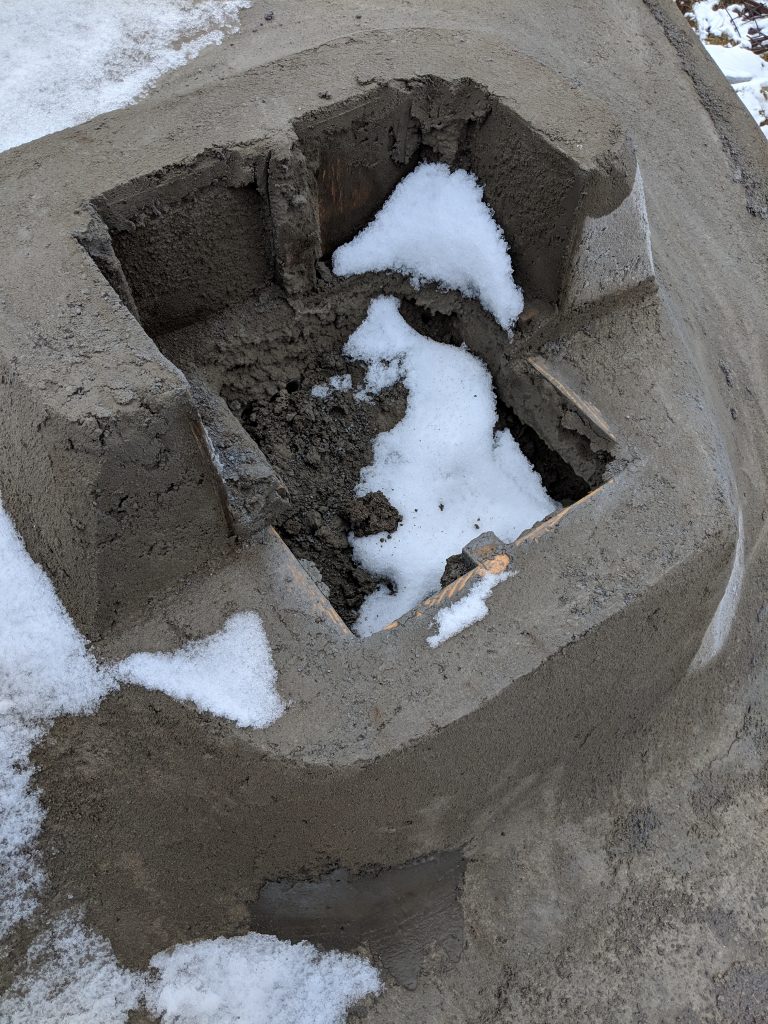
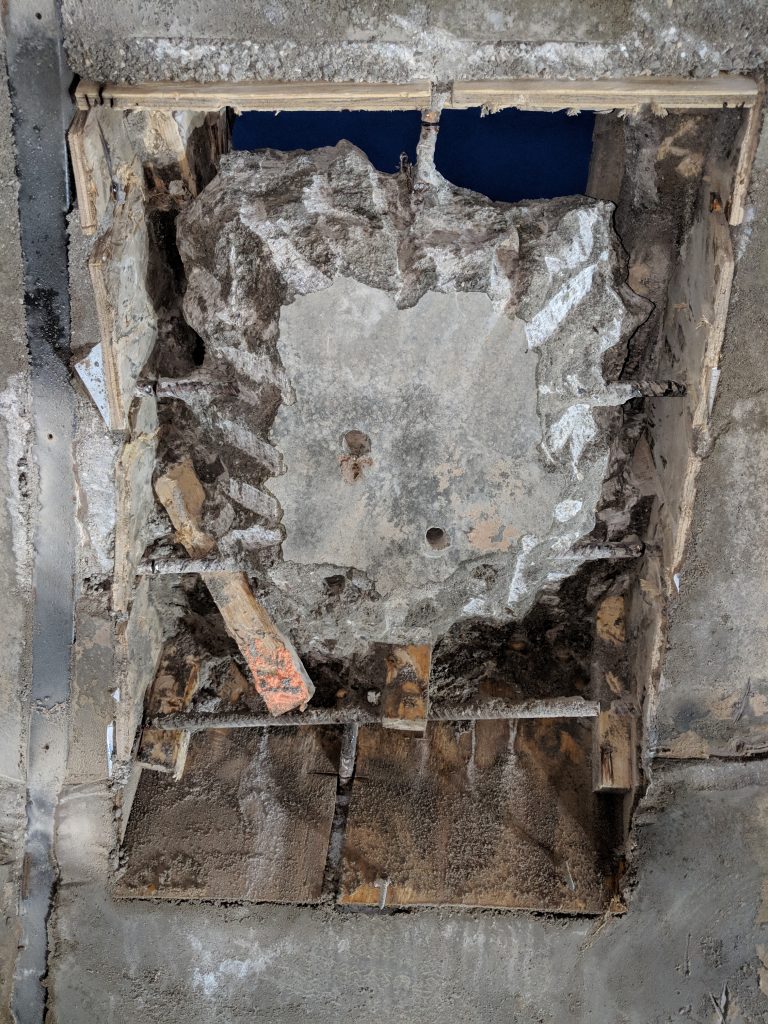
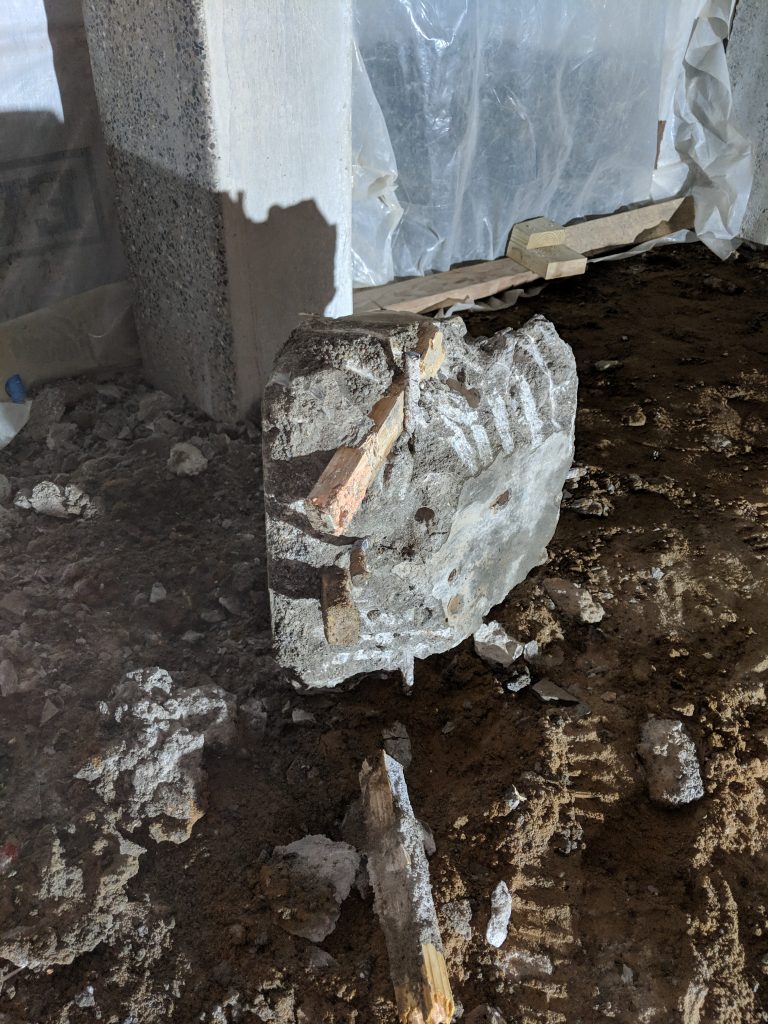
I didn’t cover the top of this chimney opening and gunite got inside. I probably should also have been more clear about its purpose with the crew. Anyway, no I’ll need to dig it out.
I had to chisel away the exctra concrete from below, which wasn’t fun. I focused on the edges and worked my way around with a drill and chisel until it was separated from the walls…
I removed the concrete all the way around the central chunk and then just had to cut the rebar.
After cutting the rebar that was holding it up, the chunk fell with quite a thump.
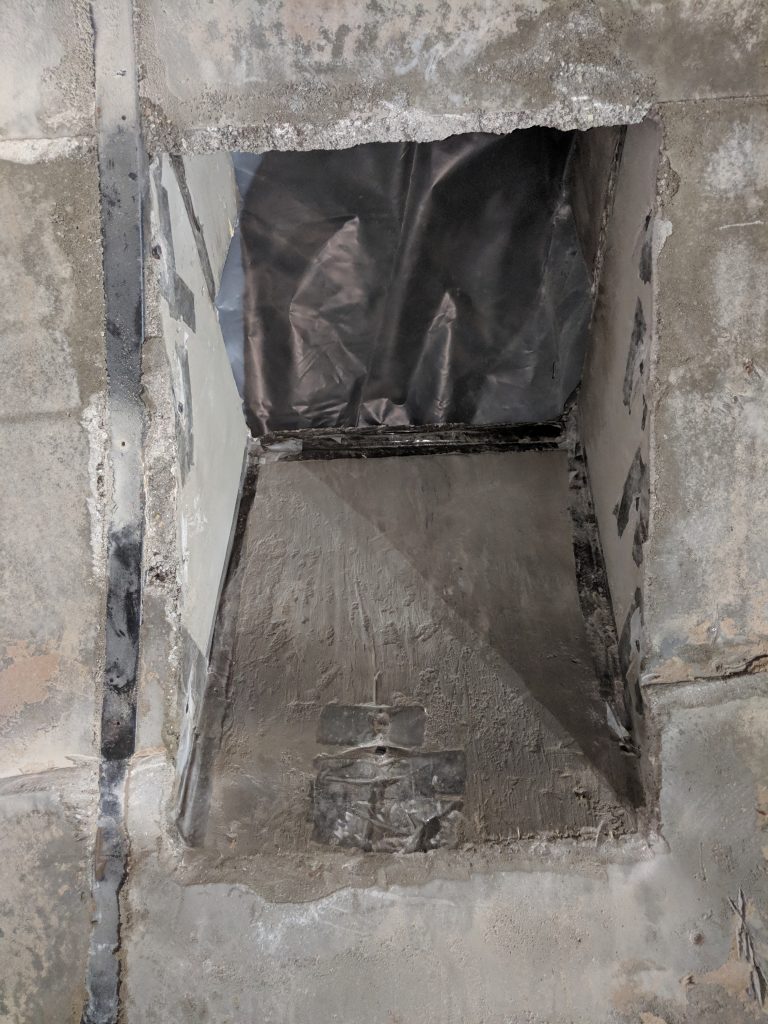
After getting rid of the chunk, we could remove the rest of the formwork. Later we installed the ceiling box for the chimney, etc.
This one is the long awaited shooting of the gunite roof. As per usual, we’ll start with the time lapse video and end with a gallery. If I am up for it, I’ll post some lessons learned in between.
The video
Lessons Learned
Gunite vs Shotcrete: This topic was already covered, but I’ll link to it here. I’ll also add that it is all in the mix. If your gunite is just a basic sand and portland mix, it isn’t going to be as strong as a shotcrete mix with some fancy additives, heavier aggregate, etc.
Lath and Screen vs Hardboard: For the shotcrete, the lath and screen worked well. None of the shotcrete passed thru the screen because it uses a pea stone aggregate. However, the gunite used sand as the aggrigate and did pass thru the screen. The hardboard was great in some ways, but the weather really beat it up and gave it a rippled surface.
Shooting and finishing: Both are important. My shotcrete crew could have done just as good a job as the gunite crew, but they didn’t. For shooting, you want someone who understands what you need to get done and is just putting up what you need. If they are paid by the cubic yard, they may put up more than you need, etc. You definitly want enough finishing people to finish the surfaces adequately. If your crew is strong on shooting, but doesn’t have enough man power to finish, you will be sad.
Cleanup… If the crew treats cleanup as an afterthought, you will be sad. There will be mess. Make sure the crew has enough man power to deal with it. Beyond that, you probably need to keep your eyes open for things the busy crew may miss. For instance, I wish I had better covered some of the near by boulders to prevent them from getting gunite on them and I really wished I had better cleaned off the polished concrete ribs before the gunite set. That mistake cost me many many hours.
Do it yourself? My rule of thumb is that if a job takes tens of thousands of dollars worth of specialized equipment, you probably shouldn’t be doing it yourself. Add the experience, skill and stamina required and I would double down that you probably shouldn’t be doing your own gunite or shotcrete. That said, I do know of some who have and kudos to them.
Gallery:
Here are the forms, ready to go. Everything was damp and unpleasant.
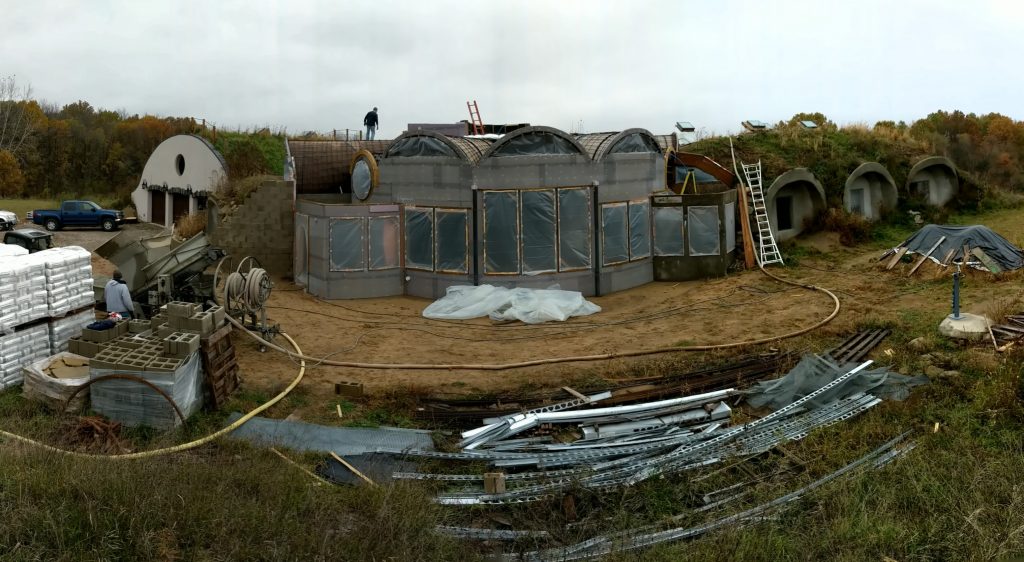
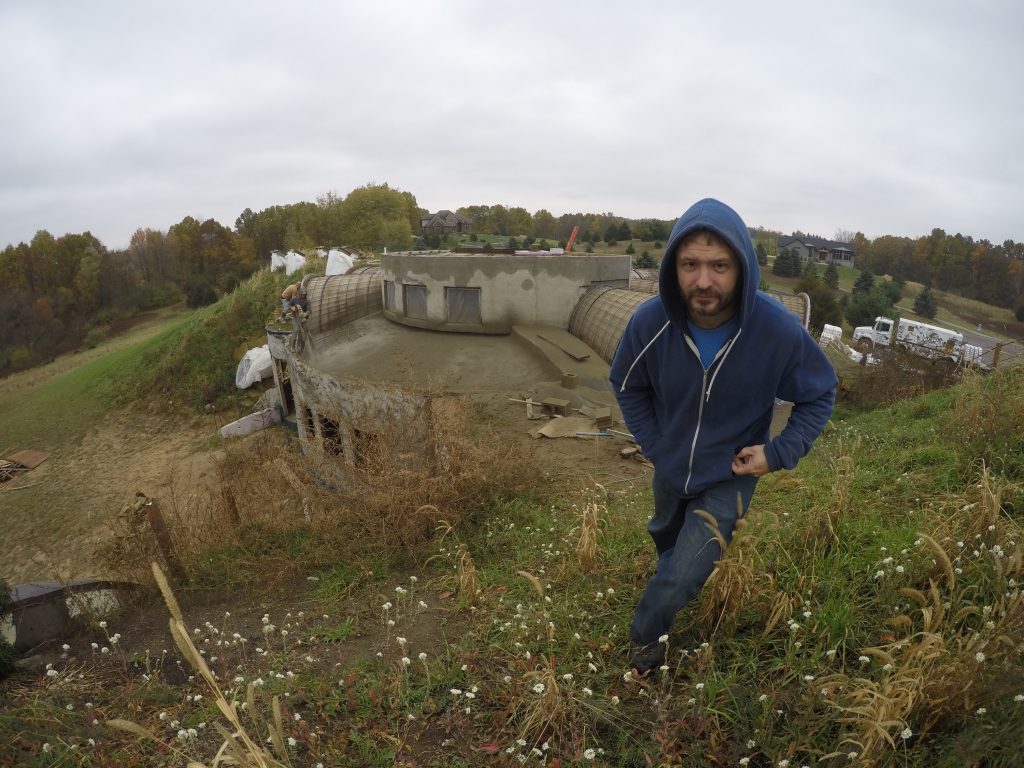
A panorama of the south side of the house. Today, the focus is the roof, but this crew will also do the south side walls and I’ll make that the next post.
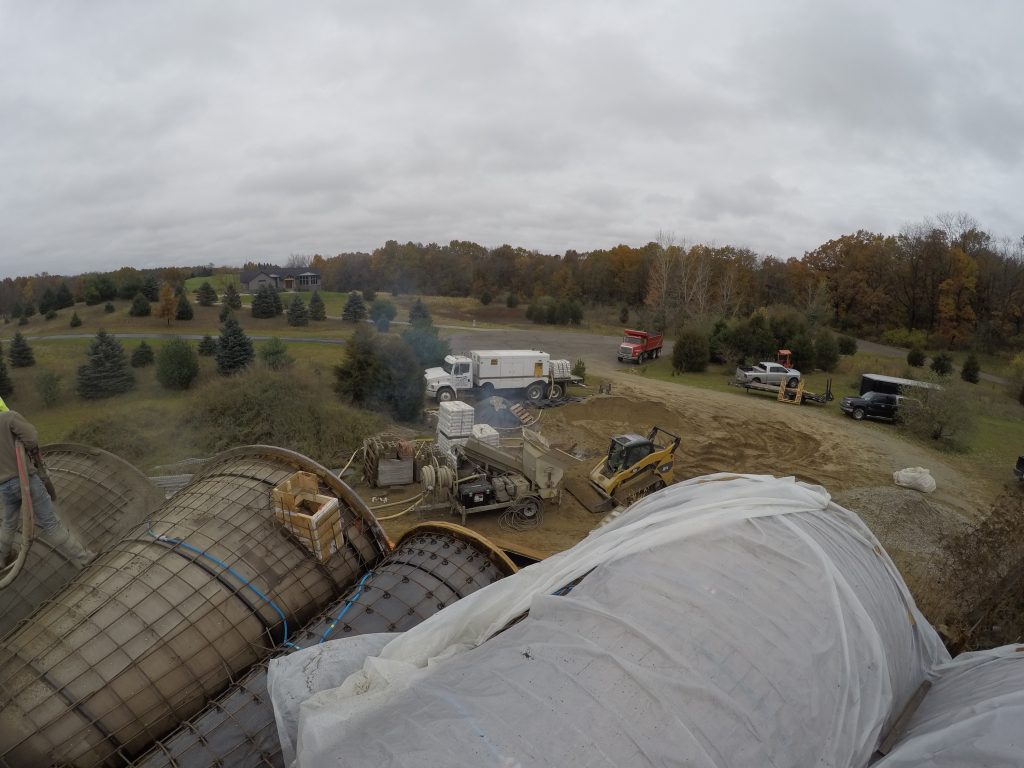
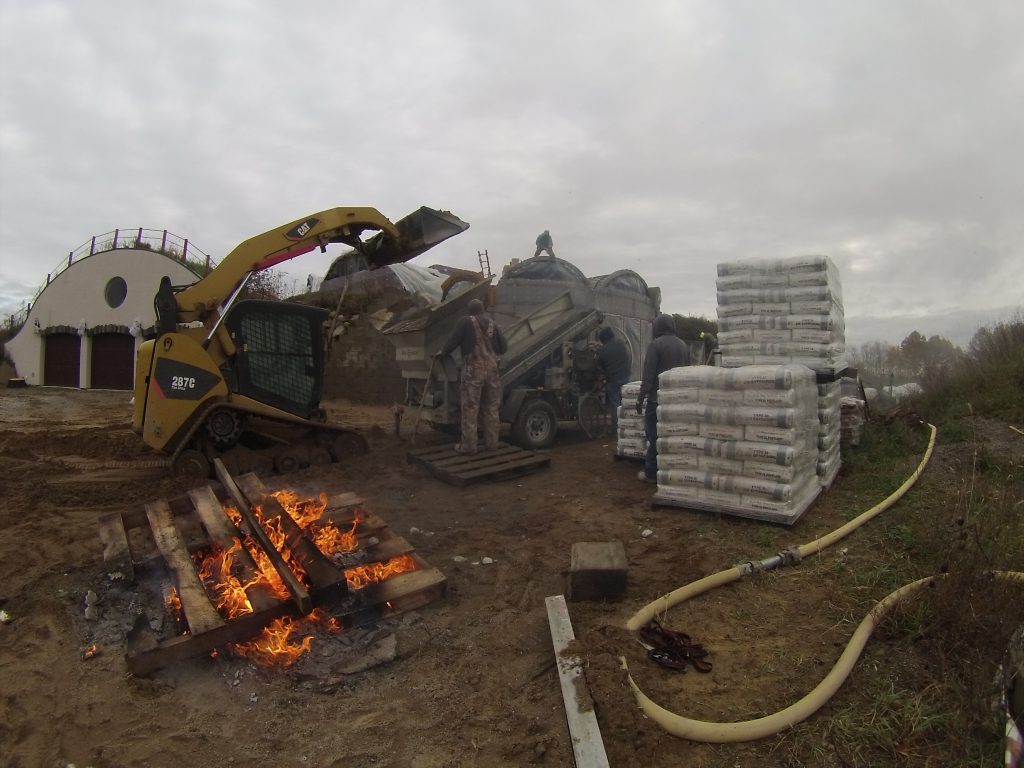
Panoramic of the equipment that arrived the first day. If any job requires this much equipment to do right, you probably shouldn’t do it yourself…
Again, I know some people do their own gunite. I just wouldn’t recommend that for most.
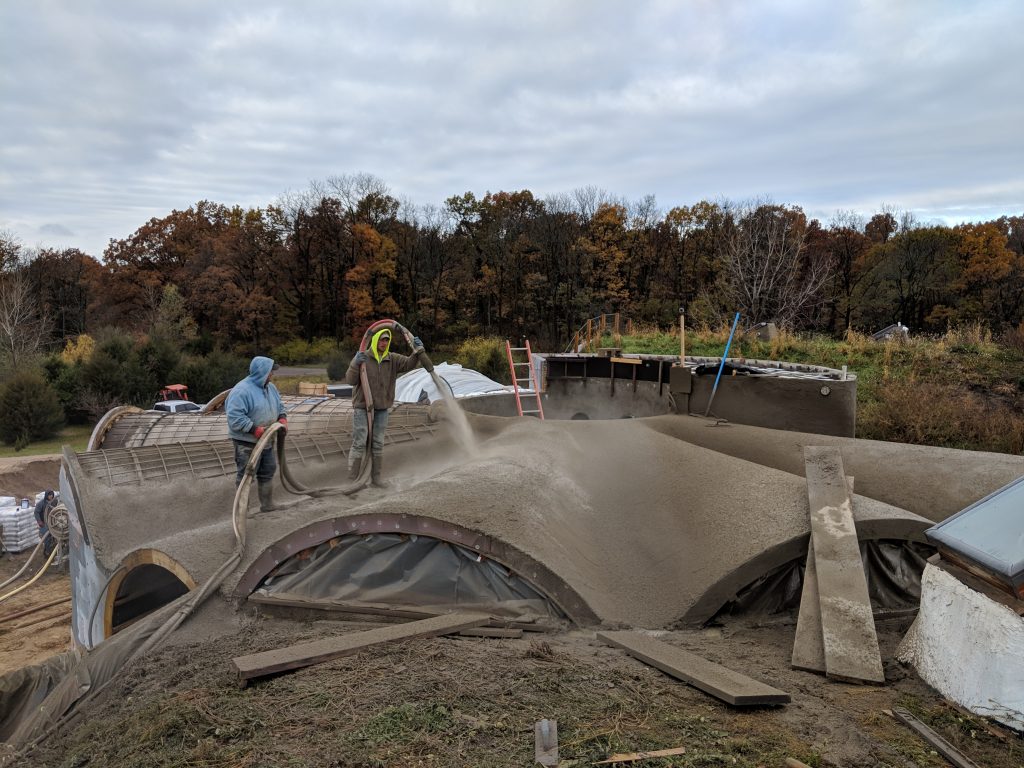
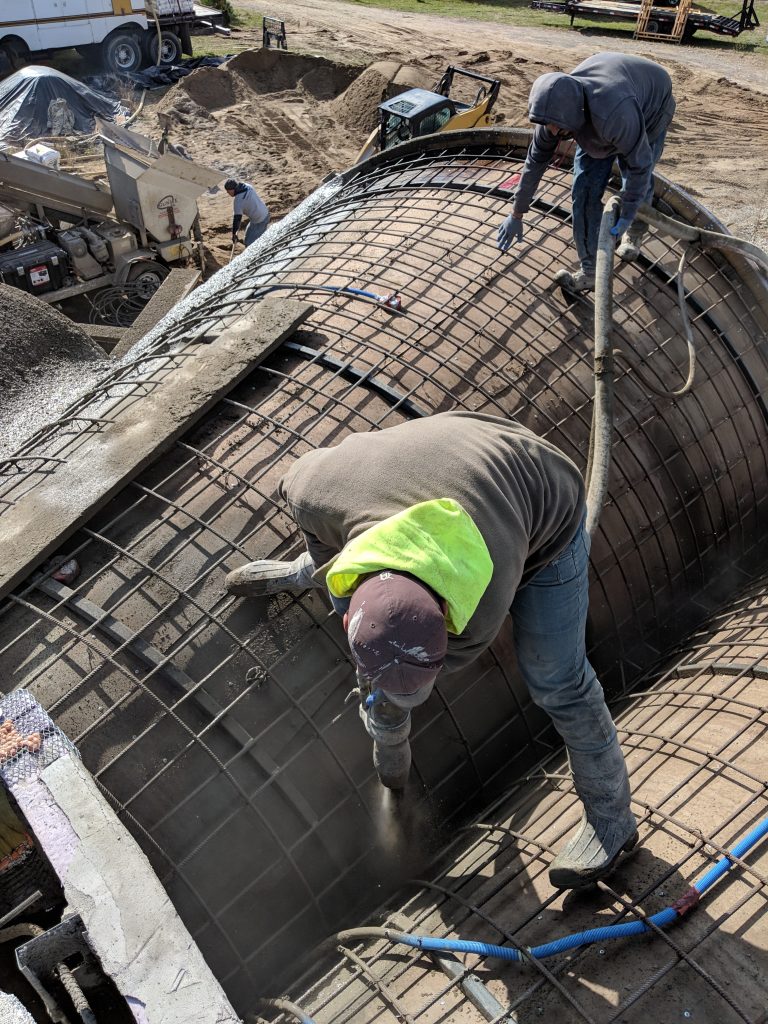
Actually, this first mix wasn’t quite right and they had a bunch of yelling and hand signals back to the rig and made some adjustments. Once they had what they wanted, they moved pretty quickly.
The biggest issue in this pic, other than the momentous start of the long awaited gunite, is the mess streaking down the walls and over the floors…
This is about the point when the curved rebar conked in (curved backwards) in this one wide area. Not ideal.
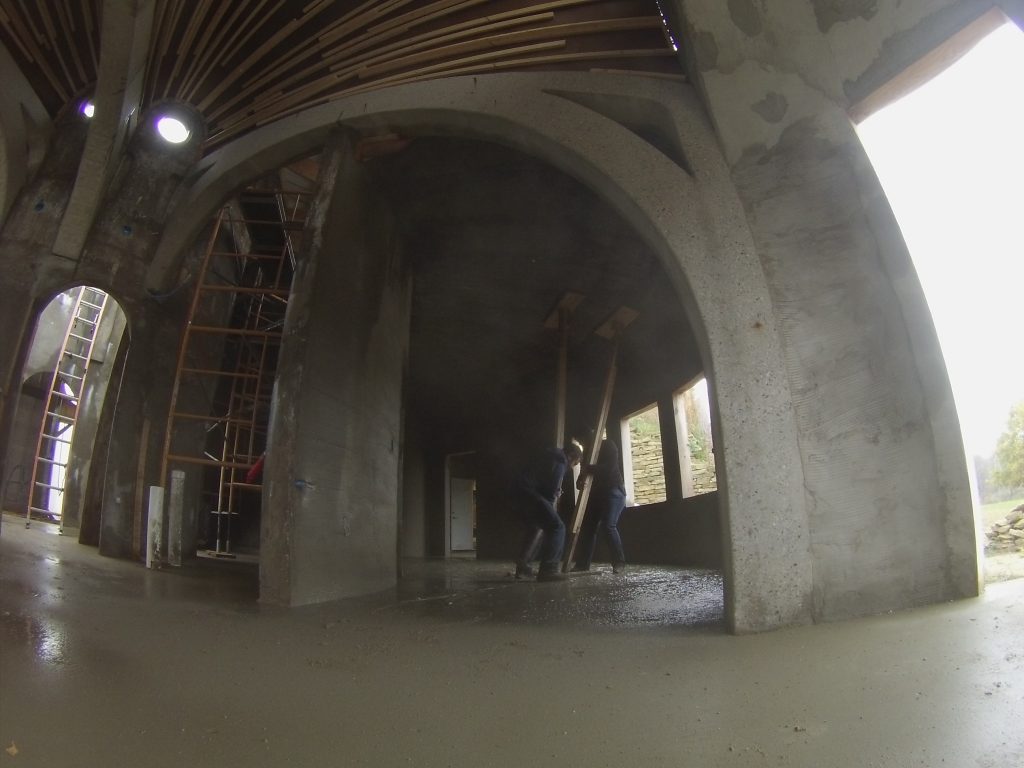
Sherri and I working together to brace the ceiling.
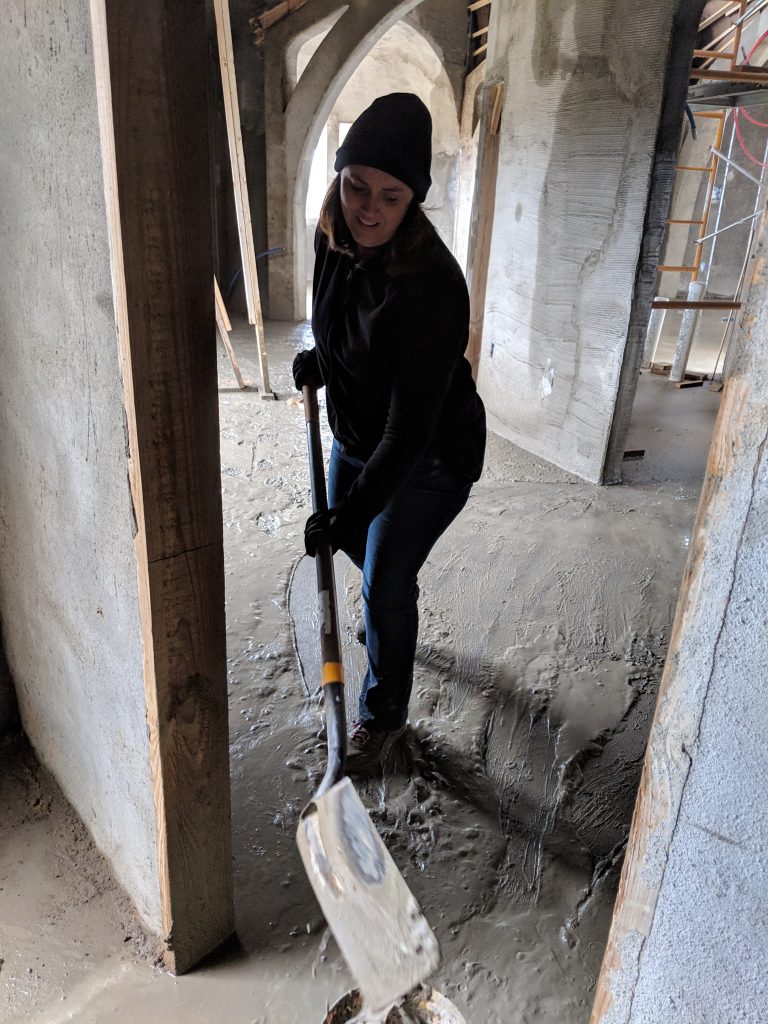
Sherri and I cleaned up the mess. I think she is smiling because I said something like, “If I take the pic, everyone will think you cleaned this up by yourself.” And she said, “I am.”
By this point, the rest of the crew was packed up or gone. A very early day for a gunite crew because of Halloween. It was just a few hours.
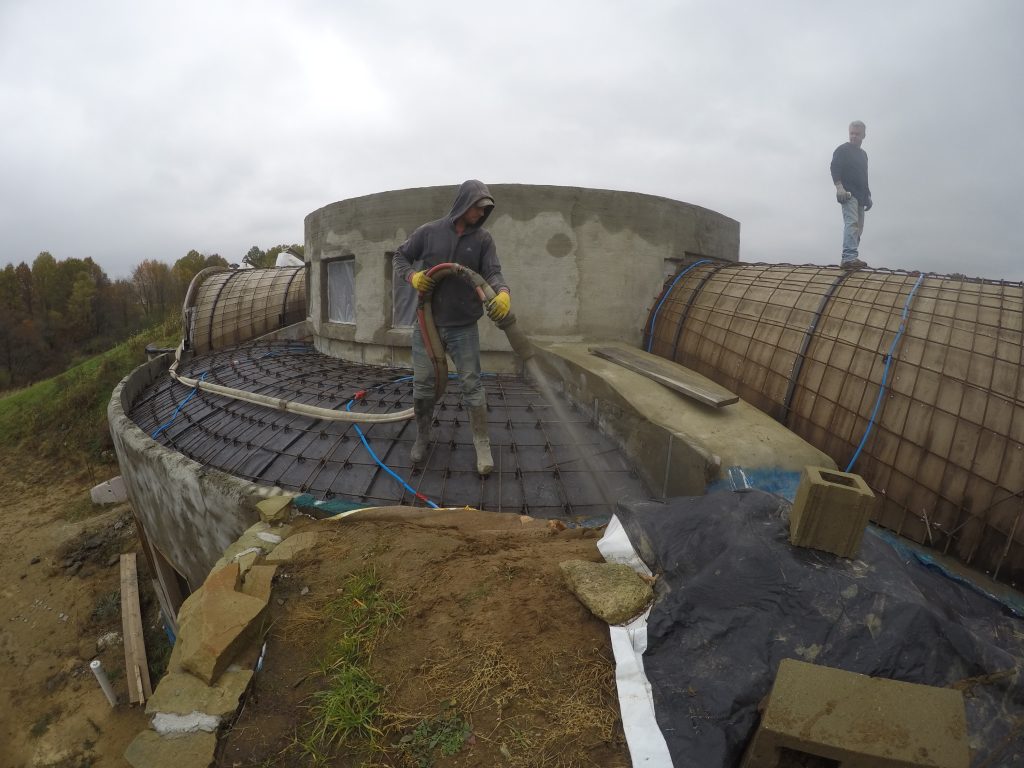
Scott was quite the artist when it came to finishing work. He is also the owner of the company.
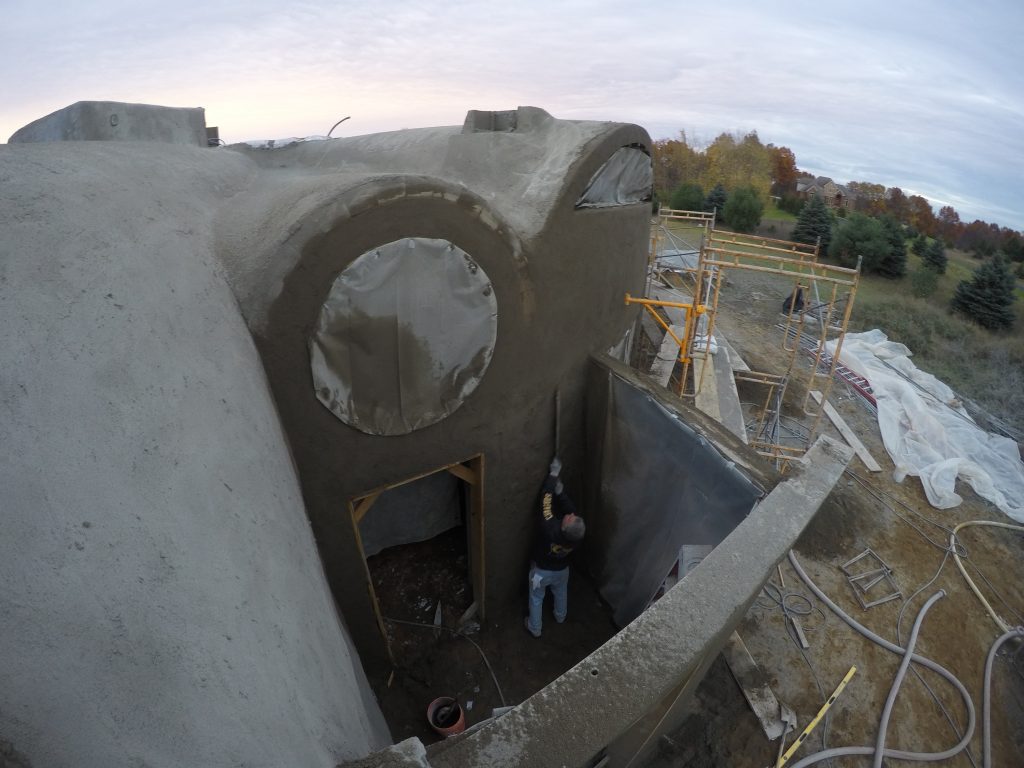
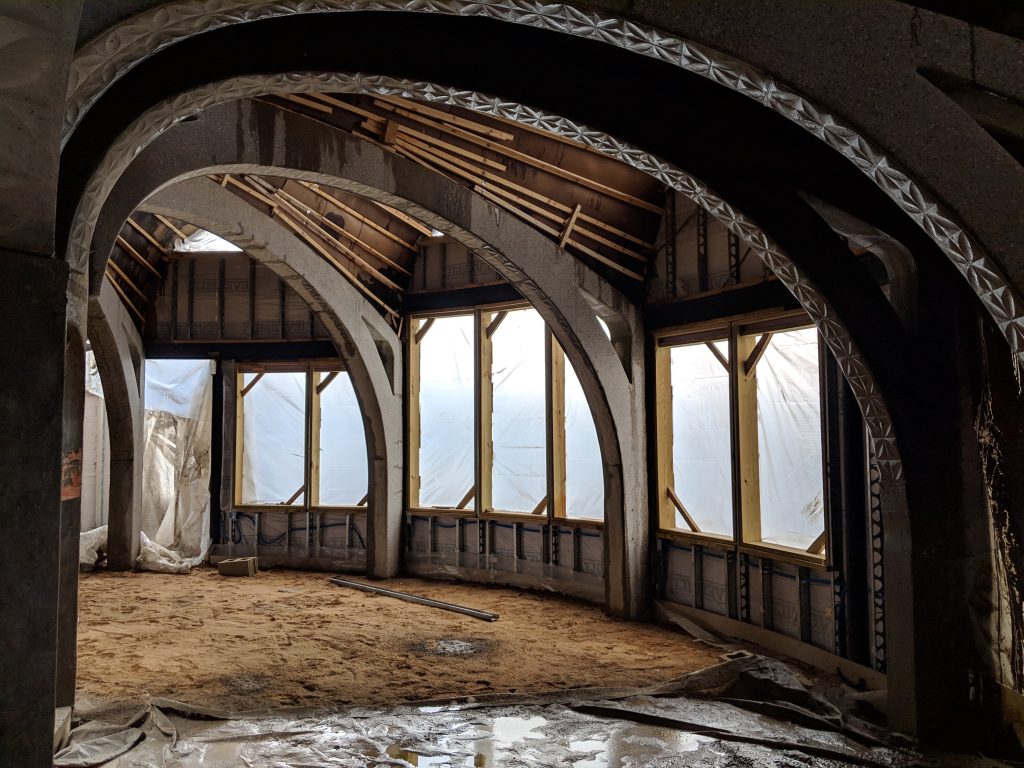
This is the finished guest room section. The 4 inch gap at the top end is to tuck the insulation and waterproofing under.
Here is the finish work on the first vault at the end of the first shoot day.
Unfortunately, this area got messed up by the hurried rain finishing with plastic over it the second day.
It went from being the prettiest to the ugliest. But either way it will be buried eventually.
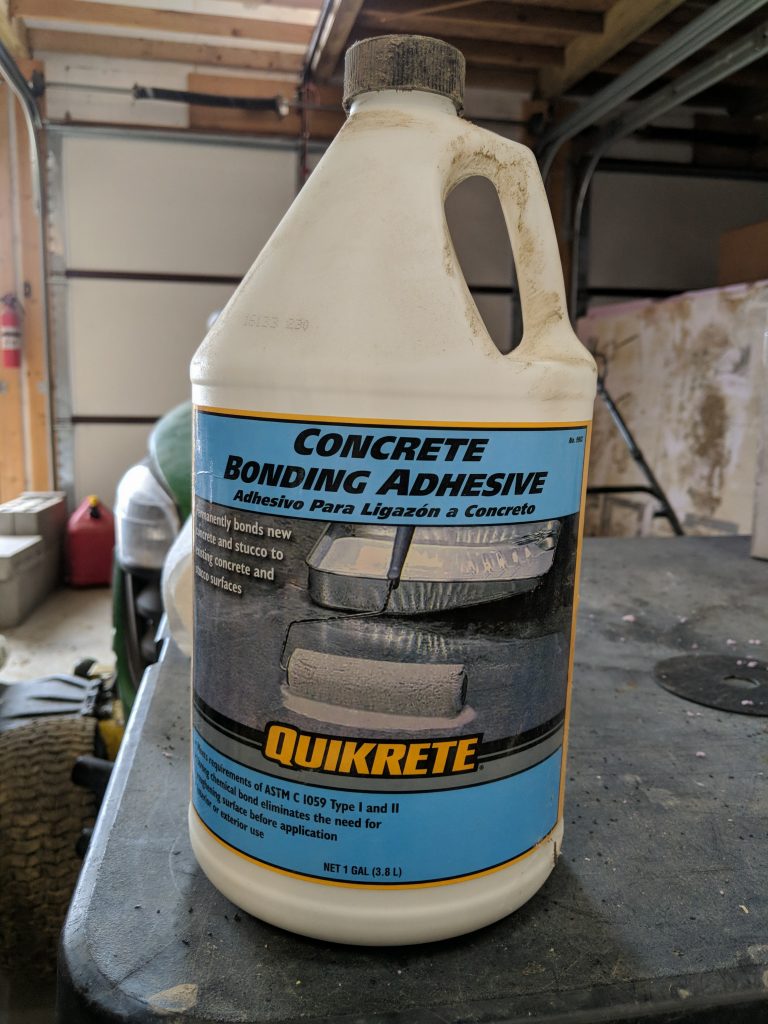
It was never caught on film, but I was running ahead of the crew and used up 2 jugs of this stuff ahead of where they were shooting. This just helps the new bond with the old.
Here the mix needed to be thin so it could get around the pipe and rebar and fill the area properly without voids. But it was a bit too thin and found its way around the edge of my formwork and onto the floor below.
Here is a look at the mess below. It doesn’t look that bad here, but keep in mind that it was well over an inch thick. For depth scale, that doorway has a 2×4 across the bottom of it and the slope goes up from there. It took many buckets full to clear this up.
I did do a quick wipe down of the sides of the concrete ribs, but I didn’t do a good enough job and spent hours more polishing it later.
Here I am cleaning up the mess…
In the background, you can see one the plumbers who showed up on this crazy day. He is putting a faucet on the outer wall.
See the video for more detail about what is going on here.
I got to try the Gunite Nozzle for a few minutes. Fun isn’t the right word for it, but I was glad I got a try.
After cleaning up the mess in the guest room, I put up this plastic to catch the mess in the first lath vault. This vault was two small with two tight a radius of curvature to use the hardboard panels.
I basically put up sticks of scrap wood with plastic screwed to them. I figured the plastic would catch the mess.
You can see that the quick-thinking sticks and plastic plan did hold up. I was pretty happy with myself at the time, but less happy when I tried to get that down after it hardened.
Not always as smart as I think I am. ¯\_(ツ)_/¯
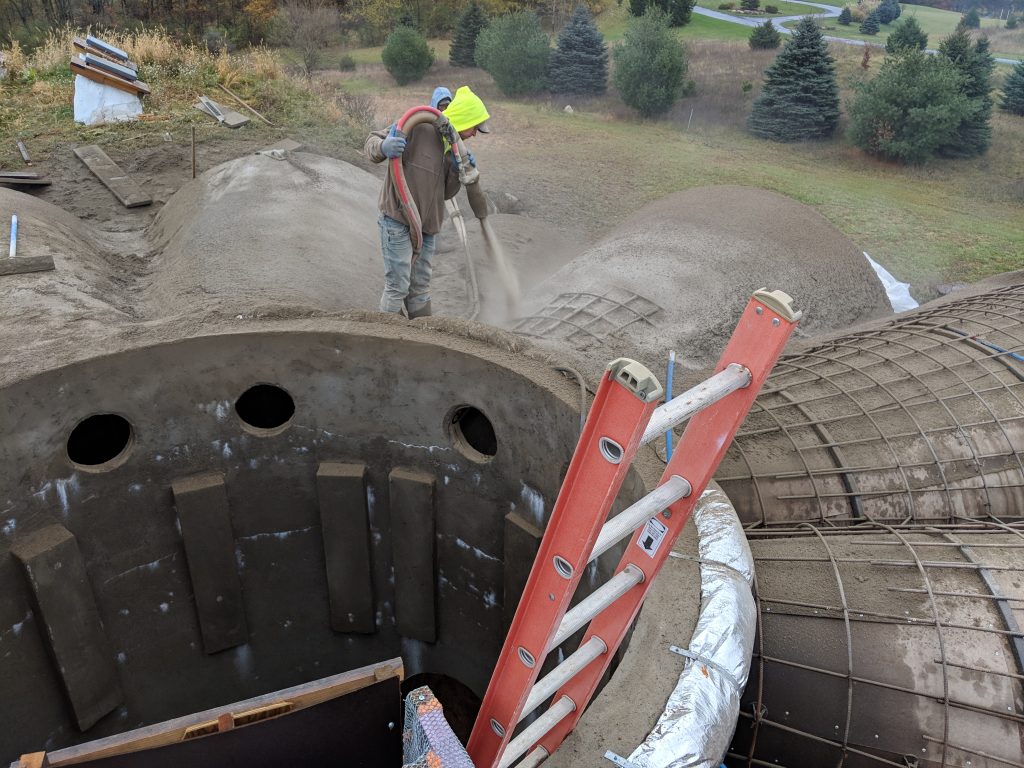
Carlos and Ben Shooting.
I couldn’t tell if Carlos wanted me to take his pic or not. On the previous job, he was downright posing for me. But this time, he seemed a bit more reluctant. Maybe it was a bad hair day. 😉
Here Carlos is going to relay a message (via hand signals) to the rig crew.
You can also see inside that vault to the mess that fored on the plastic…
For this second lath vault, I just had enough time to cover the wood and the sand, and I had already started thinking about how I would get the mess from the earlier vault down again…
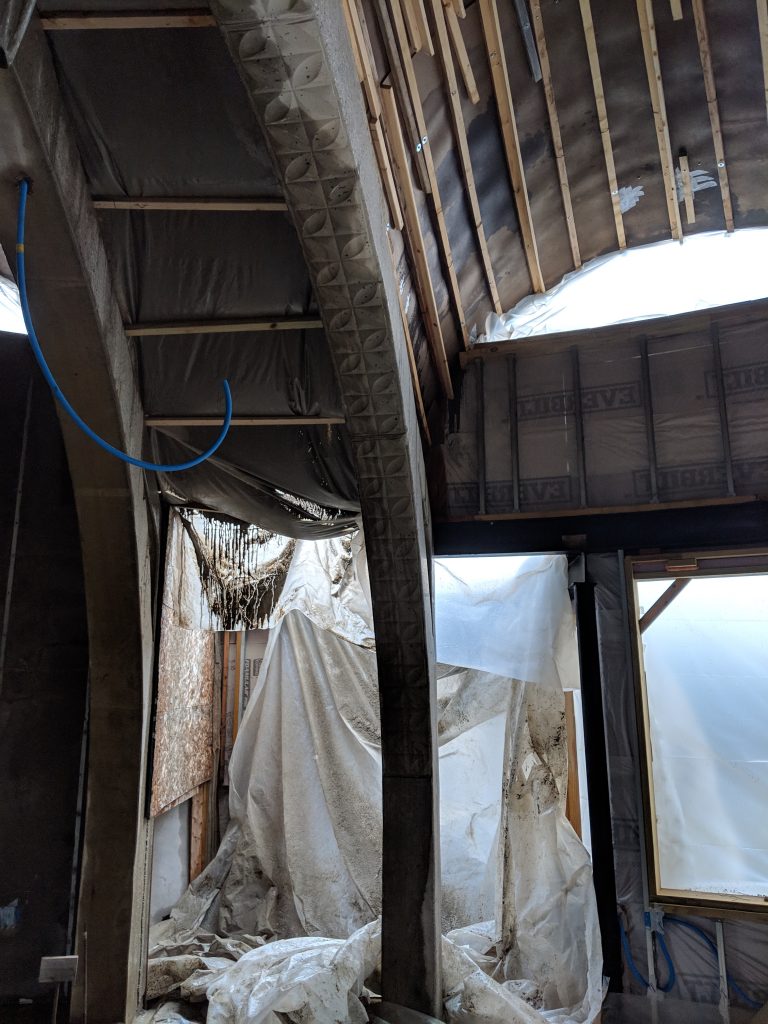
But I did end up needing to spend about 8 or more hours cleaning the ribs off later. They had so much gunite on them. I really should have washed them right away.
All the wet gunite in here gives it an interesting look.
We plan to “wet seal” these ribs when the whole thing is done, so we’ll see this again, without the mess.
Check out this guy, just standing on the edge like it was nothing…
This was the best pic. The gunite looks so soft and velvety.
This was a rare opportunity to get really close for a pic.
This went on all day, so I got a few similar looking pics. If you are wondering why I showed so many, you should see all the ones I didn’t show 😉
Especially after that first section conked in, it was pretty brave of the crew to keep on going.
Here is a momentary balance shift and recovery. It is pretty dangerous work.
The sun had set not long ago, now everybody goes below. To take a bath in one big tub. With soap all over, scrub scrub scrub.
Bonus points if you can name that author 😉
The panoramic feature on my camera did something interesting with this roof shape
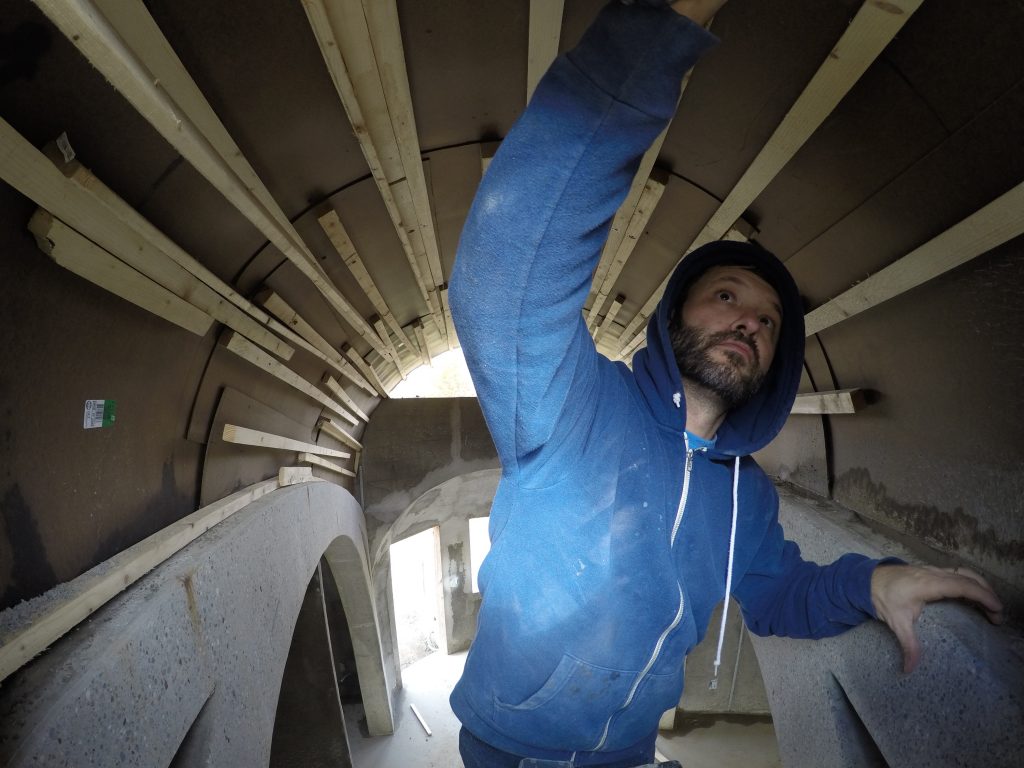
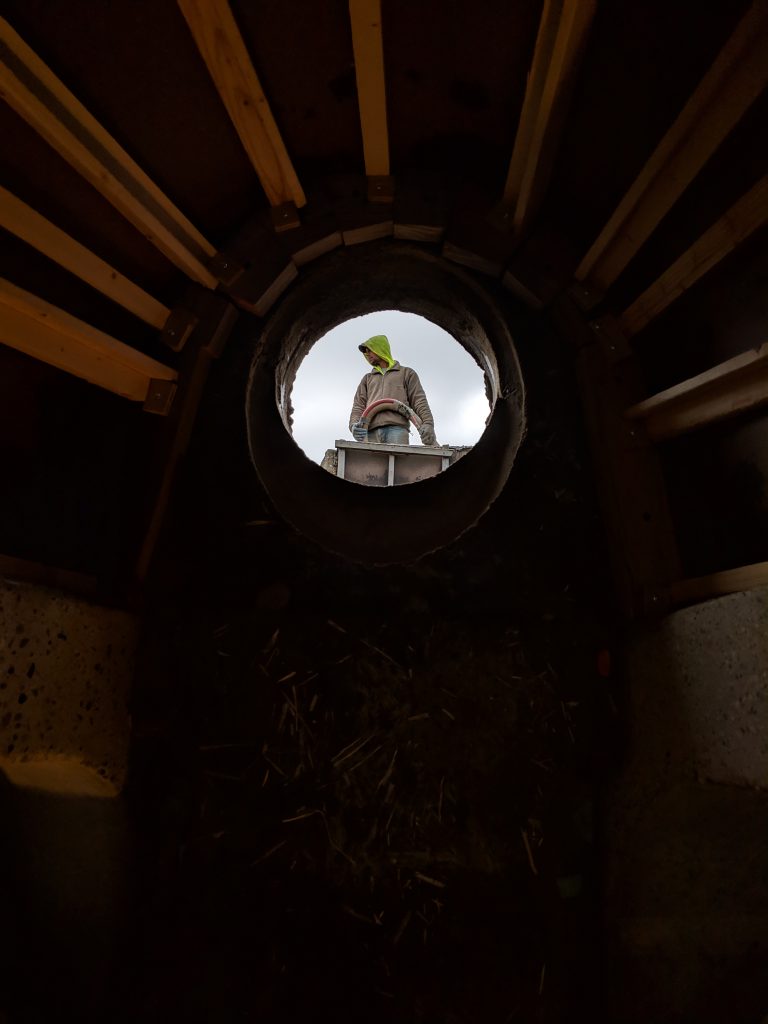
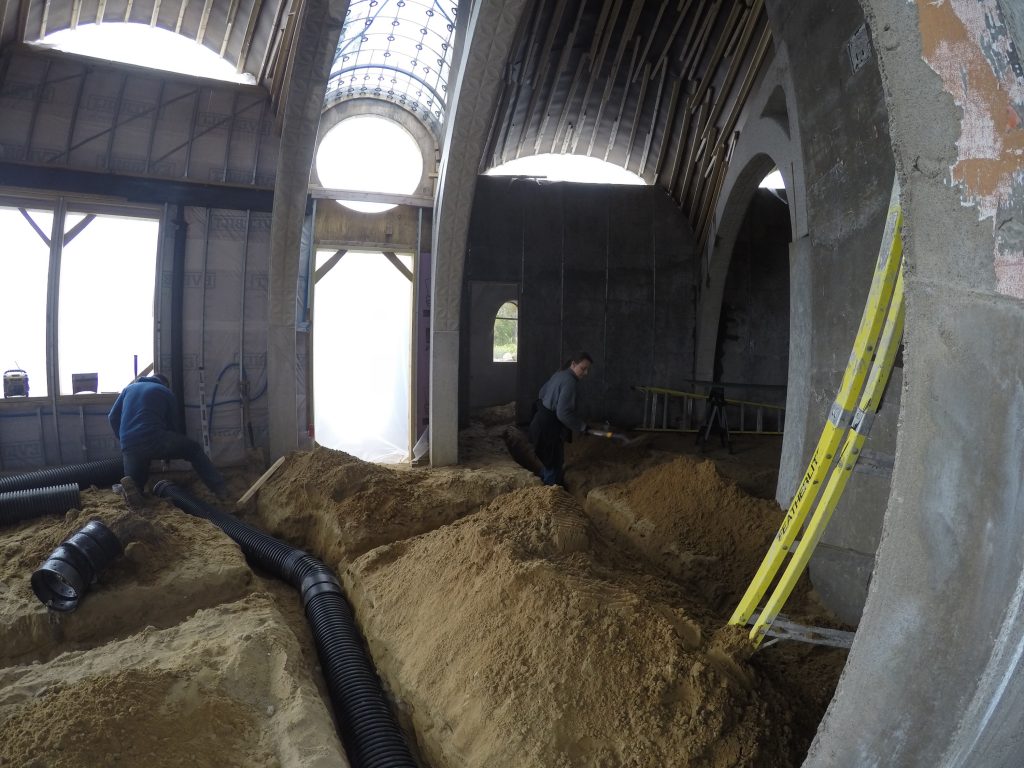
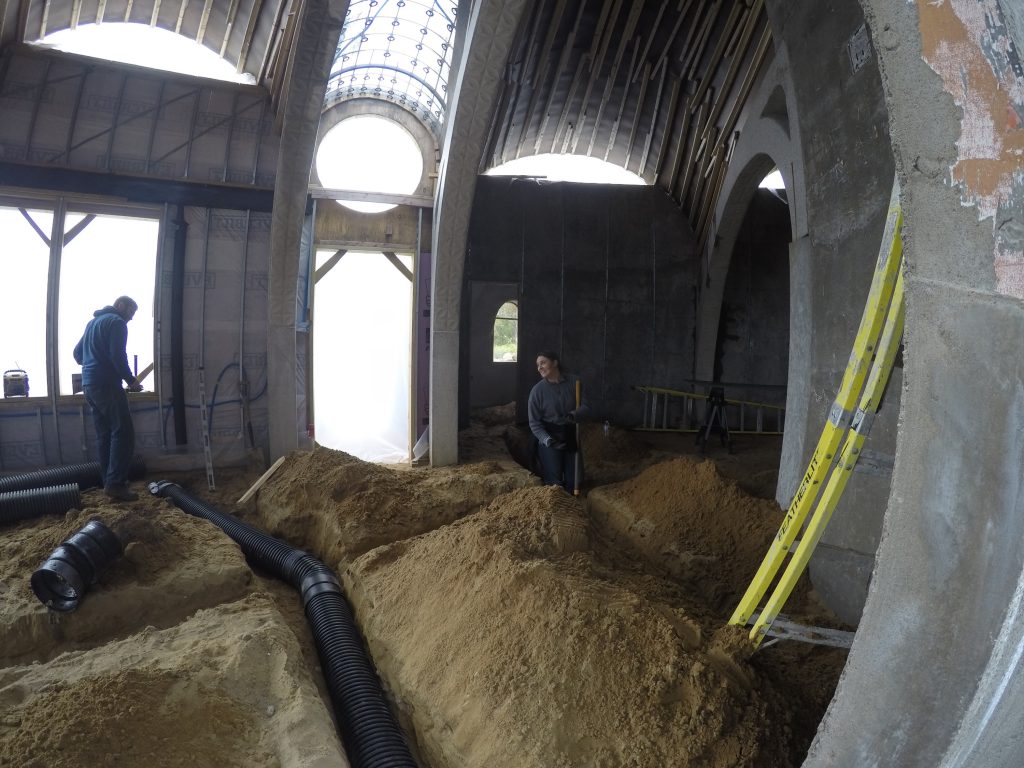
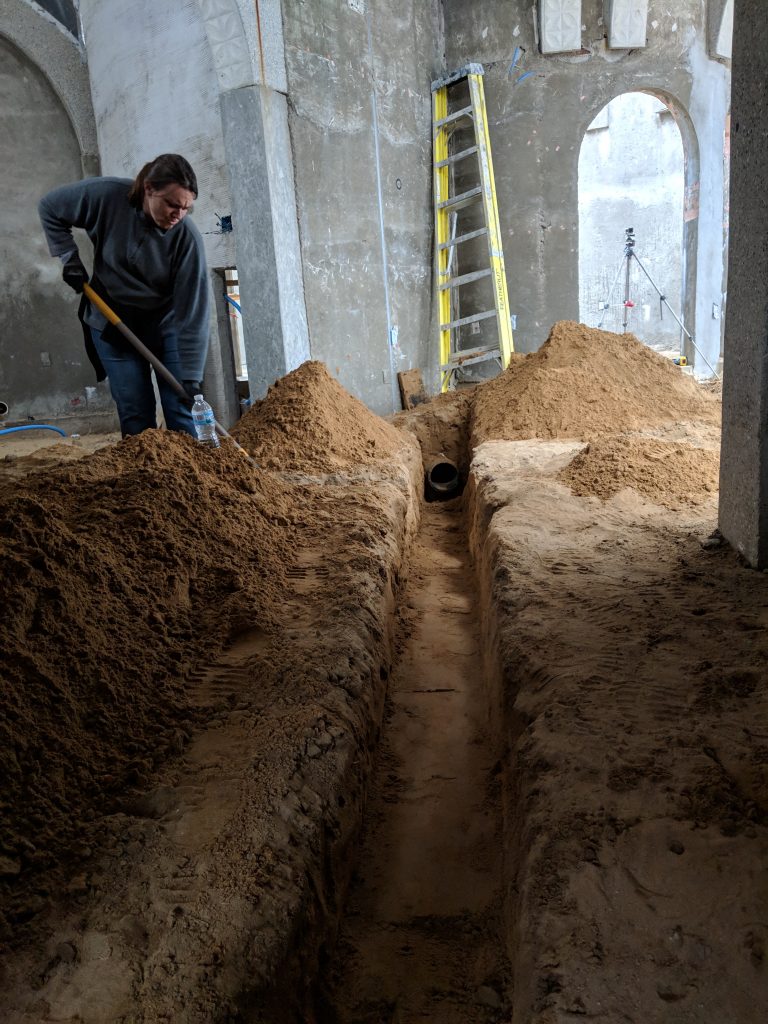
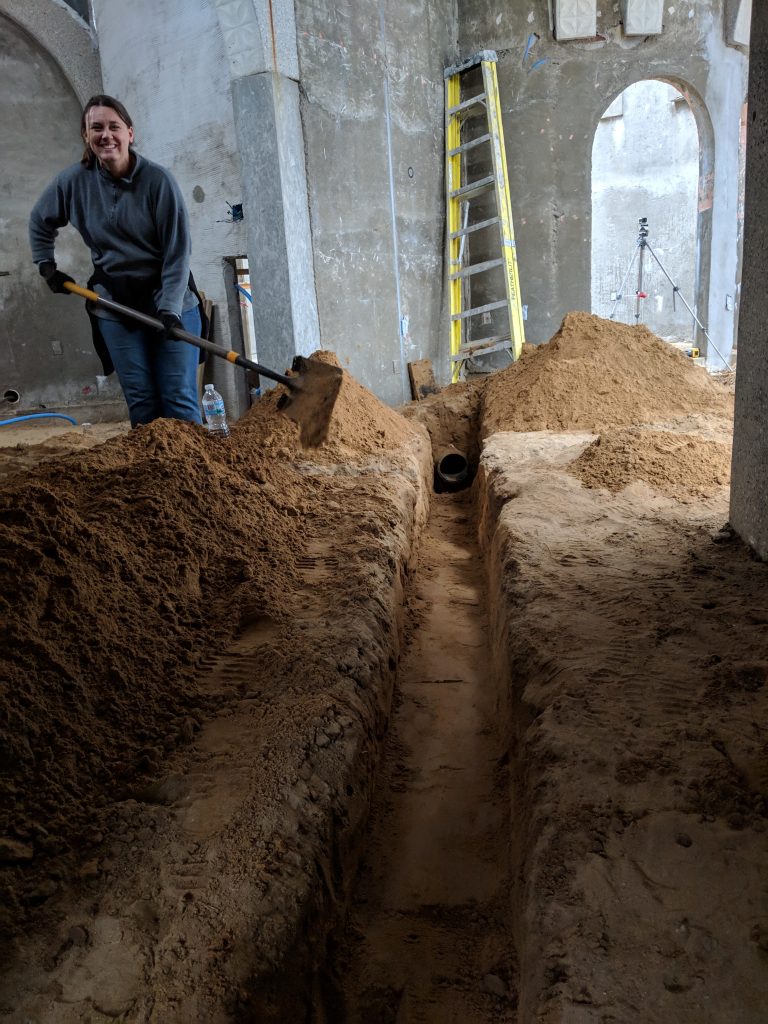
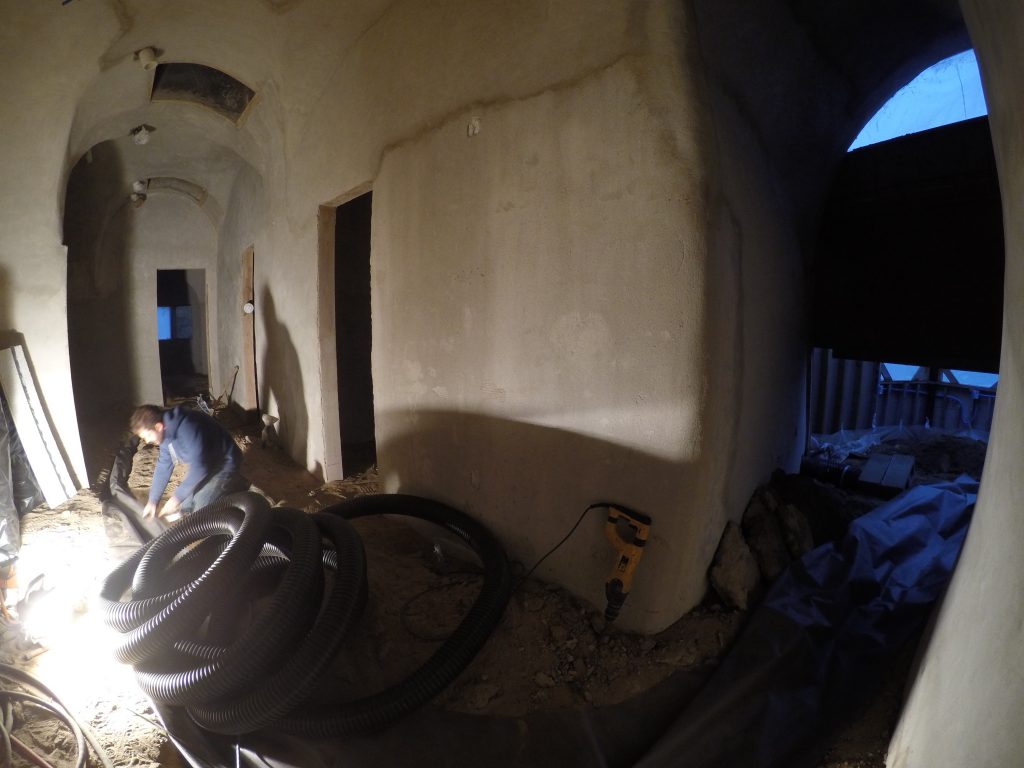
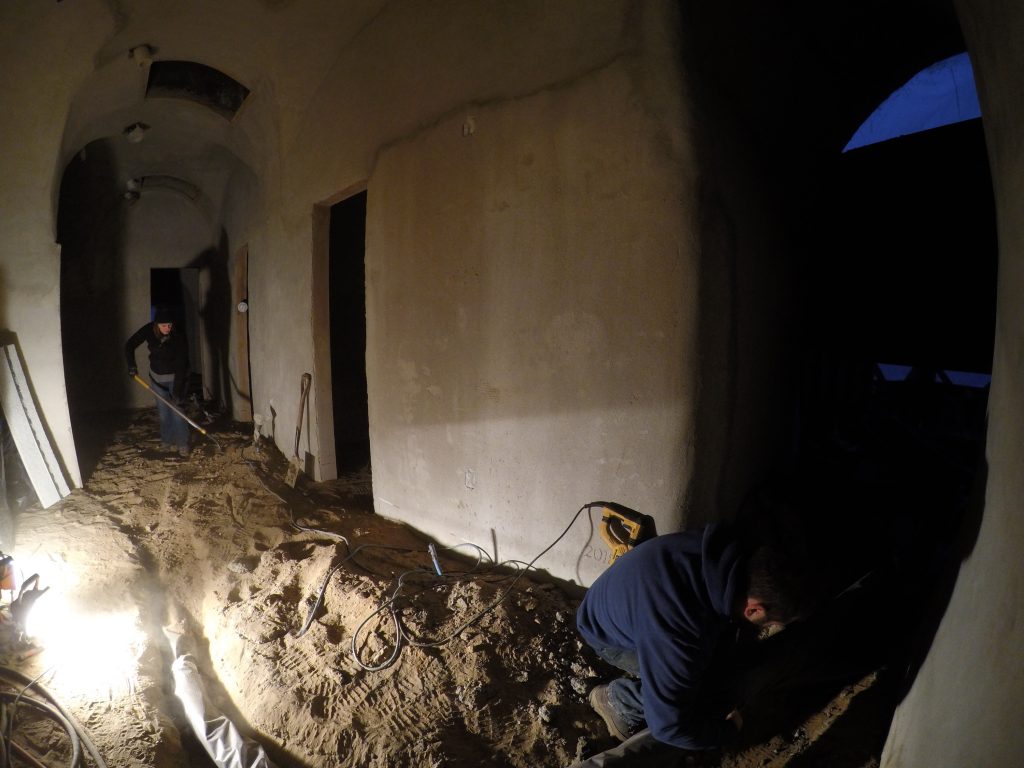
This is an in-between event where we dug in some ventilation ducts to transfer fresh air to the rooms that need it.
The Video
The Gallery
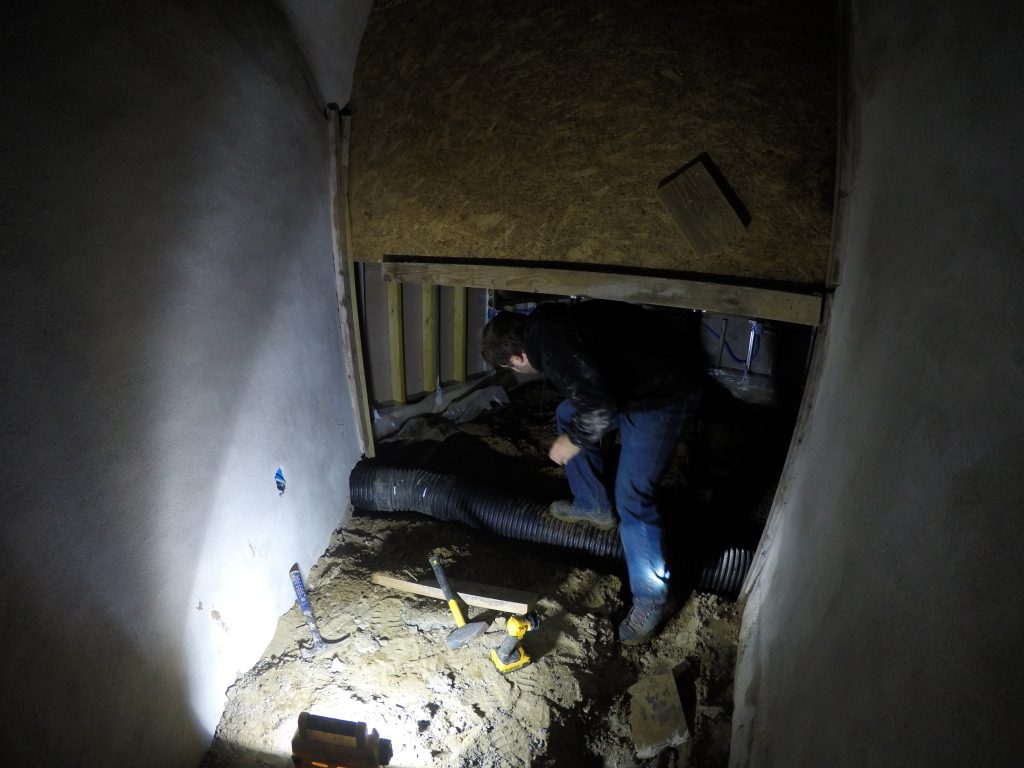
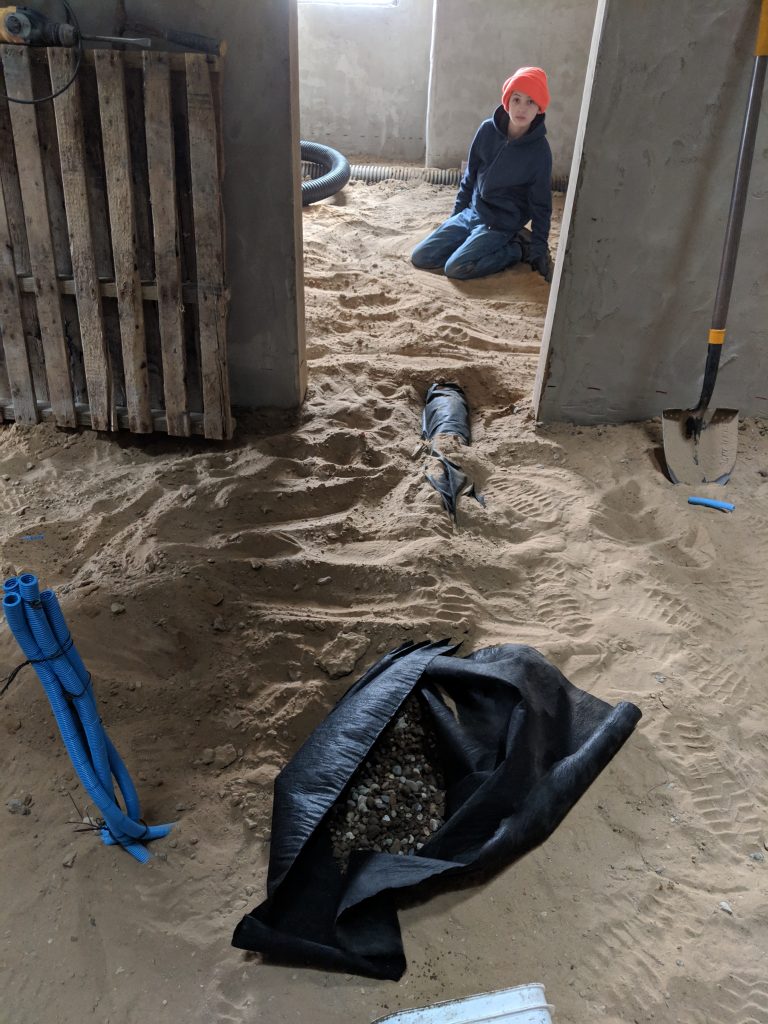
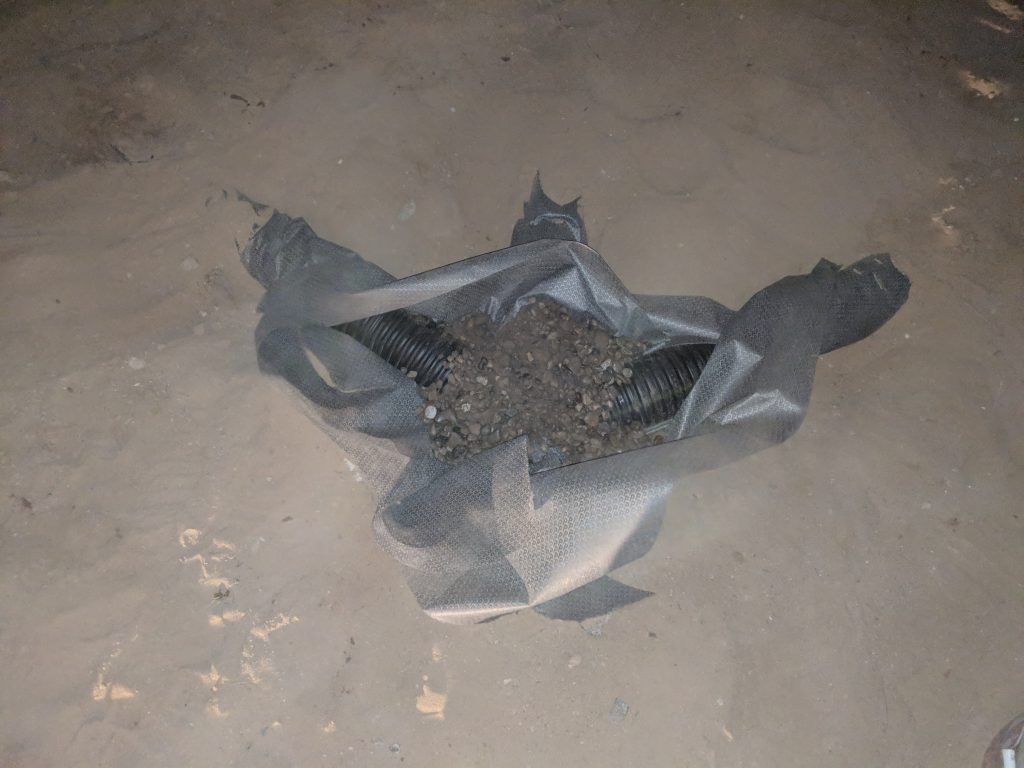
Just diggin’
Just digging
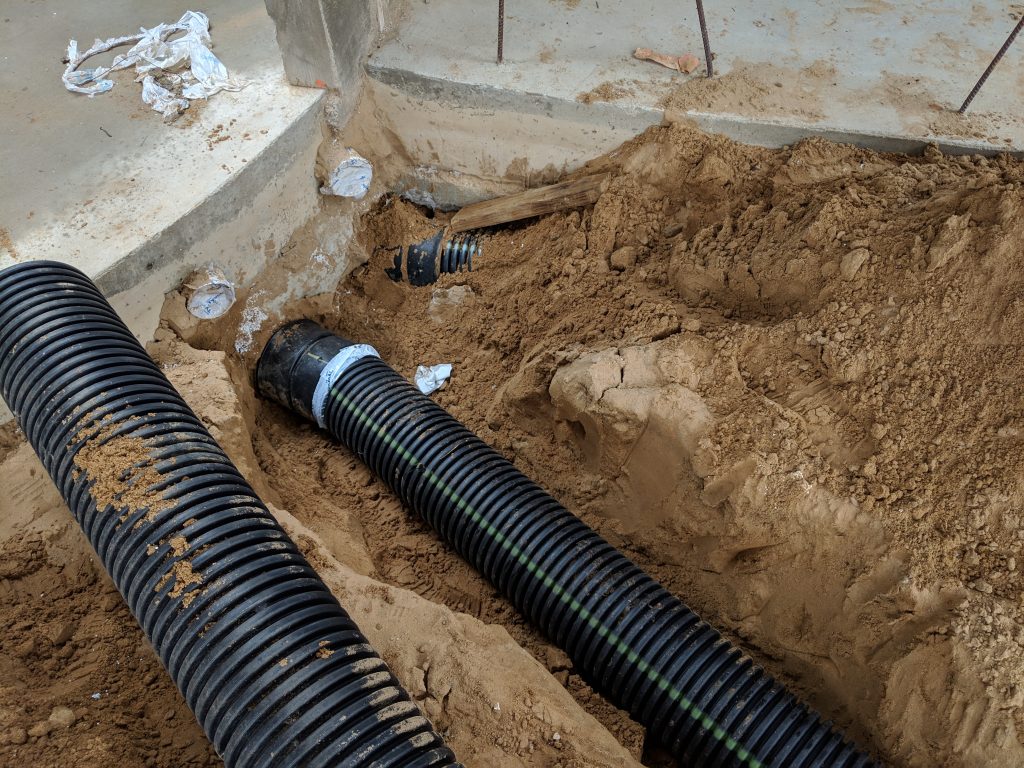
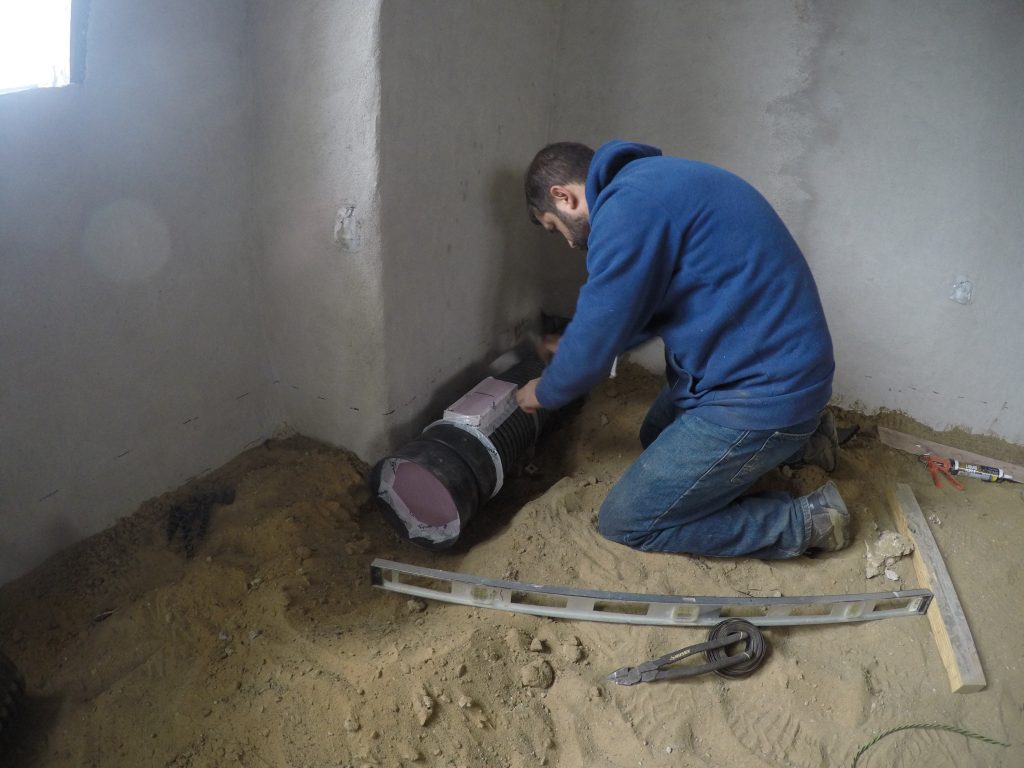
Running the Radon Tubes thru the living room…
Here is where the vent ducts pass thru the mechanical room wall.
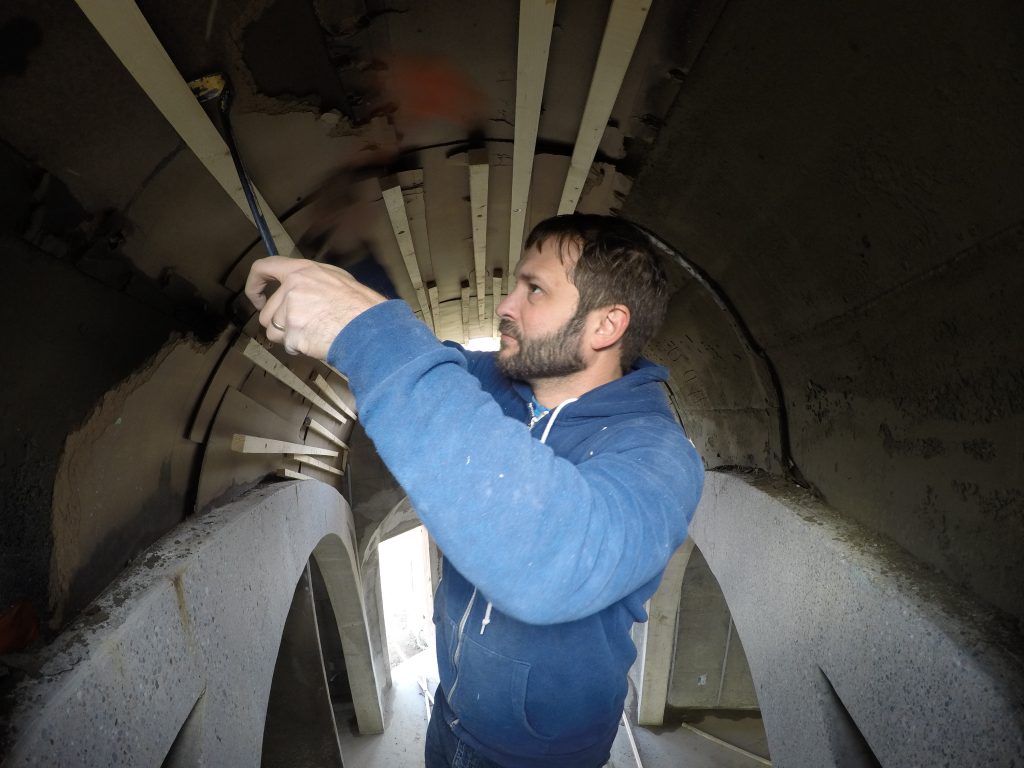
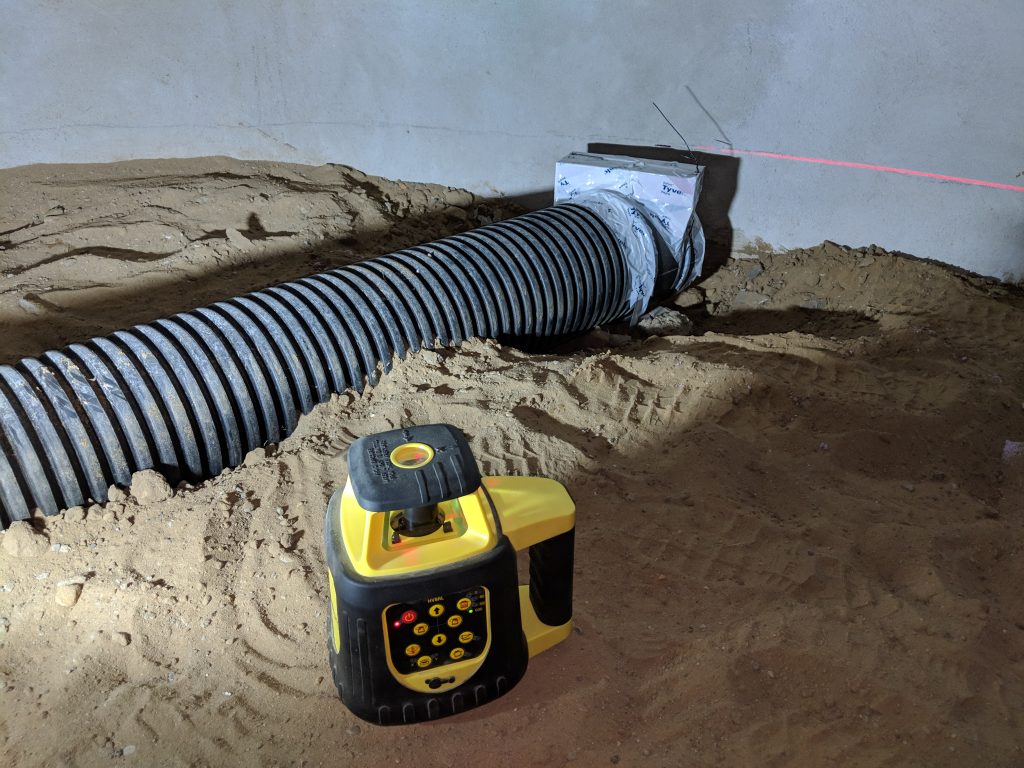
Registers are formed with insulation and then the concrete floor is poured around them. Later, we can dig out the insulation to access the duct.
I used my Laser level to set the registers to match the floor hight.
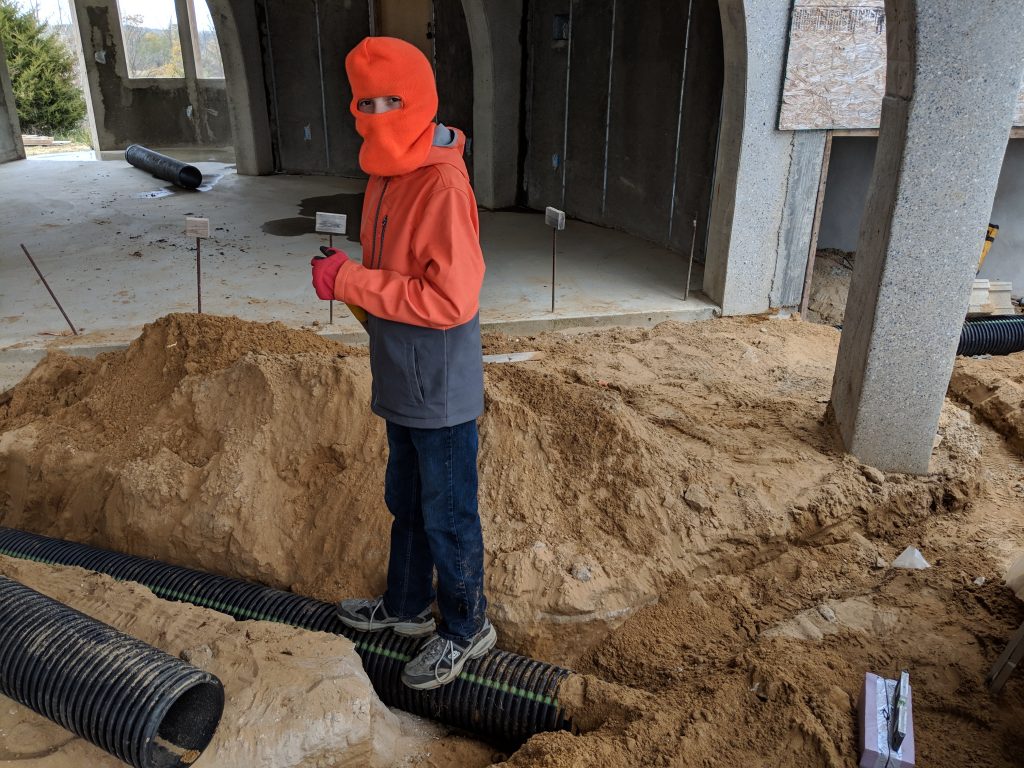
Ducts crossing the hall way to get into the bedrooms…
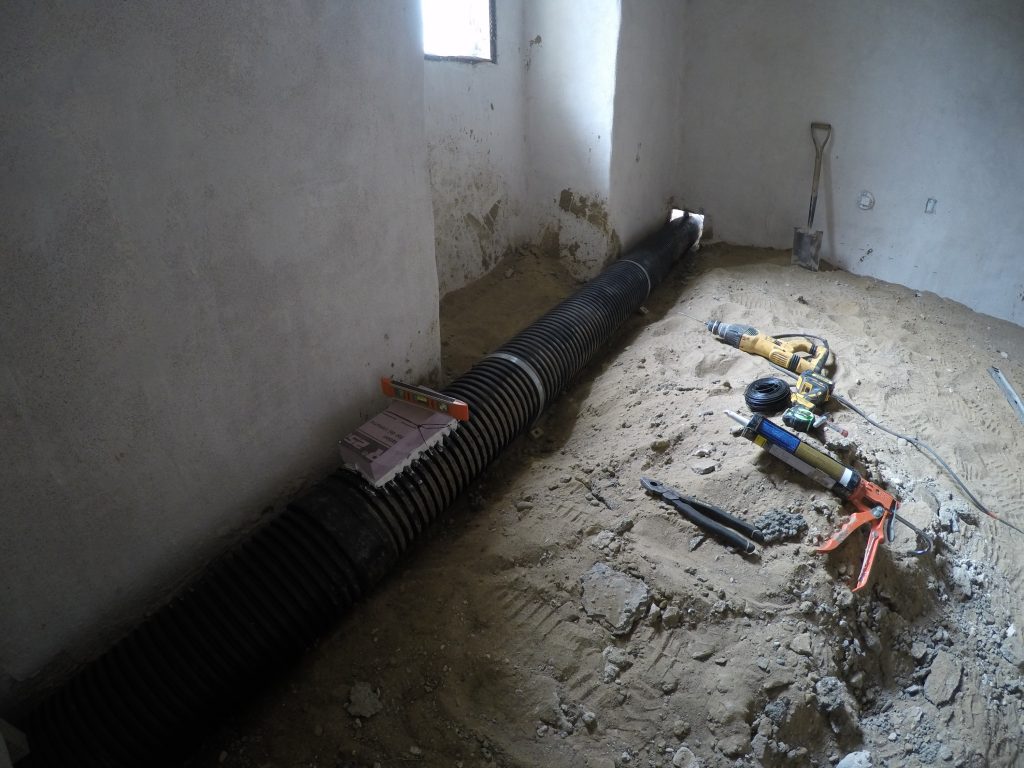
This duct section is passing thru this room… We will add a register opening.
Vent duct with a register knockout ready…
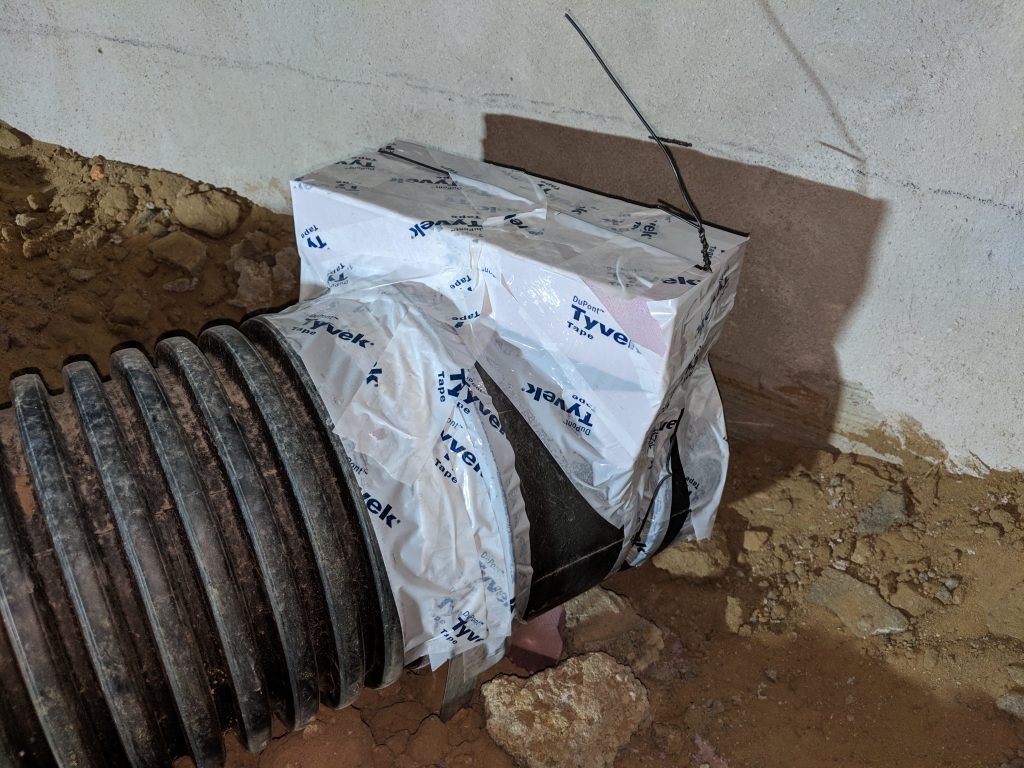
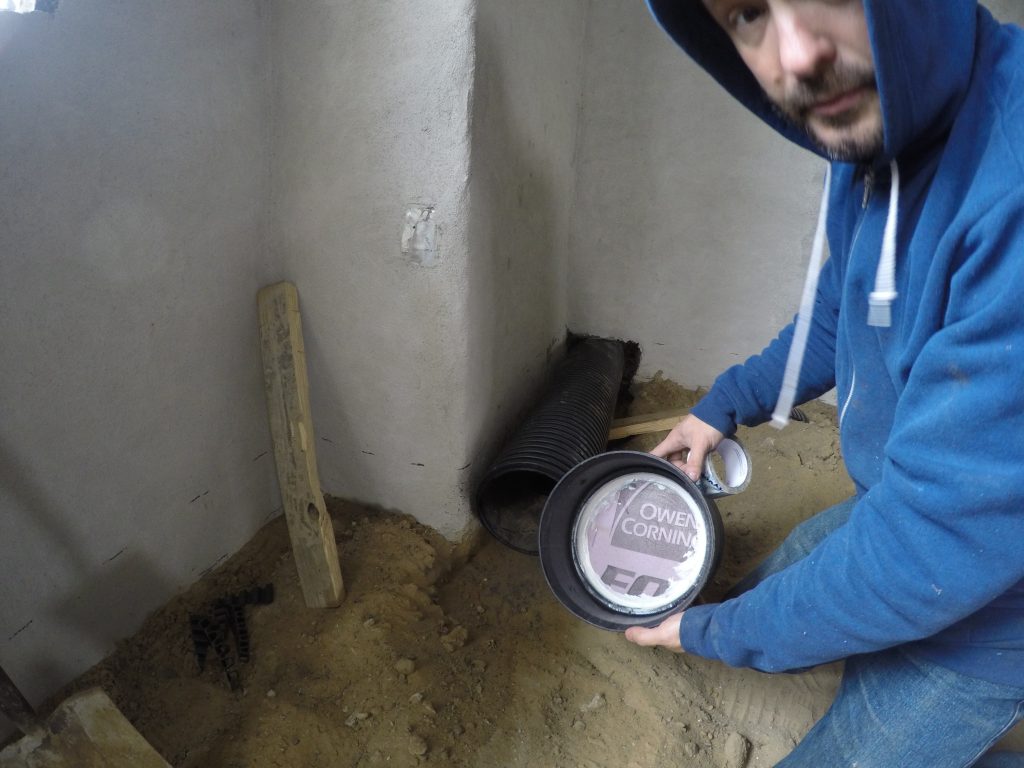
They make lots of fittings and connections for these tubes, but they don’t make an “end cap”. I made my own with a coupling and a circle of rigid insulation.
This is the last register on the duct… So it is the thinnest.